Quantcast
Channel: Bonsai Tonight
Viewing all 1061 articles
Browse latest View live

Redirecting growth on an 8 year-old black pine

$
0
0

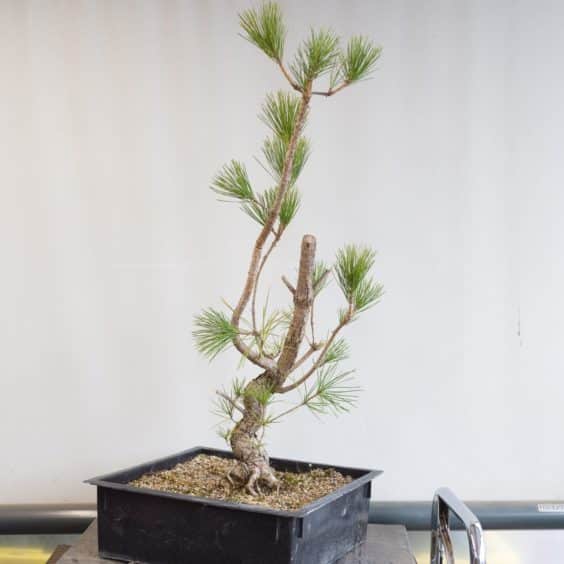
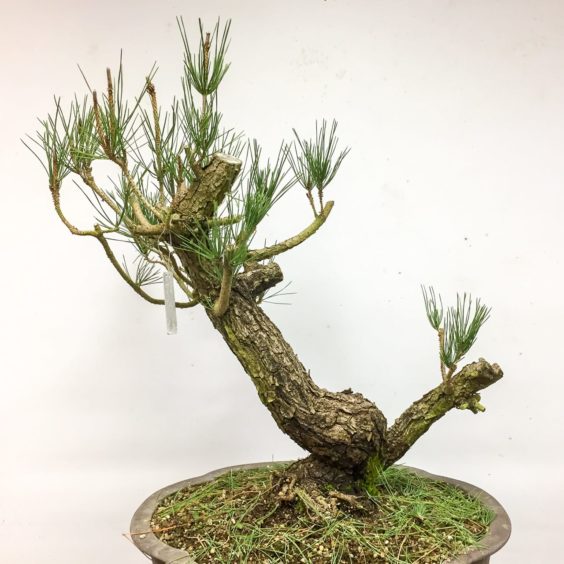
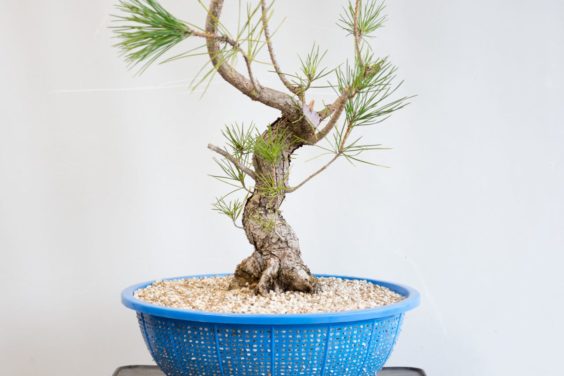
I recently picked up an eight year-old black pine growing in an Anderson flat. It had grown in the ground for several years and had been in the flat for the last one to two years.

8 year-old black pine

As you can see from the photo above, most of the vigorous growth is located far above the lower part of the trunk – the part I’ll use to create a small to medium sized bonsai.

Trunk of the future bonsai

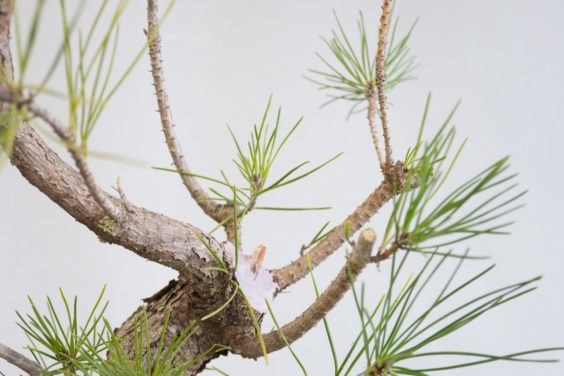
Fortunately, there are a number of small shoots along the lower part of the trunk that can be used for future primary branches. To ensure these branches gain vigor, I reduced the more vigorous shoots above.

After cutting back the more vigorous growth and reducing the leader

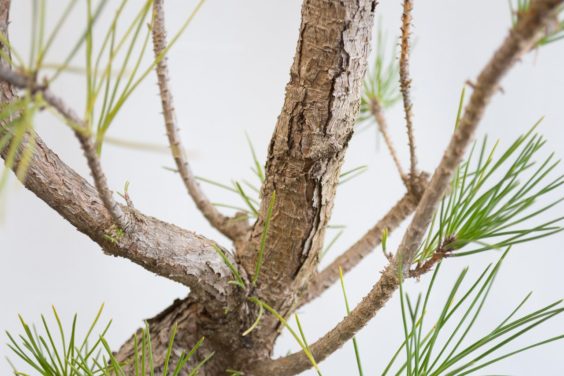
It was also time to remove the section of trunk that died back after pruning last year. This growth had been used to thicken the lower part of the trunk. By cutting back to a smaller shoot, the grower was able to create taper and add interest to the trunk line. Here’s a closeup of the section to be removed.

The original trunk line

After reducing the trunk line to a small stub

The next thing I wanted to address was the tree’s health. The tree has been growing in a mix of expanded and unexpanded perlite. I wanted to repot the tree into a mix of akadama, lava and pumice.

I first removed the roots around the perimeter of the rootball and then bare-rooted half of the remaining rootball. The perlite fell away easily.

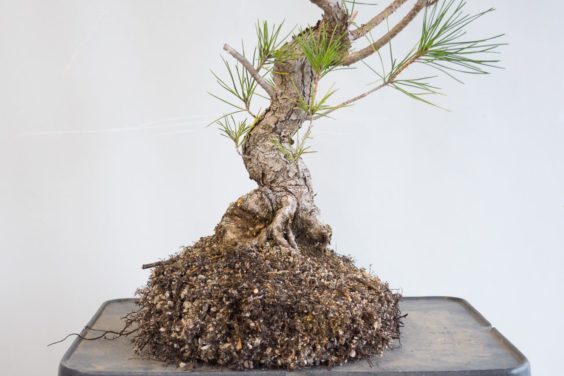
After reducing the rootball

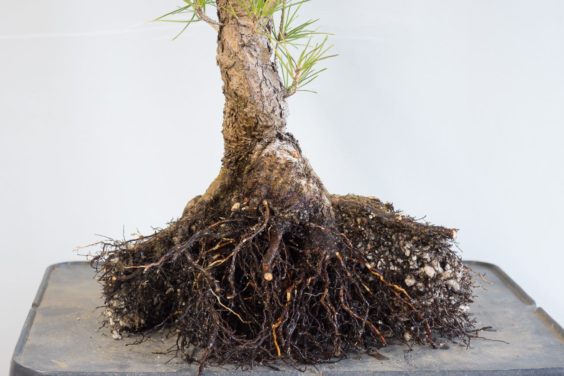
After bare-rooting half of the rootball

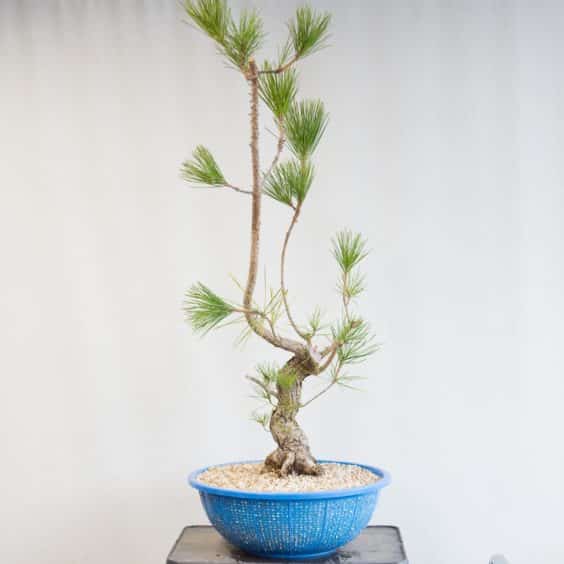
I planted the tree in a colander as I want to encourage vigorous growth over the next few years while I develop the primary branches.

After repotting into a colander

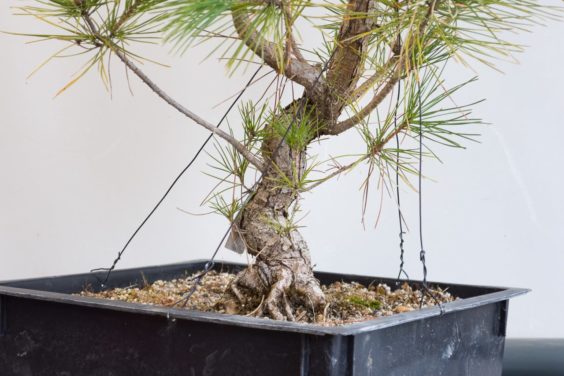
And here’s a closeup of the lower part of the trunk.

The lower part of the trunk

I don’t know exactly where the apex will be at this point. For now, the focus is on developing healthy roots and strengthening existing shoots. I’ll revisit the tree towards the end of spring to see how it is doing. I expect to begin decandling the following year.

The post Redirecting growth on an 8 year-old black pine appeared first on Bonsai Tonight.


Double decker air layer on cryptomeria

$
0
0

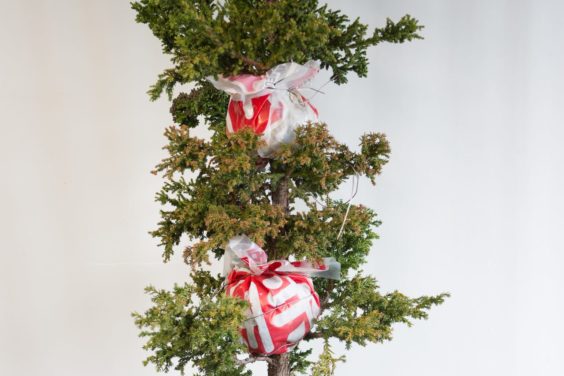
I’ve always been curious about whether a double air layer could be used to produce three trees at once. Knowing that cryptomeria bonsai layer well, I thought I’d give it a try.

Double decker air layer started May, 2017

One challenge I had was that there was little foliage between the two layers. It’s better to have more foliage as the more growth, the more successful the root production.

Small gap between layers

I could see roots inside the plastic on the top layer so I figured it would be safe to remove it. Here’s what it looked like inside last week.

Roots growing in white sphagnum moss

It turns out most of these roots emerged from just one side of the trunk.

Few roots on the other side

There was good callus all the way around so I reopened the callus where there were no roots and reapplied rooting hormone to help stimulate new roots in this area.

What about the lower layer? Here’s what I found inside.

Good callus, few roots

Clearly, it was not yet time to remove the lower layer. I cut away the bottom half of the callus, reapplied root hormone and filled the bag up with a mix of moss and bonsai soil.

All closed up

Were there more foliage between the layers, I’d guess there would be more roots. Will check the bag again in a few months to see how the new roots are developing.

The remaining layer

As for the section I removed, I pruned it a bit to remove an extraordinary number of pollen cones.

Cryptomeria pollen cones

I then planted the layer in a standard mix of bonsai soil (akadama, lava, and pumice).

Because young roots are weak, I used the tie-down wires to secure the tree directly rather than using the wire to secure the roots.

In the new pot

The side with no roots

Here’s the separated layer in its new pot.

Cryptomeria from air layer – January, 2018

It’s essentially a large rooted cutting at this point so I’ll be watching the water carefully for a while.

What about the split trunk about two inches above the soil line? Looks like a good opportunity to create a twin-trunk specimen. The now obvious second trunk was a small shoot last year or I would have started the layer higher up. I’ll look to re-layer the tree in another year or two once it’s better rooted in to its new pot.

The post Double decker air layer on cryptomeria appeared first on Bonsai Tonight.

Bonsai Development Series #3: Evaluating field grown material

$
0
0

There’s a lot to try to keep in mind when shopping for field grown material. It can be easy to focus on the lower part of the trunk and think, “This looks nice, I can fix the rest later.” The fix may not, however, always come easily.

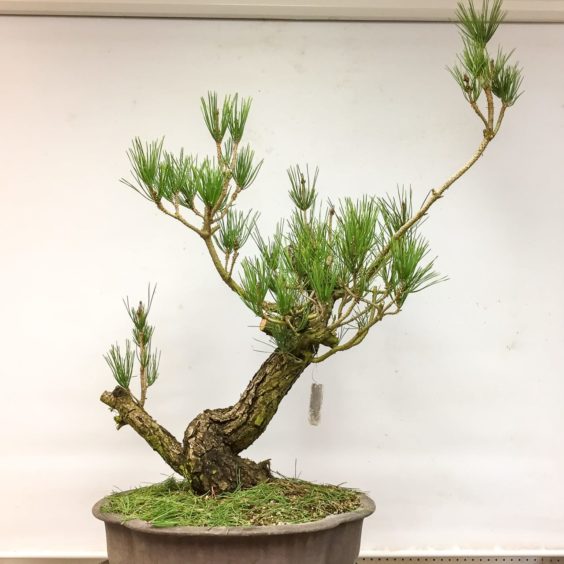
At a glance, the pine below has a nice lower trunk and is full and healthy. It merits a closer look.

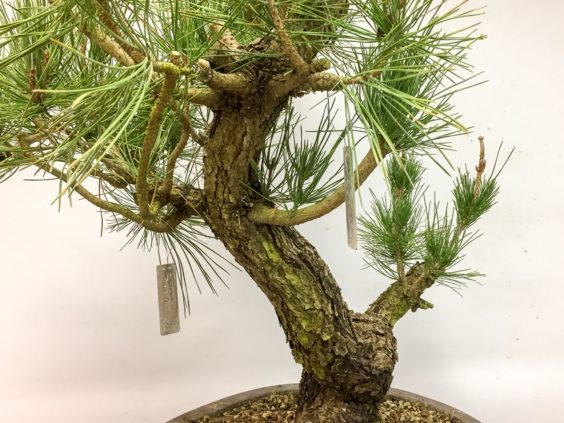
Field grown black pine

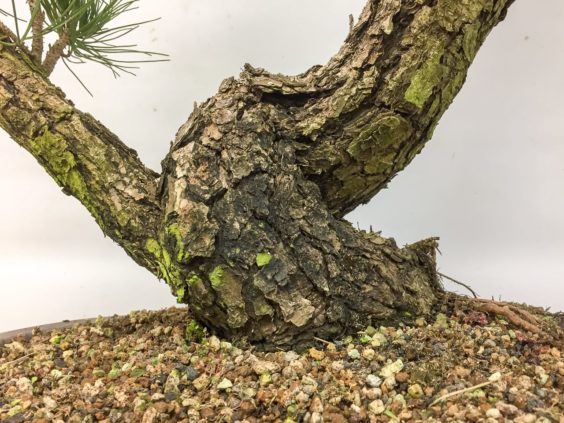
The trunk movement begins at the very base of the trunk – a good thing.

The lower trunk

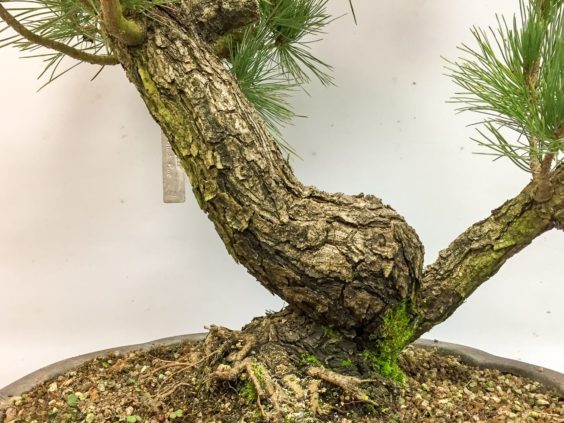
Just above the big turn, however, the trunk straightens out a bit.

The straight section above the low curve

Looking even higher, it’s clear the trunk was allowed to thicken without being wired.

The straight sections of the upper trunk

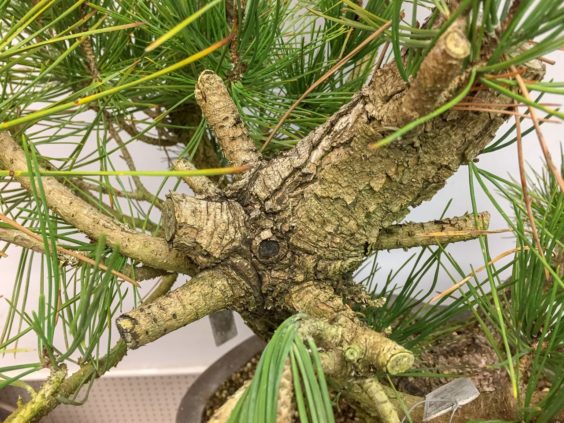
Another important consideration is the quality of the branching. Looking from the side of the tree, it’s easy to see that the branches emerge from just two points along the trunk.

Branches emerging from two points along the trunk

It’s also clear that there are more branches than we’d like to see emerging from any single point.

Many branches emerging from the same spot

I’ve called out these two points – uneven trunk movement and poor branching – as they are relatively common flaws in field grown material. They’re common because they reflect the way pines grow in nature – long straight shoots interrupted by whorls of multiple branches.

We can also see there is a lack of taper along the trunk. Using sacrifice branches near the top of the trunk prevents taper from developing.

How to avoid these issues when developing your own trees?

  • Wire the trunk before letting sacrifice branches thicken straight sections
  • Use sacrifice branches at different points along the trunk to create taper
  • Thin areas where more than two or three branches emerge to avoid swelling

How to improve the present tree in light of these issues?

To improve the branching, I removed old the needles. This will let additional light into the tree’s interior in hopes of stimulating new buds.

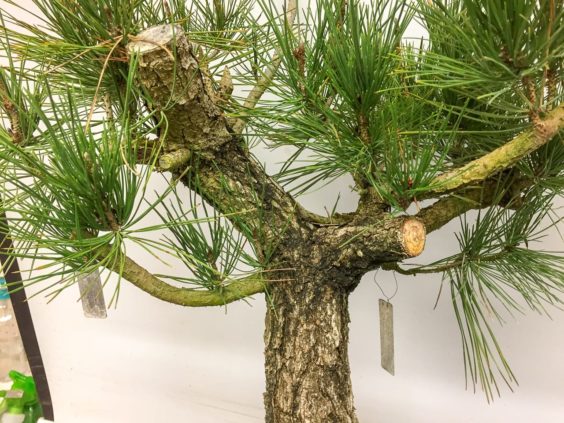
To improve the busy areas where so many branches emerge, I removed unnecessary branches and reduced the largest ones to stubs that will become relatively small jin.

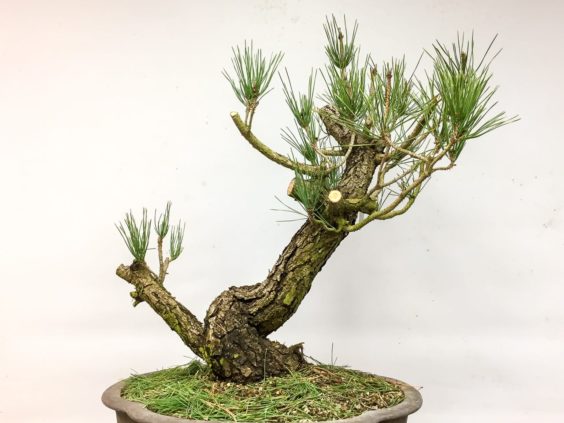
After thinning old needles and reducing the largest branches

To further encourage more growth in the tree’s interior, I reduced some of the longer shoots.

After reducing the longest shoots

As seen from the other side

Because the trunk is as thick as it is, bending isn’t a great option. The best way to mitigate the straight sections on the upper half of the trunk is to select a front and planting angle that convey as much movement as possible.

The plan from here is to establish good primary branching. This will involve some wiring, some development of new shoots, and possibly some grafting. Once the primary branching is established, we can use basic pine development techniques to fill in the silhouette.

The post Bonsai Development Series #3: Evaluating field grown material appeared first on Bonsai Tonight.

Initial work on a cork oak bonsai

$
0
0

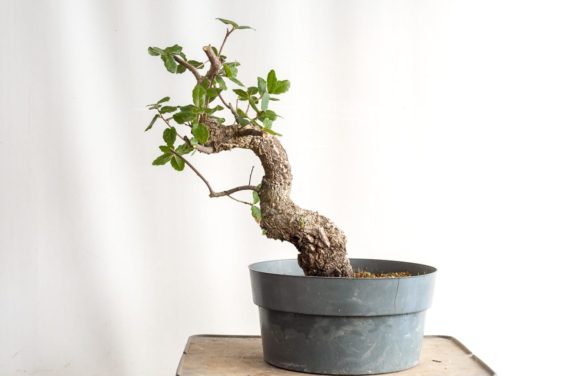
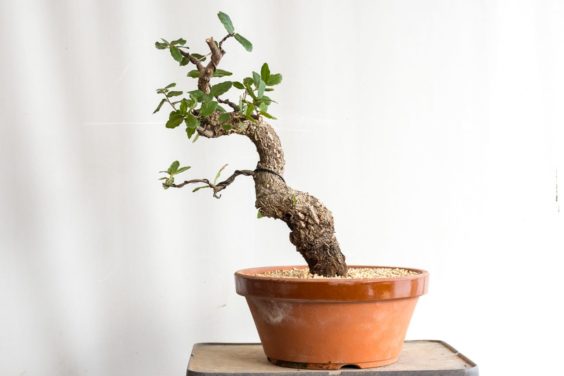
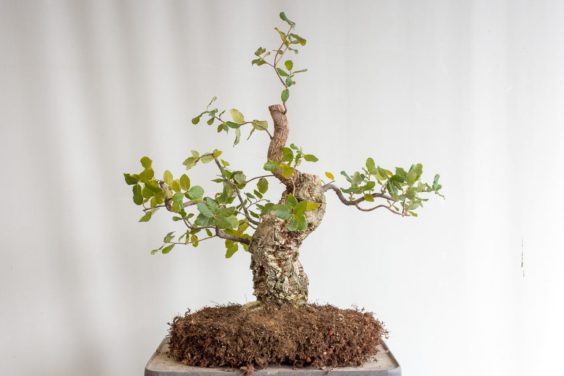
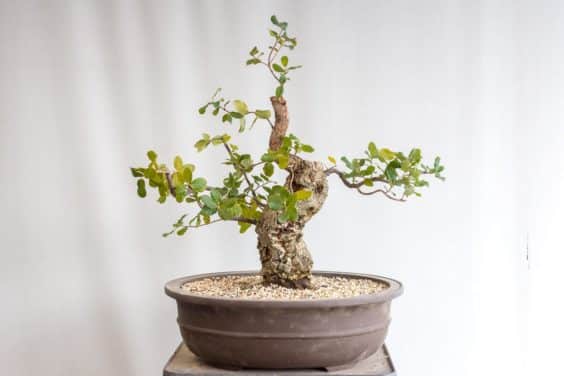
I recently picked up a field grown cork oak with some nice movement in the trunk. There are, however, few usable branches at this point.

Field grown cork oak

As I’d like to encourage new branches to grow from the trunk, I cut back the existing branches to small side shoots.

After cutback

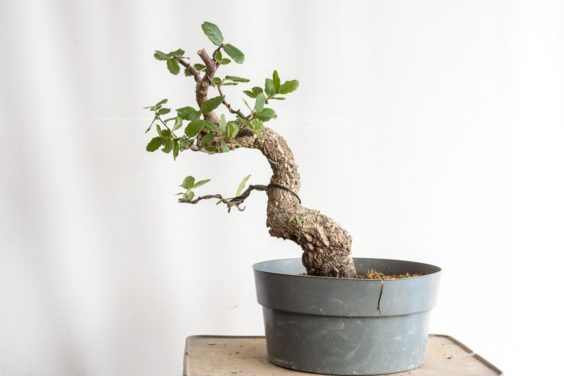
Most of the remaining branches were straight so I added a few wires.

After adding a few wires

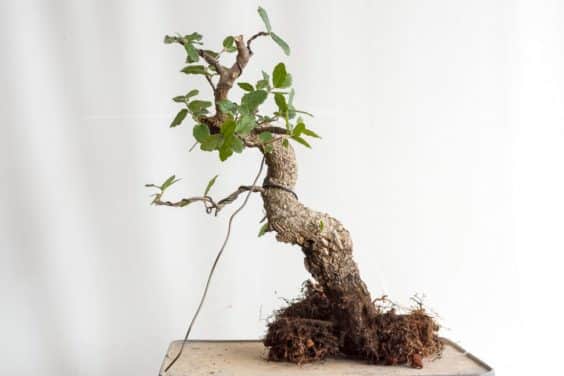
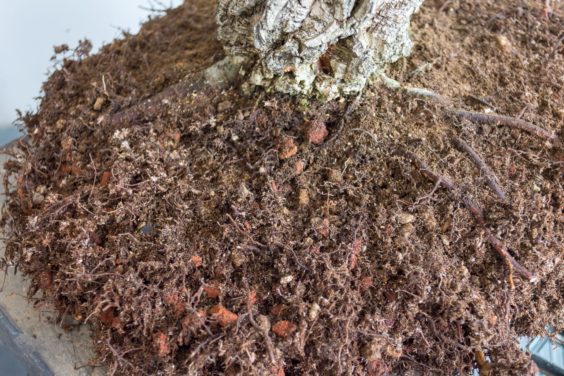
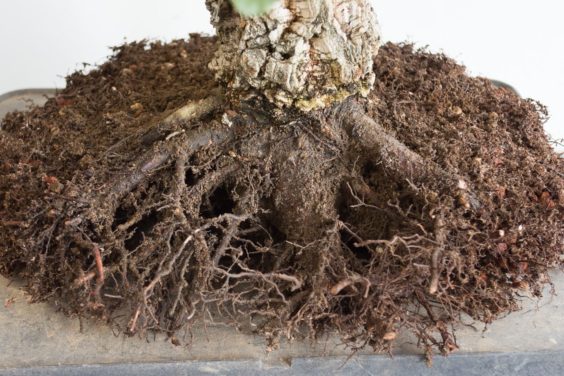
That’s about all of the attention the upper part of the tree requires for now. The roots, however, are another matter. Because the tree was dug up from the ground two years ago, there is still some old soil in the center of the rootball. I decided to repot the tree to remove as much of the old soil as possible.

After removing old soil from the center of the rootball

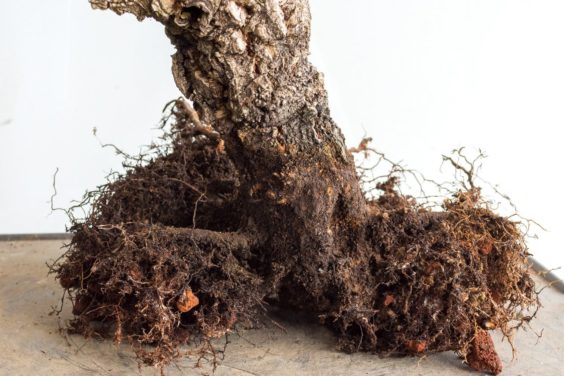
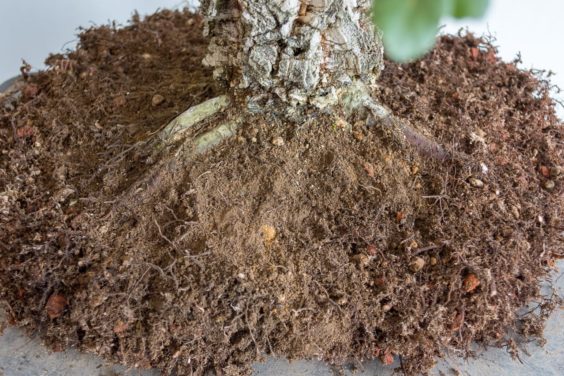
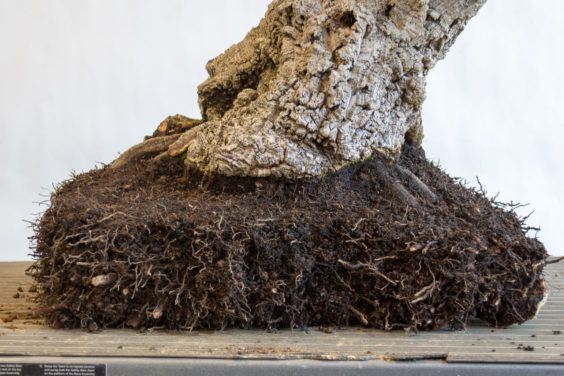
It turns out that the surface roots had been buried a couple of inches below the soil. By planting the tree higher in the pot, I’m effectively making the trunk two inches longer. Here’s a close-up of the lower section of the trunk.

Close-up of the lower trunk

It also turns out there is a little reverse taper. This is common as cork oaks don’t cork up as much below the surface of the soil. By exposing the lower part of the trunk to the sun, I can expect it to begin corking and eventually overcome any reverse taper.

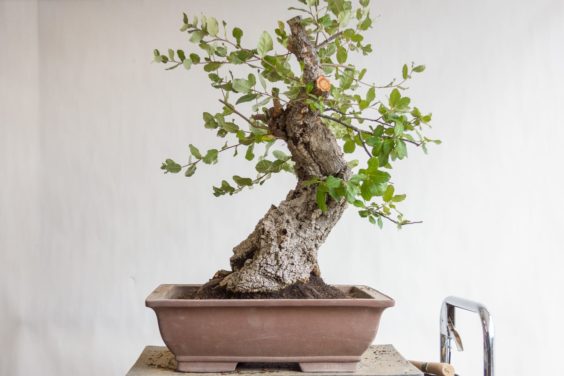
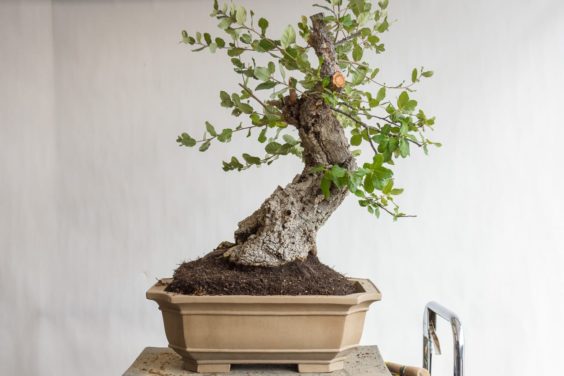
I repotted the oak in a clay pot that will give it plenty of room to develop new roots. Once the tree has primary branches and a healthy root system, I’ll move it into a bonsai pot.

After repotting

The tree can grow freely for the next several months until May or June at which point I’ll look to cut back and wire the new shoots.

The post Initial work on a cork oak bonsai appeared first on Bonsai Tonight.

Reducing the trunk to improve a cork oak bonsai

$
0
0

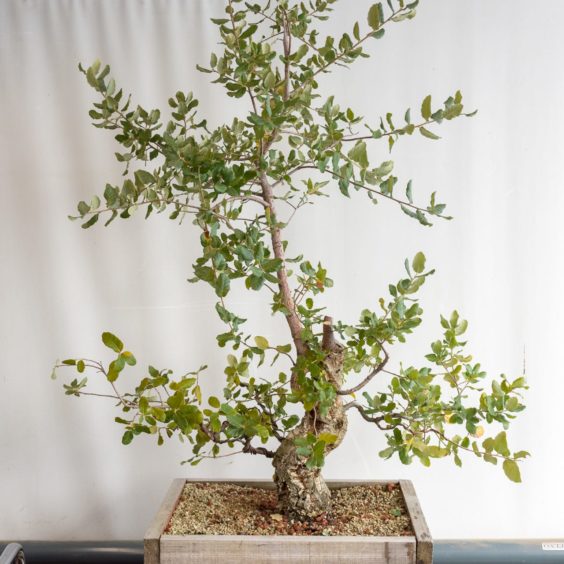
One of the first cork oaks I started working on has developed quickly. I let a couple of sacrifice branches grow freely and they have now adequately thickened the branch that will become the new leader. It’s time to make a big cut.

Field grown cork oak

The decision to cut has also been influenced by the health of the lower branches. Because the top of the tree is growing so strongly, the tree hasn’t invested in the lower branches which are turning yellow and may soon die back.

Here is the yellowish foliage I noticed on the lowest branch on the left.

Yellow foliage

And here is healthy green from the top of the tree.

Healthy foliage

I started by shortening the sacrifice branches on the old trunkline.

After cutting the first two sacrifice branches

I then reduced the new trunkline.

After reducing the new trunkline

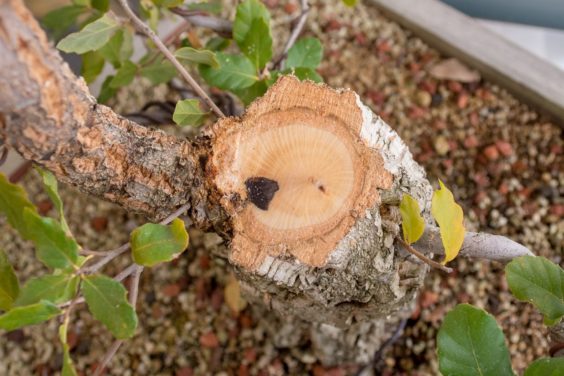
Next, I carefully removed the stub with a saw.

The wound after cutting back to the new trunk line

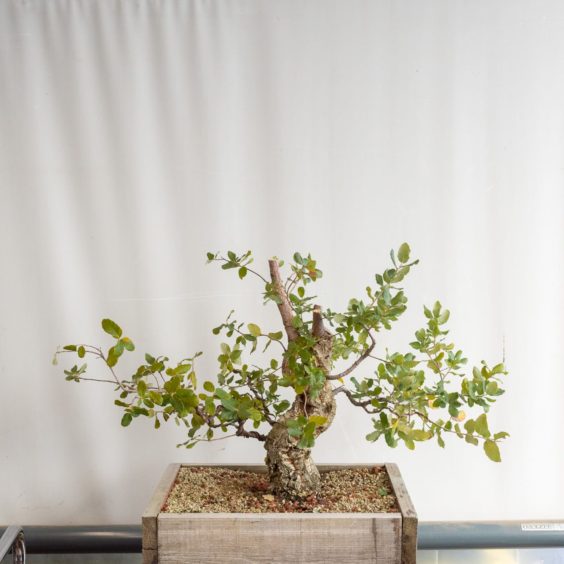
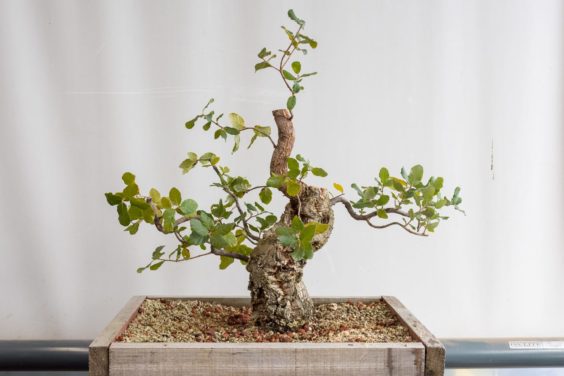
Here’s what the tree looked like after reducing the trunk and shortening the branches.

Cutback complete

As now is a good time to repot the tree, I removed it from the box and reduced the size of the rootball.

After initial root work

Looking closely at the remaining rootball, it was clear that some of the roots were growing in good bonsai soil while others were still in field soil.

A patch of field soil

A patch of bonsai soil

I decided to remove the field soil by using a root hook and an aluminum pick to scrape the soil away from the roots. There weren’t a lot of fine roots in this area.

After removing the field soil

I repotted the tree in a training pot with a mix containing 30% akadama with a mix of lava, pumice and kanuma making up the remaining 70%.

Repotting complete

I’m curious to see how the main branches fare after making the big cuts, but I won’t be surprised if there’s some dieback.

For those curious about the work on this tree over the past couple years, see “Stimulating new buds on cork oak” and “Developing a young cork oak bonsai” for details.

The post Reducing the trunk to improve a cork oak bonsai appeared first on Bonsai Tonight.

How to use a bonsai jack

$
0
0

“Bonsai Jacks” are tools designed to bend heavy branches and trunks. They allow us to make these bends incrementally – and safely – by twisting a threaded rod.

The best way to describe their use is with an example, so let’s start there. Here’s a pine styled by Daisaku Nomoto with help from Boon Manakitivipart, Matt Reel and Tyler Sherrod at the 2016 Pacific Northwest Bonsai Convention held in Olympia, Washington.

Daisaku Nomoto and Boon Manakitivipart after the demo

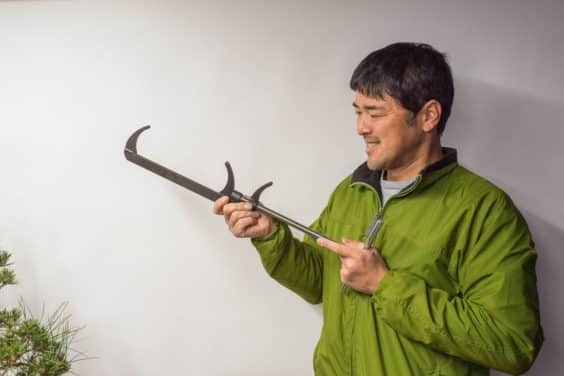
Daisaku bent the trunk of the pine significantly during the demonstration, but he noted that he wanted to bend the trunk further once the tree had recovered from the work. I acquired the tree at the event and found the perfect opportunity to complete the bend as Daisaku is currently visiting California. Here he is modeling the jack he’ll be using on the pine.

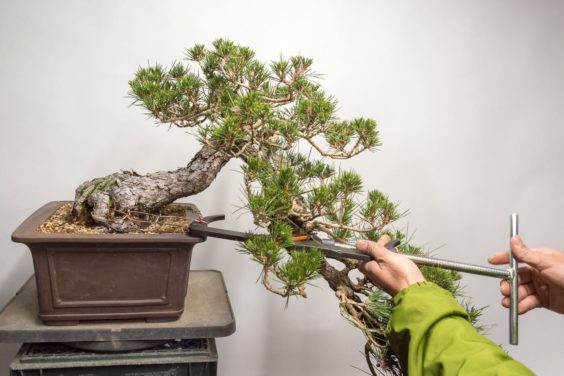
Daisaku and the bonsai jack

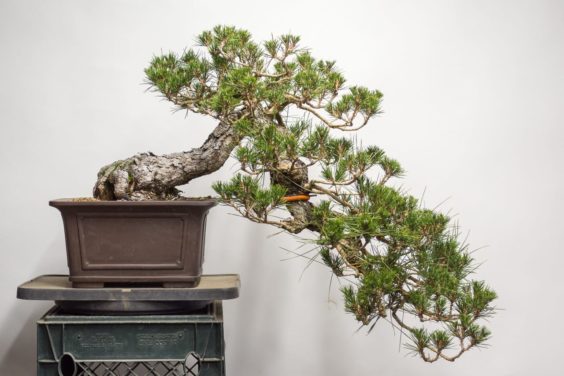
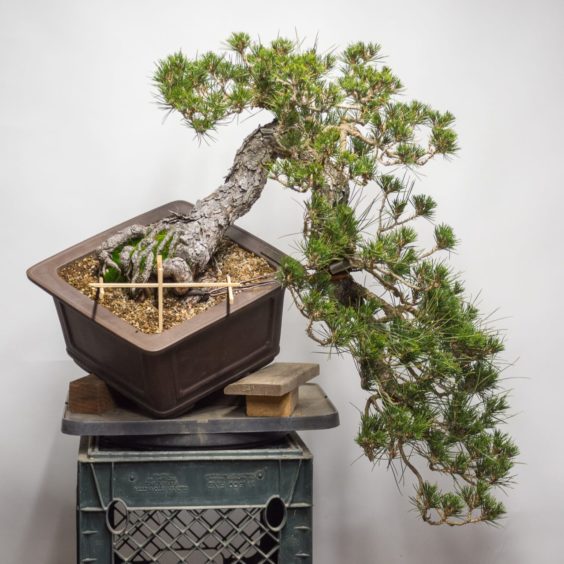
And here is a photo of the pine before making the bend.

Black pine, January, 2018

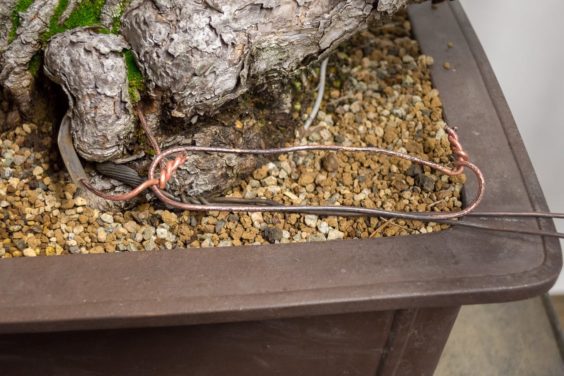
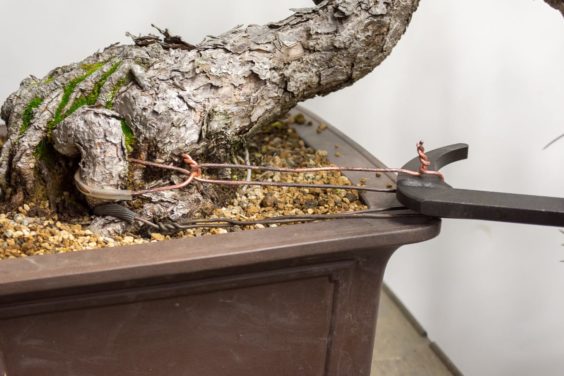
The first step is to prepare a wire loop that the jack can use as an anchor to make the bend.

Wires used to anchor the jack

In this case there are two wire loops. The first loop encircles a root as an anchor point. The second, longer, loop makes it easy to anchor the jack without it bumping against the trunk and provides some flexibility for changing the length of the anchor wire without re-doing the section around the root.

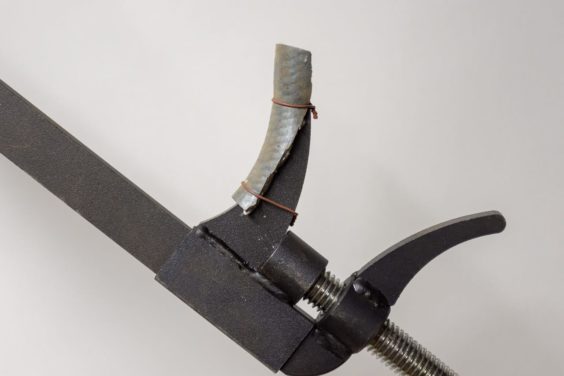
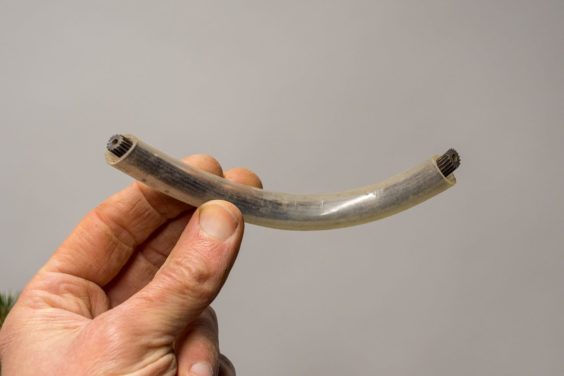
The other end of the jack will grab the trunk directly. To provide some protection where the jack touches the trunk, Daisaku added a piece of rubber hose secured with small copper wires.

Section of rubber hose covering the sharp edges of the jack

Here is a photo of the setup before starting the bend.

Ready to begin the bend

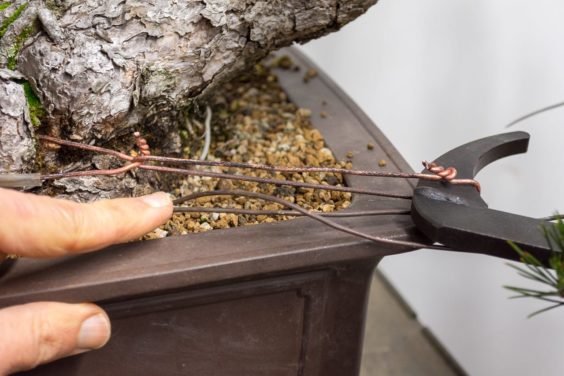
And here’s a close-up of how the jack fits into the anchor wire.

The jack inserted into the the anchor wire

Twisting the jack begins slowly. While making the bend, common practice entails listening carefully to any cracks or pops that may occur along the trunk or branch being bent. It’s also important to monitor the rigging to ensure that nothing slips out of place during bending.

Here’s a close-up of the guy wire and anchor wires after starting to bend the trunk.

The anchor wire is taught – the original guy-wire is now loose

As the tightening continued, it became clear that we needed to make some adjustments. Bringing the trunk down lowered the guy wire below the lip of the pot. We added a piece of rubber below the guy wire to protect the pot and added a second guy-wire to maintain good leverage on the trunk.

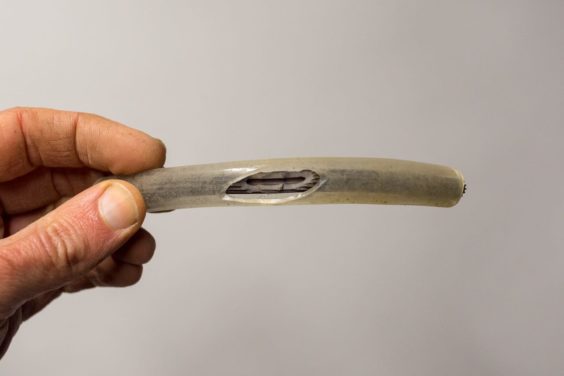
When setting up the second guy-wire, Daisaku prepared a tube inside of a tube to protect the trunk from the wire cutting in. Here’s the tubing used for this.

A tube within a tube

Slots cut in the middle of the tubes where the guy-wire will emerge

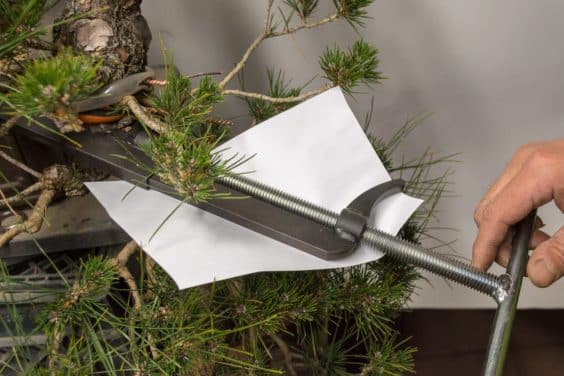
We also found that the change in the angle of the trunk brought foliage close to the moving parts of the jack. Daisaku grabbed a sheet of paper to keep the foliage out of the way.

A sheet of paper protects the foliage below

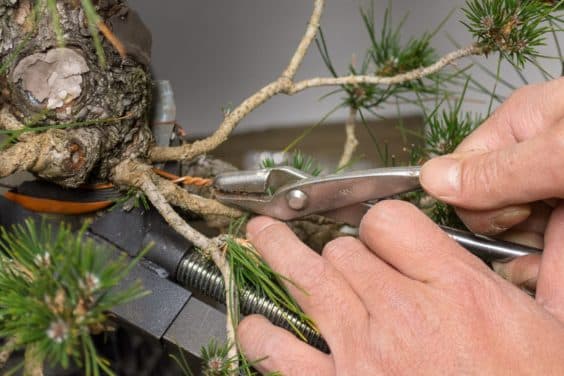
Every so often, Daisaku paused to inspect the area of the trunk where the bend happened. He also tightened the guy wires to take up any slack that showed up.

Tightening the guy wires

Daisaku shared, at this point, a trick to ensure that the new guy wire was effective. Rather than making all of the bend at once, he made several twists, tightened the slack in the new guy wire with pliers, and then relaxed the jack. This made the new guy-wire taught and allowed him to inspect it to make sure it sat exactly where he wanted.

Without letting the pressure of the trunk take up the slack early on, the slack would come out when the jack is loosened and removed. Removing any slack in the line during bending ensures the trunk will stay in place when the bending is complete.

You can see the progress made after a few minutes of bending by checking the length of the twists in the guy-wires.

Evidence of a big bend

Of course, the difference was much more evident when viewing the front of the tree.

After completing the bend

Such a big bend necessitated a new potting angle.

The new potting angle

Only a single, additional bend was made to achieve this new trunk line. Here’s a close-up of a guy-wire that pulled the lowest part of the trunk forward.

Guy-wire in the tree’s interior

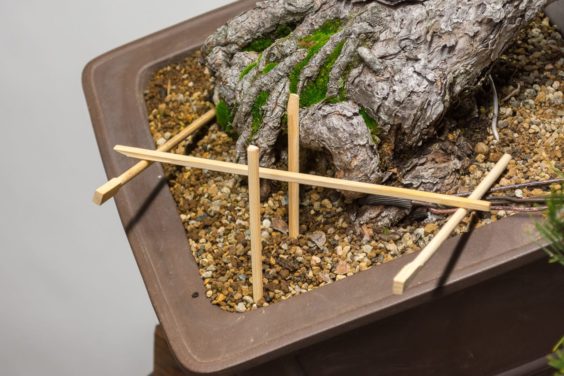
As there wasn’t time to repot the tree after making the bend, Daisaku created a chopstick framework that will make it easy to recreate the angle at a later date.

Chopsticks indicate the new angle

View from the side

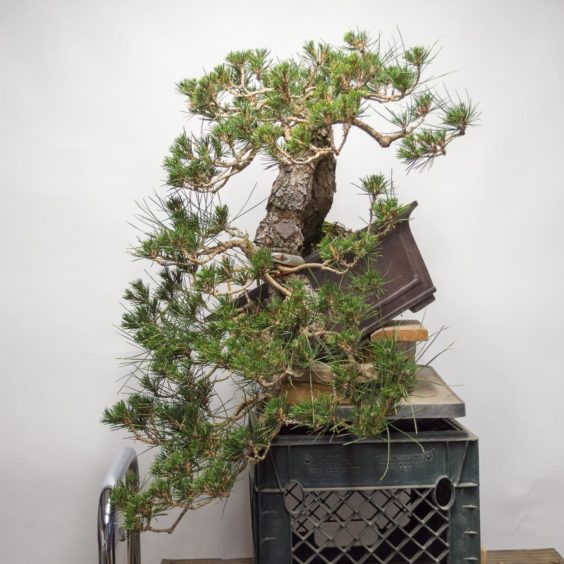
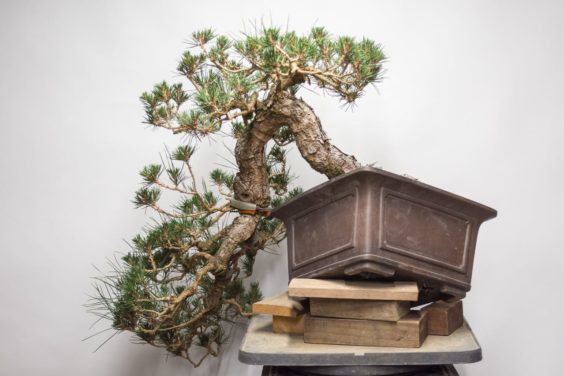
For a better perspective on the actual shape of the tree, here’s a view from the side and back.

View from the right side

View from the back

The whole process took between 1-2 hours. When the work was done, we were both happy with the results.

I’ll repot the tree in the coming weeks and plan to re-wire the branches at decandling time in June.


The post How to use a bonsai jack appeared first on Bonsai Tonight.

Setting a display with a Western juniper and Japanese maple

$
0
0

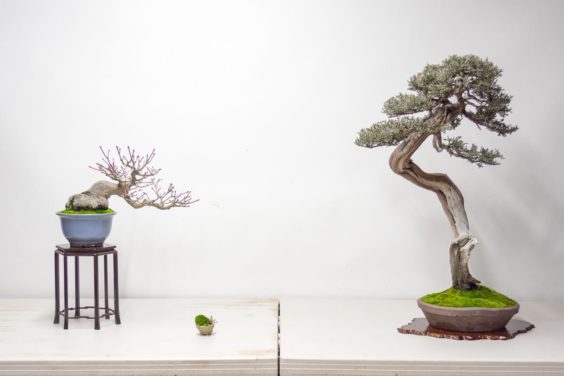
I’ll be showing a medium sized Western juniper and Japanese maple at this weekend’s Bay Island Bonsai exhibit – that much is clear. What I’m still working on is how they’ll be arranged and which stands work best.

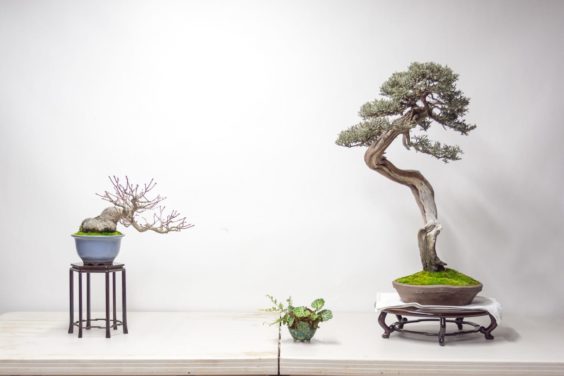
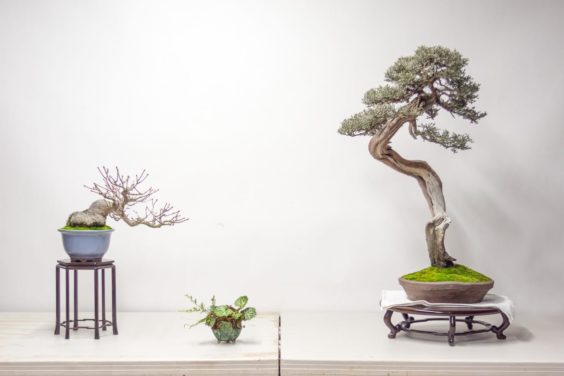
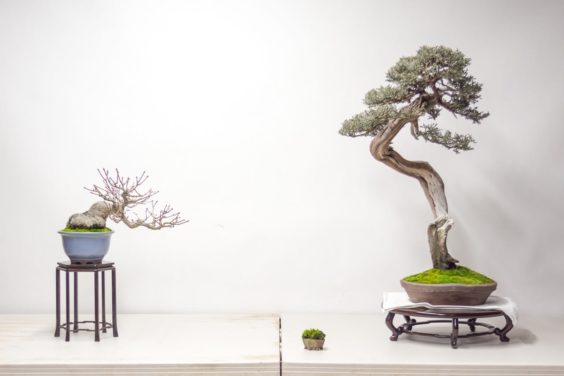
Here are the two trees – the maple on a hexagonal stand, and the juniper is on a round stand.

Display with Japanese maple and Western juniper

I usually try to create as much variety as possible when setting a display. One tree is a conifer and the other is deciduous. One has a deep glazed pot, the other a shallow unglazed pot. Both pots are round.

I’d prefer if the pots were different shapes, but these were the best pots I had for these trees.

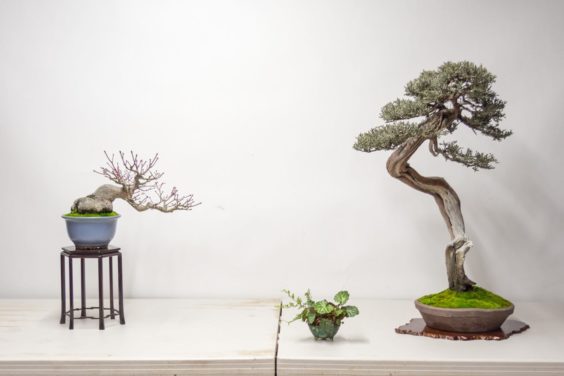
Accent plants offer additional opportunity for contrast – I’ll try to find a broadleaf variety, possibly like the saxifrage planting below.

Display with saxifrage accent plant

I’ve paired the accent with the larger tree in the photo above. It’s a bit large when placed next to the maple.

Large accent next to the maple

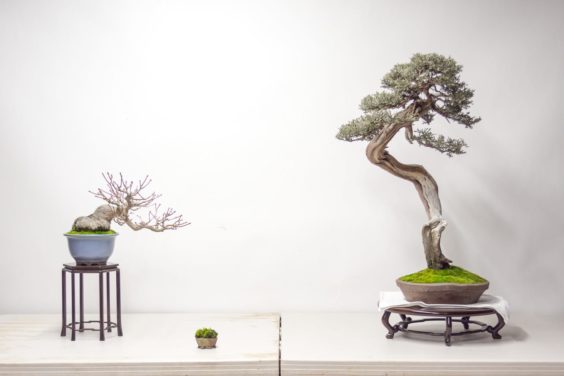
If I decide to complement the maple, I’d likely go with something smaller.

Small accent next to the maple

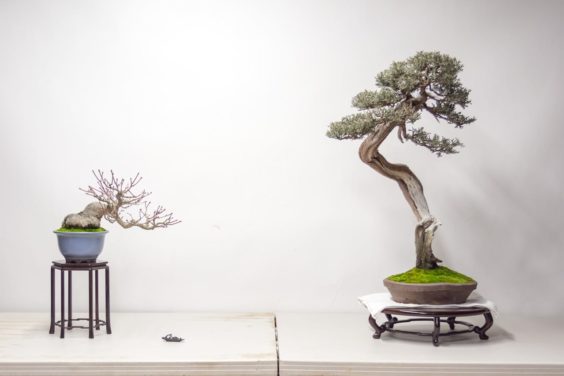
A small figurine might work instead of an accent in this case.

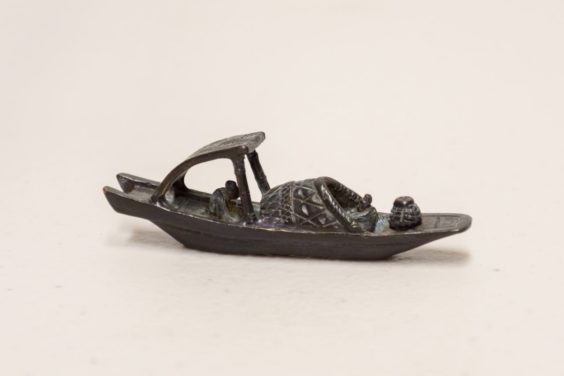
Small boat accent

Close-up of the boat

Just as a large accent doesn’t make sense next to the smaller tree, a small accent doesn’t make sense next to the larger tree.

Small accent next to the larger tree

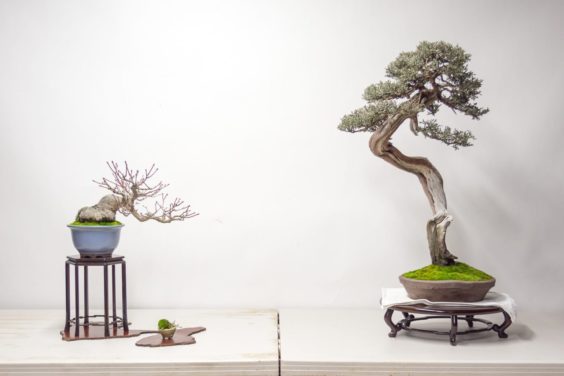
As an alternative to the round stand for the juniper, I tried a large slab.

Juniper on a slab

Here it is with the saxifrage planting.

Juniper on slab with accent plant

And here are the same stands with the accent next to the maple.

Juniper on slab and accent next to the maple

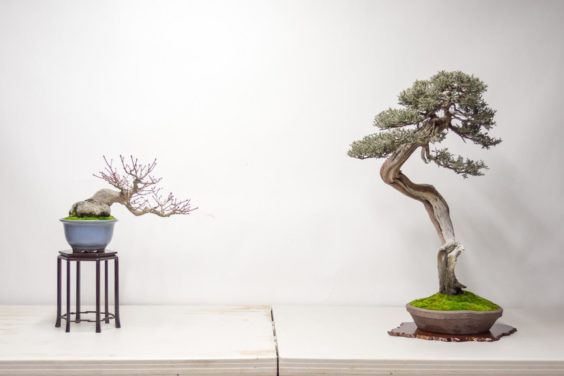
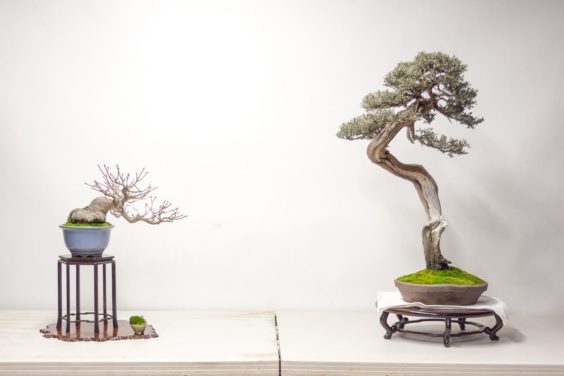
The last options I tried used a slab to connect the maple with the small accent.

Maple and accent on a manzanita slab

Maple and accent on a quince slab

I like that slabs under the maple add more visual weight to the left side of the composition. The manzanita slab in particular does a good job of this.

Which will it be? That’s a matter for tomorrow. One of my favorite parts of participating in Bay Island Bonsai exhibits is the collaboration between members to share stands and accents to create the best display possible given the materials on hand.

If you’re curious to see the final display, come to Oakland this weekend to see the trees in person (details below).

The post Setting a display with a Western juniper and Japanese maple appeared first on Bonsai Tonight.

Fantastic Sierra juniper at Bay Island Bonsai’s 19th annual exhibit

$
0
0

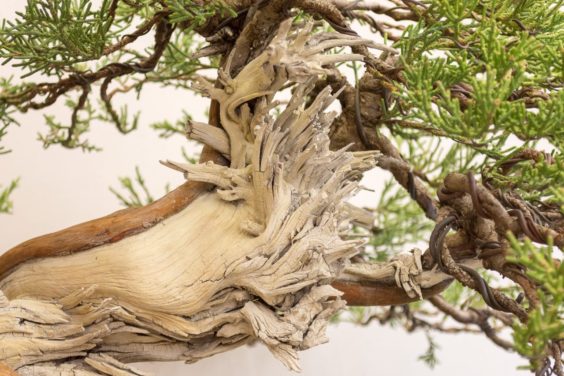
Sierra junipers have become a favorite variety of mine in recent years. They grow vigorously and often feature deadwood with undulating movement and exciting jin.

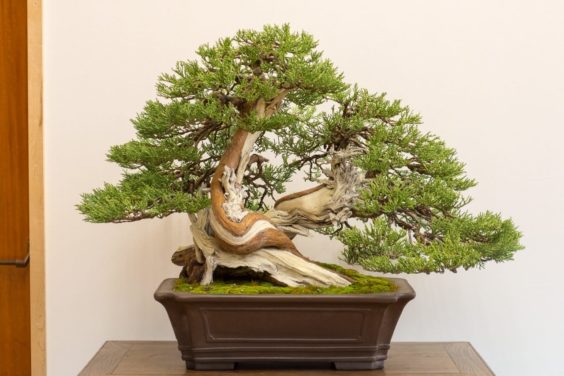
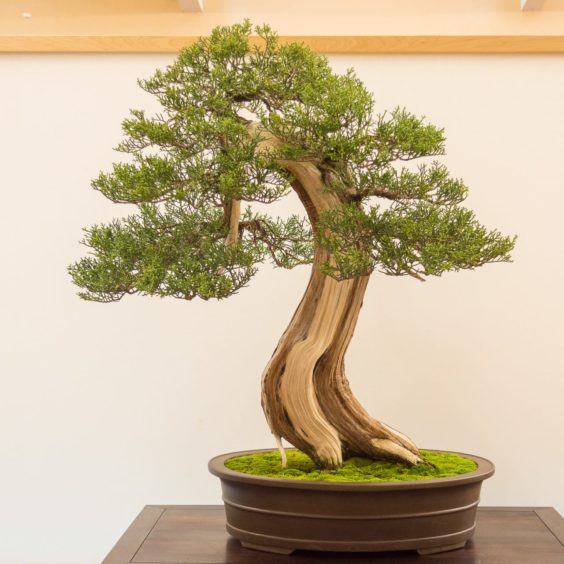
The Members’ Choice award for large conifer at Bay Island Bonsai’s 19th annual exhibit went to a Sierra juniper. It’s a fantastic tree.

Members’ Choice Award – Sierra juniper

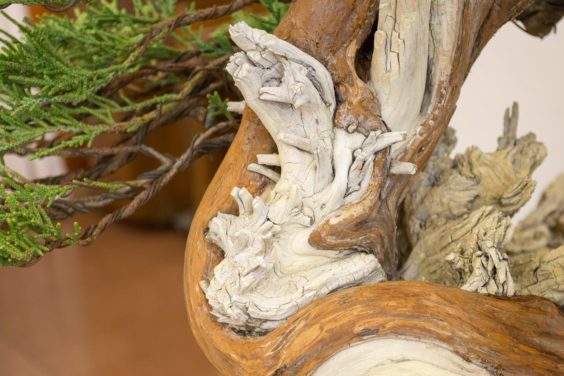
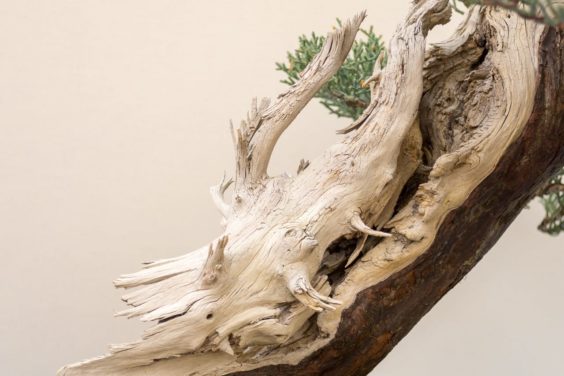
Great jin

Deadwood between lifelines

BIB members filled two rooms with bonsai displayed in 6′ spaces on light blue felt and in front of fabric backdrops.

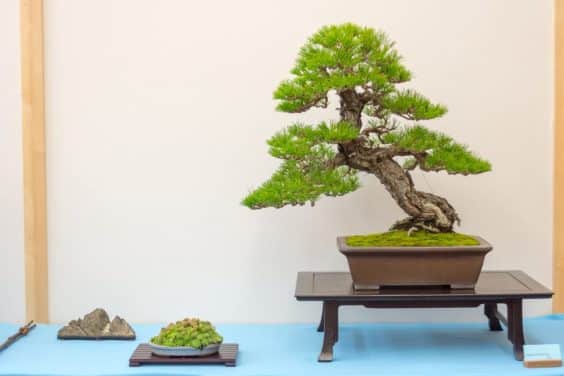
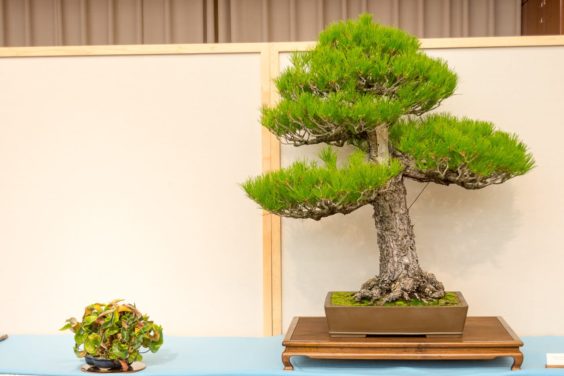
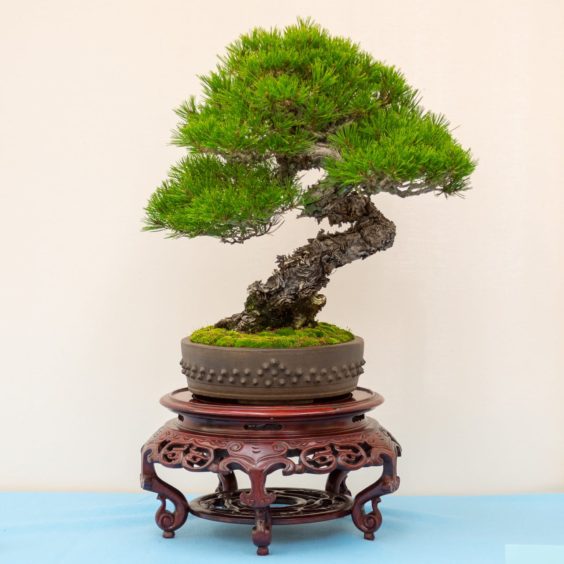
Japanese black pine

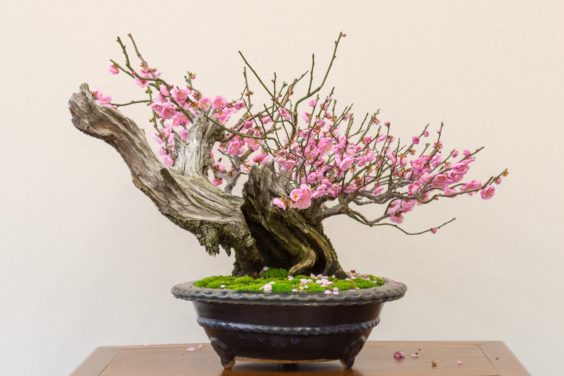
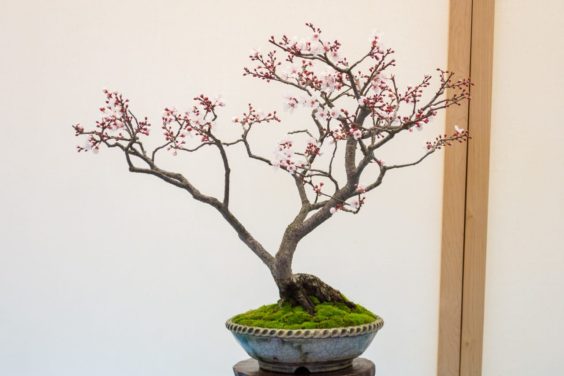
A handful of trees provided color and fragrance, including a bright pink ume.

Ume

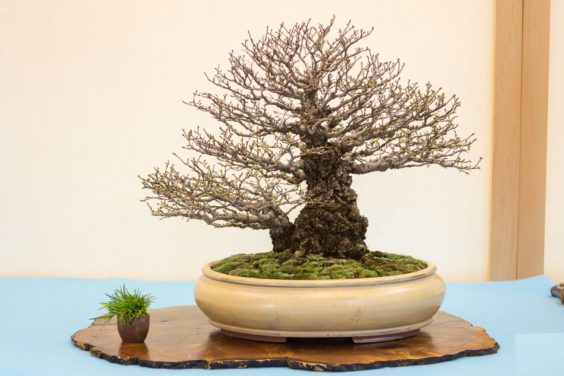
Other deciduous varieties provided winter silhouettes.

Korean hornbeam

As is common for the exhibit, there were a number of impressive conifers.

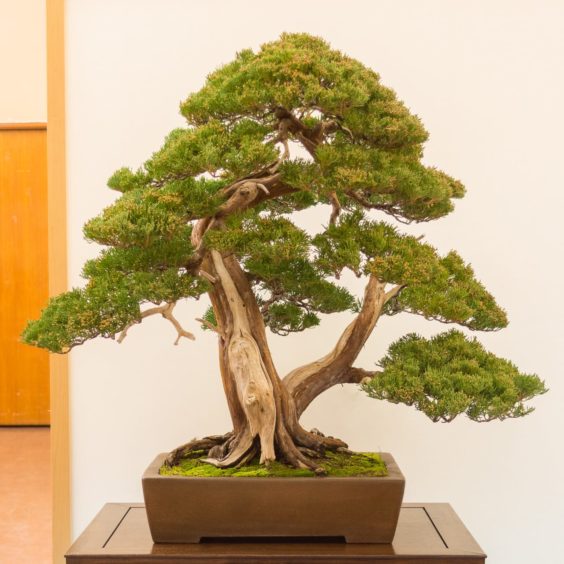
Sierra juniper

Great deadwood

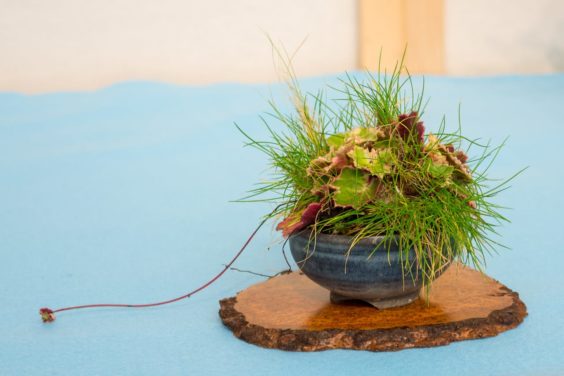
Accent plant

California juniper

Lemon Hill juniper

Monterey pine

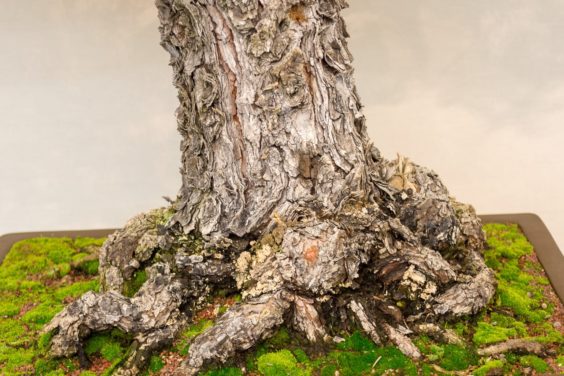
Trunk detail

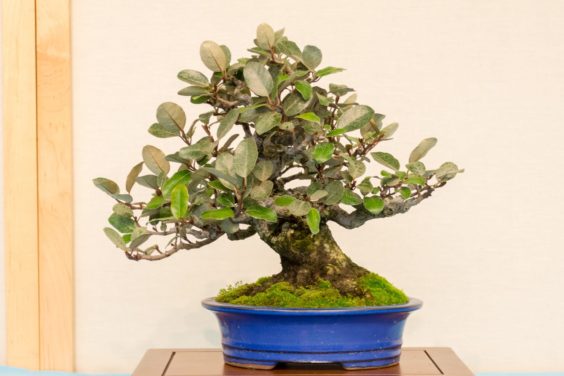
Broadleaf evergreens were also on display, including a small silverberry.

Eleagnus

Check back Friday for more from the exhibit, including highlights from the small and medium sized trees on display.

The post Fantastic Sierra juniper at Bay Island Bonsai’s 19th annual exhibit appeared first on Bonsai Tonight.


Bonsai on display at BIB’s 19th annual exhibit

$
0
0

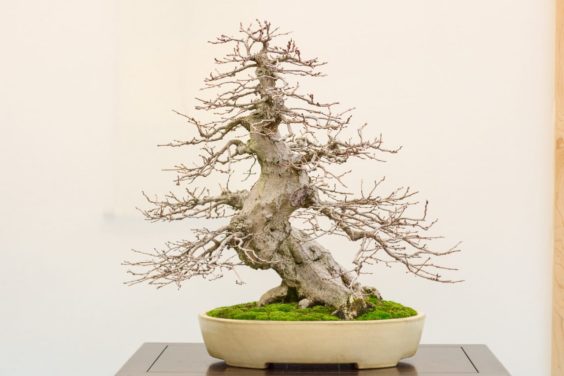
One thing I’ve appreciated about Bay Island Bonsai’s annual exhibits is the use of moss to cover the surface of the soil. The convention is common among bonsai exhibits in Japan and elsewhere. It gives the trees a clean look and provides some life in the case of dormant deciduous varieties like the corkbark elm below.

Corkbark elm

Moss can provide contrast to both pots and flowers.

Flowering plum

And in the case of evergreen conifers, moss can help set the scene, grounding trees in what we might imagine to be undisturbed earth.

Red pine

Shimpaku juniper

Of course, it’s hard to overlook the trees growing in the moss or the oftentimes antique containers in which they are planted.

Japanese five-needle pine in antique Japanese pot

Tsukumo cypress in antique Chinese pot

Branch structure as seen from below

When I see trees that are in relatively early stages of development, I study the branch placement to get an idea of what the tree might look like a few years down the road.

Japanese black pine

For more mature trees, I simply enjoy the age and character of the trunk.

Japanese black pine

Shore pine

One of my favorite trees with a bright future was a Chinese elm created just a few years ago from air layer. The density is already good. In time, continued refinement will showcase the trunk and convey age through the fullness of the silhouette.

Chinese elm

Shohin black pine

Shohin shimpaku juniper

Mas Nakajima displayed two suiseki art installations featuring stones with paintings. The photos don’t begin to do justice to the depth of the paintings or the overlapping colors among display elements.

Suiseki art by Mas Nakajima

Suiseki art by Mas Nakajima

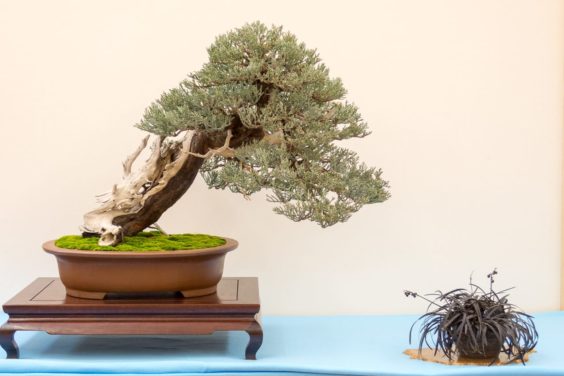
And what of my maple and Western juniper? I left the trees on their own during setup and found someone had paired them in a fairly similar fashion to how I’d imagined them together. The main difference was that the juniper was turned to point slightly more to the right.

Japanese maple and Western juniper

In time, I plan to change the tree and extend the lowest branch to further emphasize the right-leaning movement so I can use the tree on the left side of the display.

Bunzan pot

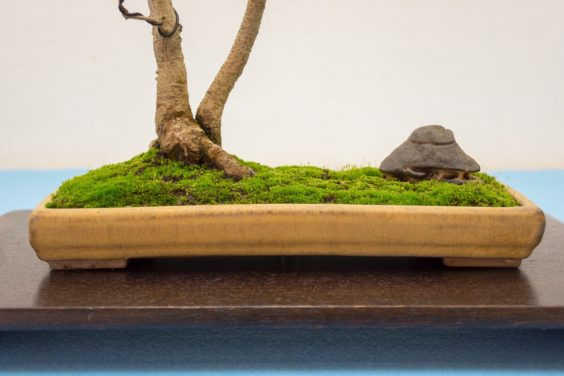
Hut stone and moss

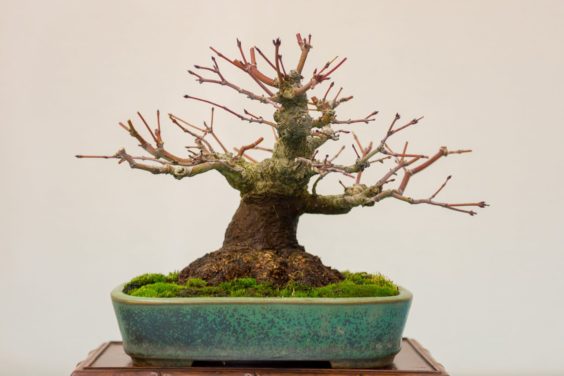
Japanese maple

The next Bay Area bonsai exhibit is coming up soon – tomorrow and Sunday at the biennial Shohin Seminar in Santa Nella, California.

The post Bonsai on display at BIB’s 19th annual exhibit appeared first on Bonsai Tonight.

2018 California Shohin Seminar – selections from the exhibit

$
0
0

This past weekend the California Shohin Society hosted the 16th Biennial Shohin Seminar in Santa Nella, California.

The event was a huge success. It revolves around a full day of workshops and features demos, a large vendor area and an exhibit of small-sized bonsai.

Below is a selection of the trees on display in the exhibit. I’ll share photos of the displays on Friday.

Trident maple

Japanese black pine

Hokkaido elm

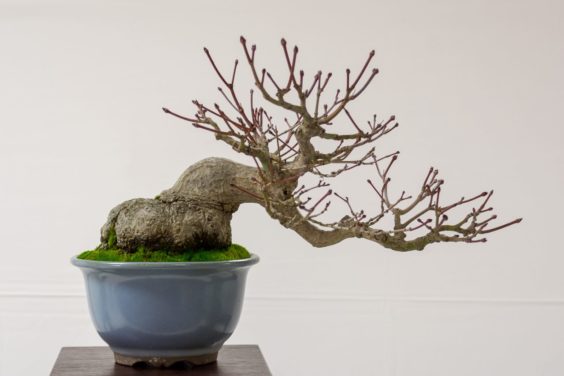
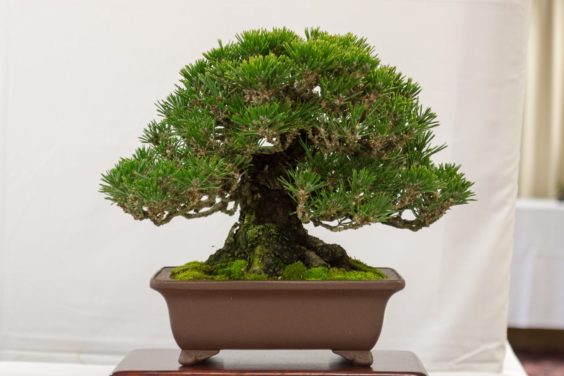
Two of my trees were included in the exhibit – a Japanese maple and a black pine.

Japanese maple

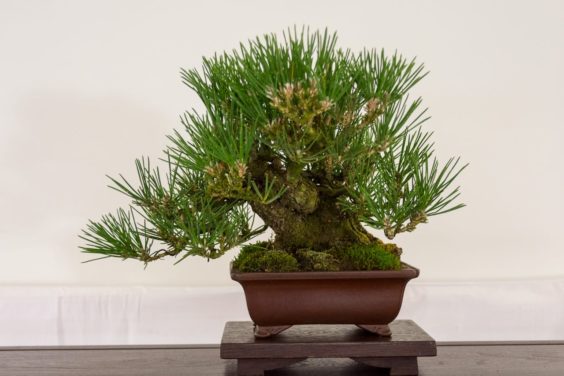
Japanese black pine

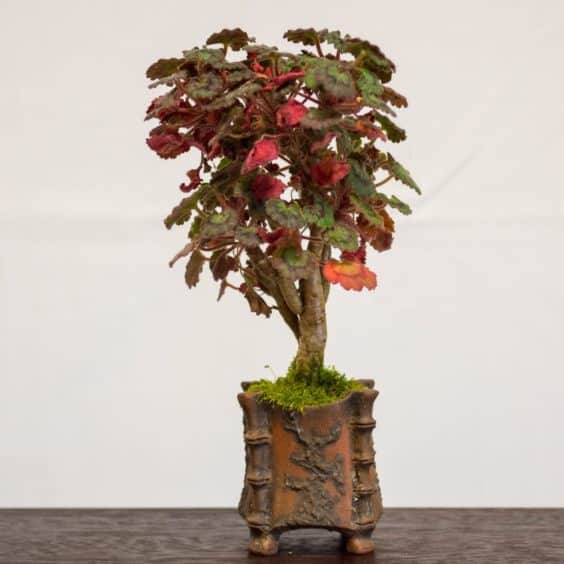
One of my favorite entries was a miniature geranium.

Geranium

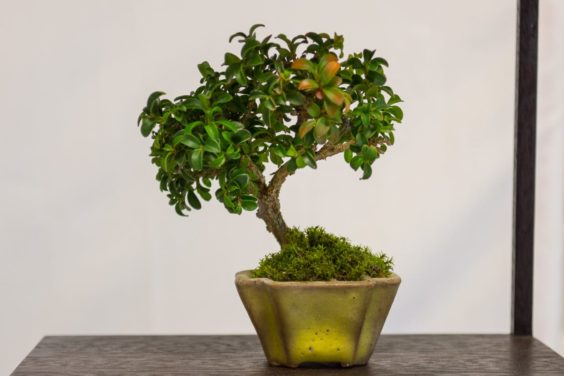
Kingsville boxwood

Japanese black pine

Procumbens juniper

Sawara cypress

Japanese black pine

Tune in for more pics on Friday!

The post 2018 California Shohin Seminar – selections from the exhibit appeared first on Bonsai Tonight.

Bonsai displays at the 16th biennial Shohin Seminar

$
0
0

With small bonsai display, the focus tends to be on the arrangement of elements as much as on the individual trees themselves. The great challenge, then, isn’t just developing trees that work on a small scale, but in having enough different trees from which selections can be mixed and matched to create compelling displays.

Easier said than done.

I opted for a simple three element display at last weekend’s Shohin Seminar and missed the mark on all three! Here’s the display.

Japanese maple and black pine

What would I like to improve? The stand for the maple is too heavy. I’d prefer something simple with straight, slender legs. The current stand would be fantastic for a larger, heavier tree.

The pine points to the right. For use on the right side of the display, it would look better to have something that pointed left.

The stone is too large in relation with the other elements.

Why didn’t I make these adjustments at the exhibit? I don’t have the right stand, the right stone or the right small tree. Which means I have plenty to work on for the future!

Here are some more displays from the Seminar exhibit.

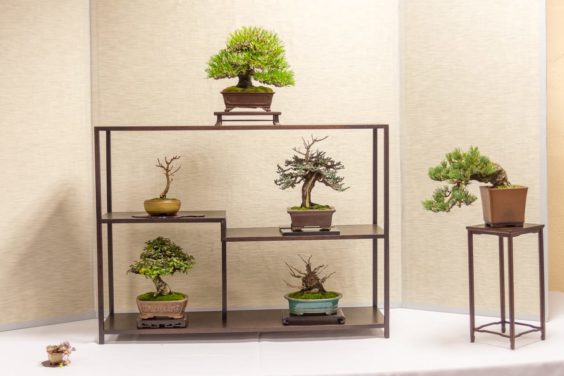
Six-tree display with a low and wide box stand

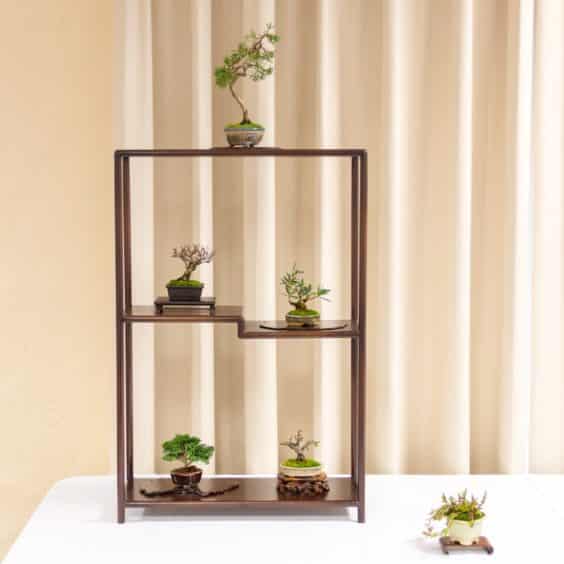
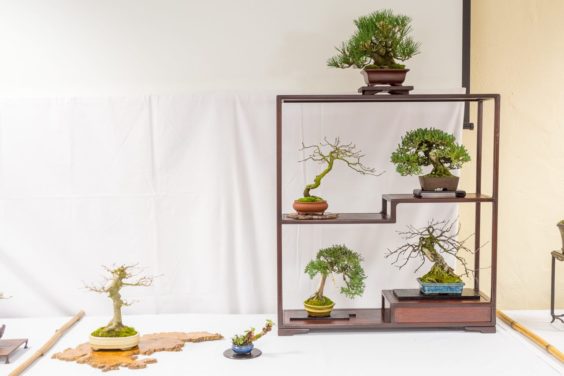
Five-tree display in a tall, narrow box stand

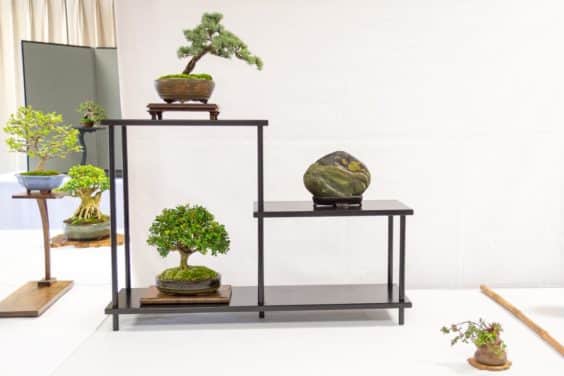
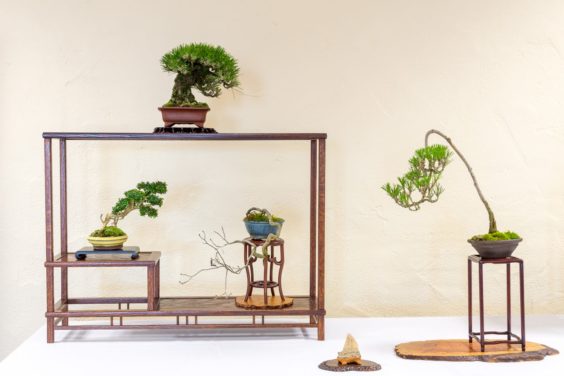
Two-tree display with stone and accent

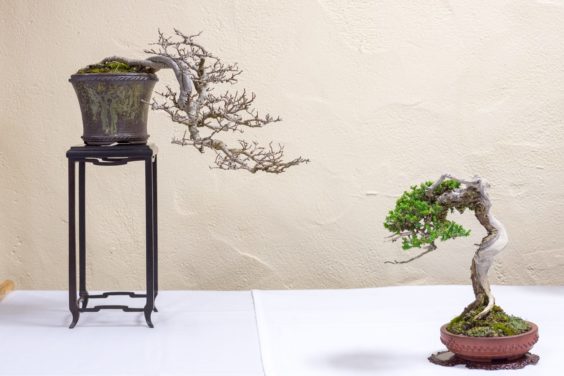
Two-tree display

Single tree display

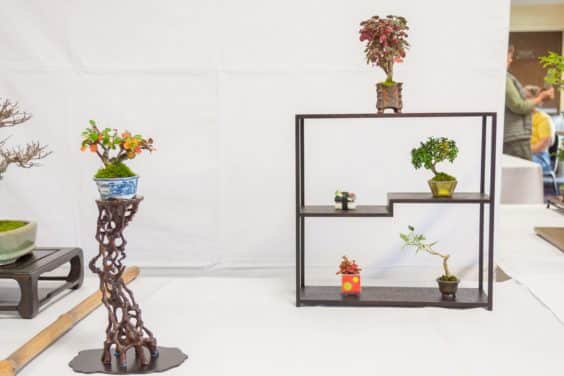
Four-tree display or mini-sized bonsai

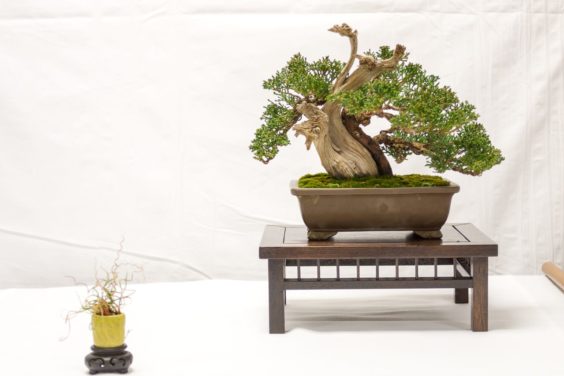
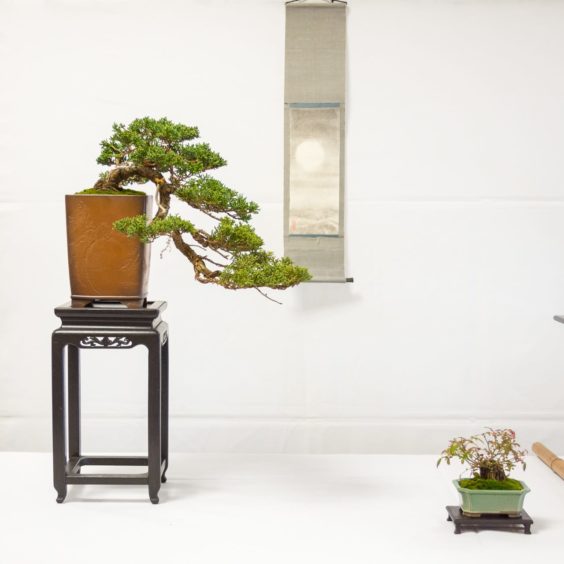
Juniper with scroll and small second tree

Four-tree display with accent

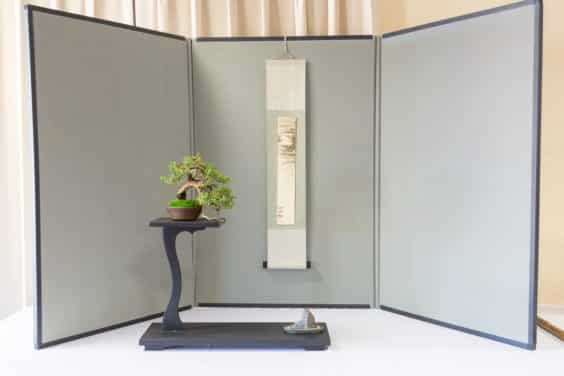
Single-tree display with scroll and accent

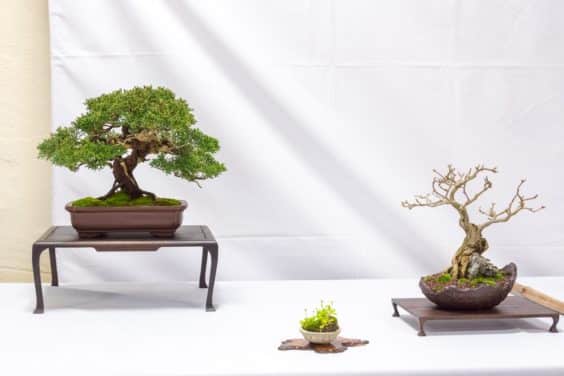
Two-tree display with accent

Six-tree display with box stand

The post Bonsai displays at the 16th biennial Shohin Seminar appeared first on Bonsai Tonight.

Repotting a collected Sierra juniper

$
0
0

When everything goes just right, a tree collected from the mountains begins to grow and gain vigor. After a while, it’s ready to begin the journey of becoming a bonsai.

The Sierra juniper below is showing strong signs of vigor. Although it’s strong enough to begin styling work, I wanted to know what I was dealing with under the soil before committing to a design. The first step would be repotting.

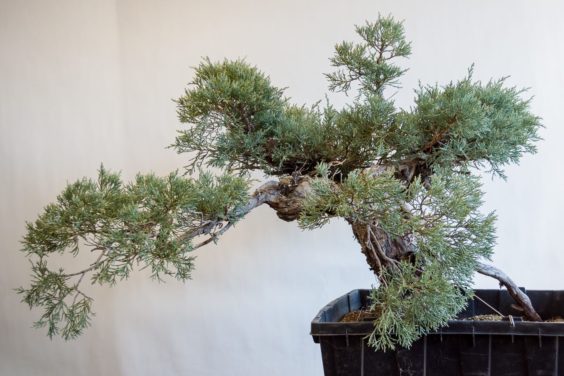
Sierra juniper

Even though the styling will wait, the repotting is a great opportunity to start thinking about the front of the tree and the optimal potting angle.

As seen from the back

As seen from the right side

Daisaku Nomoto and I worked together on the roots and cleared away some soft deadwood near the center of the trunk. After some basic root work, we started looking at options for the front.

Upright but leaning strongly to the right

The view from further to the right

A better view of the jin coming towards the front

At this point I’ll state the obvious and note that the trunkline has an unusual shape. Some views of the trunk offer more movement, other views offer more deadwood. And as it is with so many trees, some of the most interesting views of the upper trunk left the viewer with the most narrow view of the lower trunk. Some compromises would be in order.

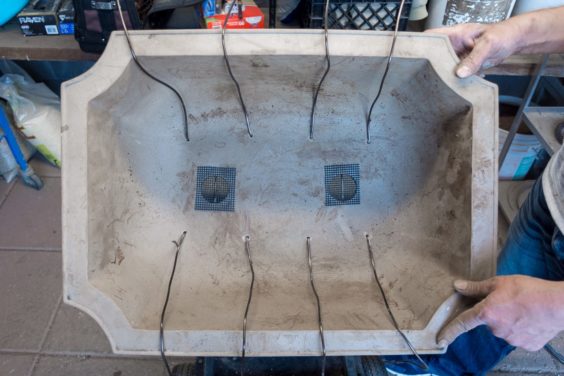
The pot, too, would have some say in the matter. I drilled extra holes in a large pot to accommodate extra tie-down wires before getting a close look at the roots. In the end, the tie-down procedure was simple and only a few of the wires were needed.

Preparing the pot

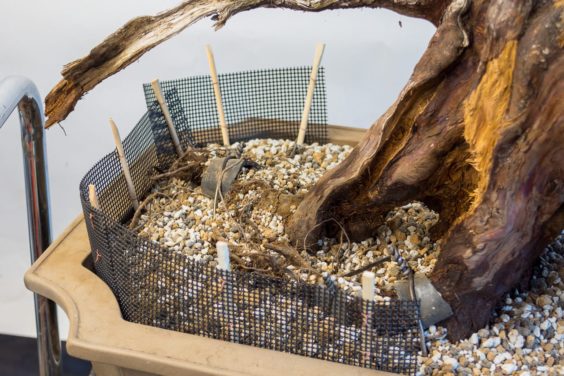
Daisaku and I ended up selecting a front that’s close, but not quite what we were looking for – some large roots prevented us from situating the tree at the selected potting angle. This left a large root slightly above the edge of the pot so we mounded up some extra soil and held it in place with a drainage mesh fence.

Chopstick and drainage mesh fence

Because the roots don’t stick up much, I’ll look to reduce the soil behind the fence starting in a few months. If all goes well, I’ll remove a little bit every couple months until the soil level is closer to the lip of the pot.

Alternatively, I could leave the fence in place all year and lower the soil level all at once this fall. Will wait and see how the tree is doing before making any decisions.

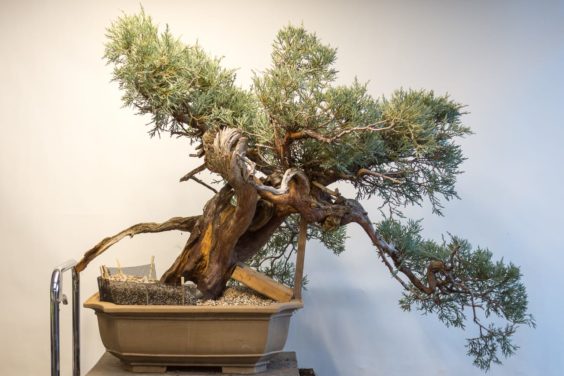
Here’s what we ended up with.

Repotting complete

I’d like for the tree to lean a bit more to the right and to bring the lower right branch slightly forward by twisting the trunk clockwise during the next repotting. In the meantime, I’ll be happy with the tree at this angle for the next 2-3 years.

The post Repotting a collected Sierra juniper appeared first on Bonsai Tonight.

Restoring an old cork oak bonsai

$
0
0

Toward the end of 2014, I picked up an old cork oak bonsai that belonged to a former member of Bay Island Bonsai. The tree hadn’t been repotted for maybe 5-10 years. Getting it out of the pot took several hours – the whole repotting took more than a day.

At the time, the tree had little foliage or evidence of root growth. I put the tree in a wood box and waited for spring.

The tree grew – slowly at first, and then vigorously. After a couple of years of letting it grow freely, I cut back and wired the branches last year. Now, after three years in the box, it’s time to repot.

Skipping past this year’s cutback, here’s the oak in the wood box.

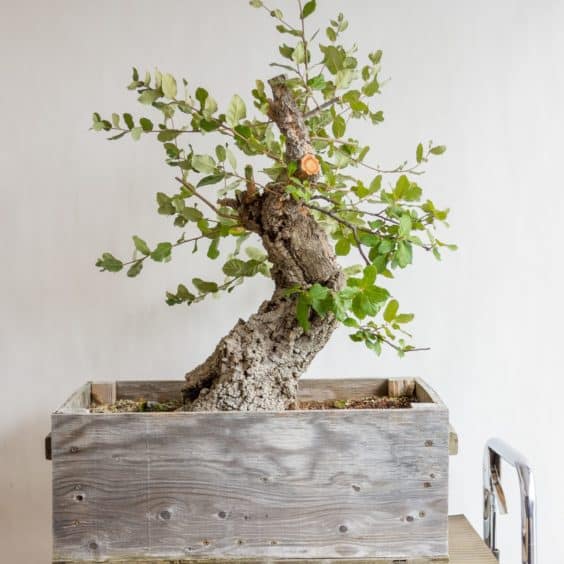
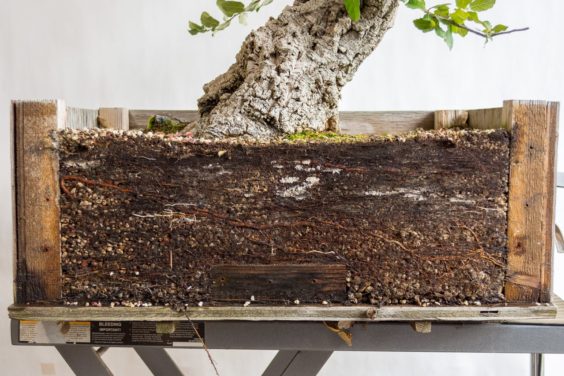
Cork oak – February, 2018

After the last repotting ordeal, I decided take a more civilized approach and enlist the help of a friend.

Lucky dismantling the box

After removing the first panel, I was happy to see lots of roots.

A window to the roots

There were a few white patches of some type of fungus – not sure if it’s beneficial or not – but there weren’t enough to be concerned about.

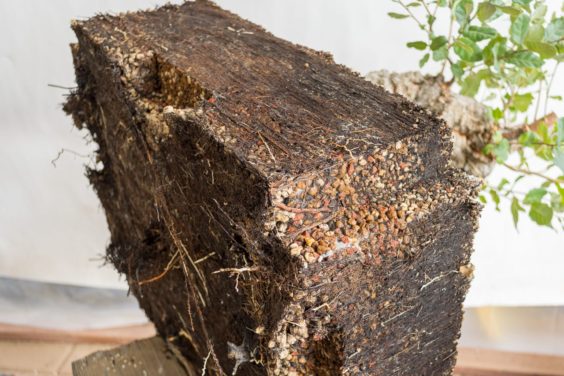
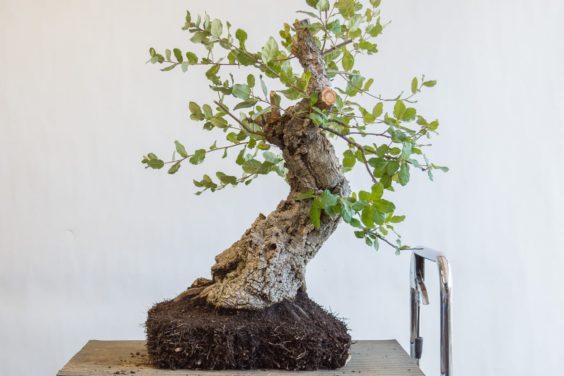
Once the tree was out of the box, I was struck by the angles made by the blocks that supported the box walls.

Angular root ball

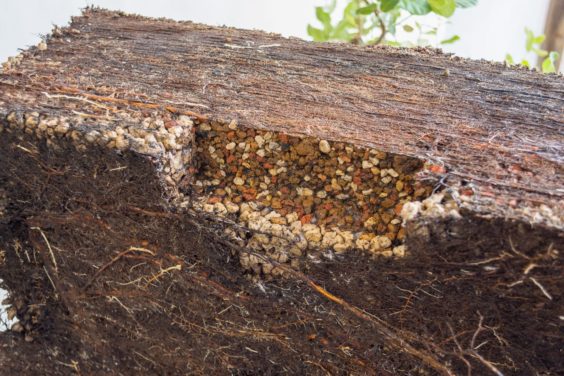
Looking closer, I noticed that no roots grew next to the blocks.

No roots in the cutout

I thought about why there were no roots growing against the edge of the box where the blocks were and came up with a single idea – that the edges of the box were warmer than the edges of the 2 x 2 blocks.

Once Lucky and I got started on the rootball, we found consistent root growth throughout the rootball. We removed about an inch of soil from the tree’s surface and several inches from the bottom, leaving the rootball about half as deep as it was when we started.

We then worked on the sides of the rootball, bringing it close to the size it was during the last repotting.

Rootwork complete

Closeup of the rootball

Normally I’d like to cull out more old soil from between the roots in this area, but as we’d already removed the majority of the roots, I thought this would be enough rootwork for this year.

Which meant it was time to select a pot.

Option #1 – new Chinese

Option #2 – new Chinese with cut corners

Option #3 – training pot

Option #4 – Handmade Gyouzan

(I wasn’t too serious about using the Gyouzan – and it’s a bit large for the tree – but I’ll happily try it out whenever I get the chance.)

I went with the training pot as it’s a good size for the tree.

Happy with the work

Now that the tree is in a bonsai pot again, I can focus on developing the apex and primary branches. Although this work might progress faster in a bigger container, I’m curious to see how it goes in a smaller container. If the tree slows down too much, whether as a result of the recent rootwork or the new, smaller, container, I’ll hold off on the styling and get the tree back into a larger container.

Repotting complete

The post Restoring an old cork oak bonsai appeared first on Bonsai Tonight.

Signs that it’s time to repot

$
0
0

There are some obvious signs that indicate when it’s time to repot a tree – like when the water fails to percolate or when a pot breaks.

Other signs are more subtle. When there’s a significant change in the amount of time it takes for a tree to dry out, for instance, it might be time to take a closer look.

This is often the case with my Yaupon holly. In recent weeks, the tree has been drying out within hours of the last watering.

Yesterday I found that the soil didn’t give at all when pressed firmly and digging down I saw that the akadama had broken down leaving nothing but brown dust and fine roots. I decided to repot.

Yaupon holly out of the pot

Had I checked underneath the pot to see if there were roots clogging the drainage holes, I would have seen none.

Although it’s often said that this is a good measure of whether or not a tree needs repotting, I’ve found it to be misleading as often as it is helpful. Here’s what the bottom of the holly’s rootball looked like after removing it from the pot.

Roots everywhere except for the drainage holes

It appears that the holly roots prefer moist areas to dry areas as roots refused to grow above the drainage holes. And it’s not as if the tree doesn’t have many fine roots. Here’s what the bottom of the rootball looked like after removing about 1/4″ of soil.

Lots of fine roots

I can’t say I’m surprised by what I found as I typically repot the tree every year. But just because I typically repot a tree every year doesn’t mean that I’ll automatically repot it. What it means is that I’ll check to see if it needs repotting every year and make a decision based on what I see.


The post Signs that it’s time to repot appeared first on Bonsai Tonight.

Checking the roots on a large cork oak

$
0
0

I’d like to highlight a comment from the last post:

“Whenever I get a new tree I like to repot it at the first ideal opportunity, regardless of whether or not the tree or soil are showing signs of a required repot because that is such an important component to the future of the tree and a complete unknown until you get in there yourself.”

I couldn’t have said it better. Whenever I get a new tree during repotting season, I make sure to repot it right away so I can see exactly what condition the soil and roots are in. And when I get new trees outside of repotting season, I wait – sometimes patiently – until the first opportunity comes along to repot.

The latter was the case with the cork oak below. I acquired last March – just after it had started putting on new growth and too late, by several weeks, to repot that season.

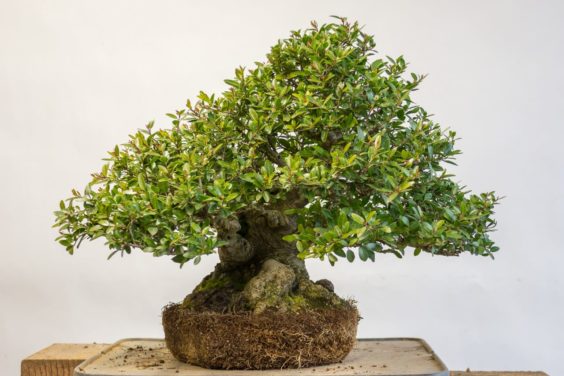
Large cork oak

After taking the tree out of the pot I found lots of good soil – mostly fresh akadama and pumice. After removing the outer layer of soil, however, I found the core of the rootball to be fully broken down and compacted.

I decided to remove a section of this old soil in the front of the tree. It took about an hour to remove all of the old soil in this area.

After removing old soil from the front of the rootball

And here is the cleaned out section from below.

Beneath the trunk

Normally I’m comfortable removing more old soil than this on established trees, but I haven’t done this work on old cork oaks and don’t know how they’ll respond. Depending on how the tree grows over the next year or two, I’ll think about removing another third of the old soil the next time I repot.

The repot also gave me the opportunity to change the front of the tree.

After repotting

Lots of vigorous growth will be needed to adequately thicken the young primary branches. I’ll start feeding the tree in about a month and let it grow until May or June at which point I’ll see if the tree has grown enough to warrant mid-season cutback and wiring.

The post Checking the roots on a large cork oak appeared first on Bonsai Tonight.

Repotting bare-root satsuki azaleas

$
0
0

For most varieties of bonsai, there are many approaches to repotting. Soil mixes, timing, and the number and selection of roots to be cut can vary widely depending on who is doing the work.

When it comes to azaleas, this isn’t the case.

Satsuki bonsai care – at least the basics – is fairly conventionalized. The planting medium is kanuma. The top dressing is “mountain moss.” Repotting times are early spring and early summer.

Here’s what the process looks like for trees that have been bare-rooted.

Satsuki azalea – ‘Koyo’

Azaleas exported from Japan are frequently cut back, bare-rooted, and wrapped in New Zealand sphagnum moss to keep the roots from drying out.

Roots wrapped in moss

During the bare-rooting process, many roots are often cut to ensure there are no soil particles left behind. The result can be a surprisingly small root ball.

Small rootball

It’s common for these rootballs to be a mix of structural roots and fine roots.

Rootball with big and little roots as seen from below

The basic approach to repotting is the same for azaleas as it is for other varieties. The primary difference is that the most common soil mix is 100% kanuma, a volcanic medium mined 3 meters below the surface in parts of Japan.

After repotting in kanuma

Kanuma is primarily composed of silicic acid (51%), alumina (16%), and iron oxide (9.9%). The kanuma used for growing azaleas is often hidden from sight, however, as it is frequently covered with mountain moss.

After covering the surface of the soil with mountain moss

Mountain moss helps preserve moisture in the pot – a valuable capability considering that azaleas can suffer significant damage when the roots dry out, even if for a short time.

Mountain moss

And that’s the basic approach to repotting satsuki bonsai. If you live in a country that imports bare-root azaleas from Japan, it’s likely that your tree went through a similar process at some point.

Next up: what to do when there are deep pockets in the rootball.

The post Repotting bare-root satsuki azaleas appeared first on Bonsai Tonight.
Preventing air pockets under the trunk – repotting satsuki azalea

$
0
0

Air pockets in the rootball, we are often told, lead to dead roots which can cause further dieback on roots or branches. It stands to reason – roots exposed to the air will not fare well on varieties like satsuki.

The most common place to find air pockets is below heavy roots or under the trunk. It’s easy to understand how this might happen as these are areas that aren’t always accessible to chopsticks or other implements used to incorporate soil particles between roots.

I found a fairly deep pocked beneath the trunk of a Koyo satsuki this week.

Satsuki azalea – Koyo

Pocket below the trunk

The round pocket was almost 2″ deep and there was no way for me to create a column of soil onto which I could set the tree to perfectly fill the gap. I saw the opportunity to use the trick that appears in so many bonsai articles – pouring soil into the pocket and flipping the tree over onto a mound of soil.

I started by filling the pocket with kanuma.

Pocket filled with kanuma

Depending on the nature of the pocket, it can make sense to use chopsticks to incorporate the soil into the roots. In other cases, the pocket may be the wooden underside of the trunk from which no fine roots emerge.

As some of you may have experienced, simply filling the pocket with soil isn’t enough to keep it in place when you turn the tree over. Wetting the soil can help hold it in place.

After wetting the kanuma

I used a spray bottle to wet the soil in the pocket and was about to turn the tree over when I noticed the soil move a bit. It turns out I hadn’t wetted the soil enough. Lesson: make sure the soil in the pocket is completely wet or it will fall out quickly when the tree is turned over.

It also helps to prepare the pot and soil mound ahead of time.

Mound of kanuma

I quickly turned the tree over and placed it on the mound. From what I could tell, the kanuma stayed in place during the maneuver.

Tree resting on kanuma mound

I nestled the tree into place by holding the base of the trunk and twisting it back and forth while pressing the roots into the soil. I stopped periodically to check the level of the trunk.

Checking the level

Once the tree was situated at the proper depth and angle, I added some soil and incorporated it between the roots with chopsticks.

Tree at the proper level

After working soil between the roots

I do this before wiring the tree into the pot for trees that have been bare-rooted. The soil between the roots provides support and keeps roots in place as the wires are secured.

After securing the tie-down wires

From there I filled the pot to the desired depth.

Repotting complete

After filling the soil to the proper level, I rushed the tree outside for its first proper watering in its new container.

Next up: the final work before spring – removing flower buds

The post Preventing air pockets under the trunk – repotting satsuki azalea appeared first on Bonsai Tonight.
Removing flower buds from satsuki azaleas

$
0
0

Removing the flower buds from satsuki azalea bonsai is a common technique for getting a tree to focus on producing new growth instead of flowering.

Satsuki azalea – Momoka

Although I’d love to enjoy the tree’s flowers this year, I’d rather it grow as much as possible and gain the vigor that will be necessary before I can continue the tree’s training as bonsai.

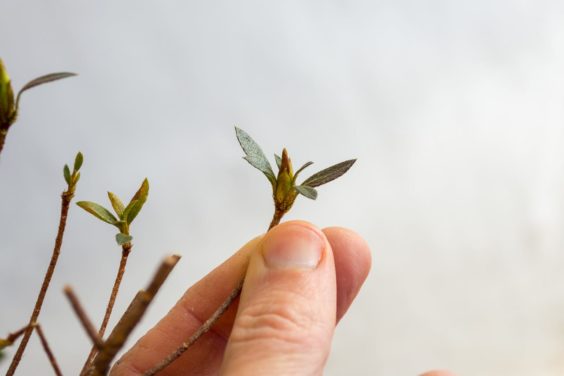
The work is simple but requires care. I start by identifying a flower bud.

Flower bud

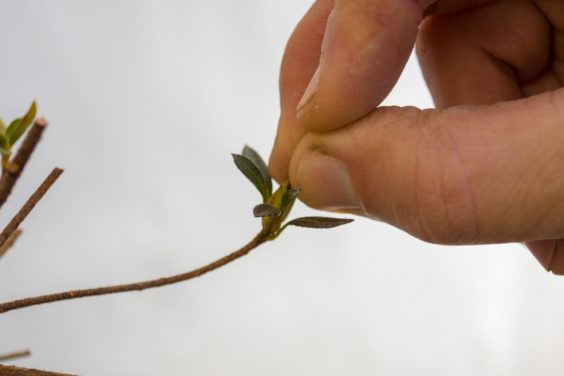
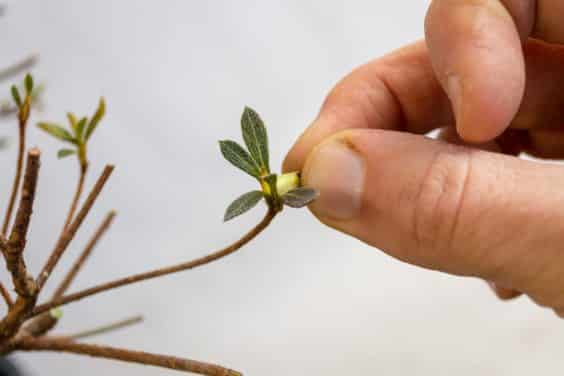
I then grab the bud and gently bend it to one side until it separates.

Grabbing the bud

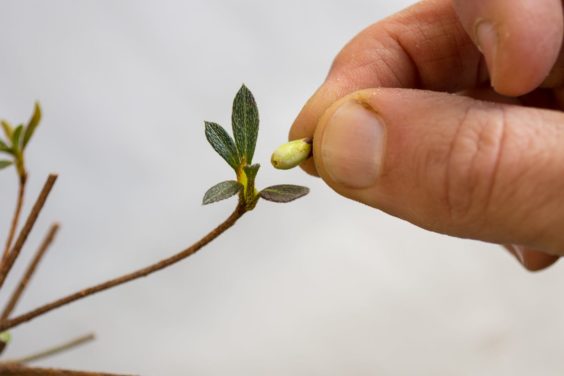
Removing the bud

Bud removed

I typically use my left hand to support the base of the shoot as I do this to prevent the shoot from breaking. Azalea shoots are brittle – if this work is done too quickly or without adequate care it’s easy to snap the shoot.

Broken shoot

Once the shoots are removed the tree is ready for spring. Until new roots are established, I’ll keep the trees in a warm, humid, environment and mist them throughout the day until the weather warms up at which point I can take the trees outdoors.

After removing flower buds

The post Removing flower buds from satsuki azaleas appeared first on Bonsai Tonight.
A quick tip for maintaining Korean hornbeam bonsai

$
0
0

Korean hornbeams typically produce lots of back buds. For the most part, this is a good thing as the prevalence of buds helps hornbeam bonsai develop quickly.

Korean hornbeam

Not all buds, however, are useful for the design of the tree.

Buds emerging from the trunk

Hornbeams often produce buds along the trunk, at the base of branches, and anywhere callus has formed. If these buds are left alone, the resulting shoots will need to be trimmed, thereby leading to the production of more callus and more buds the following year.

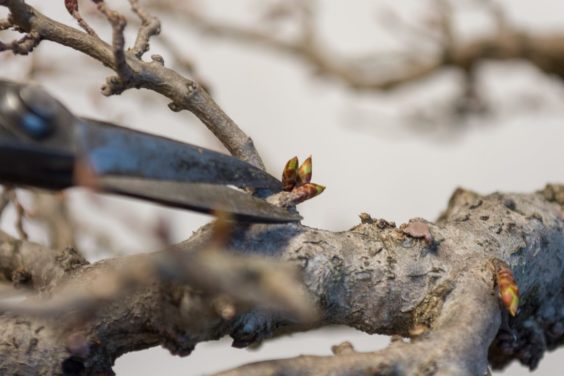
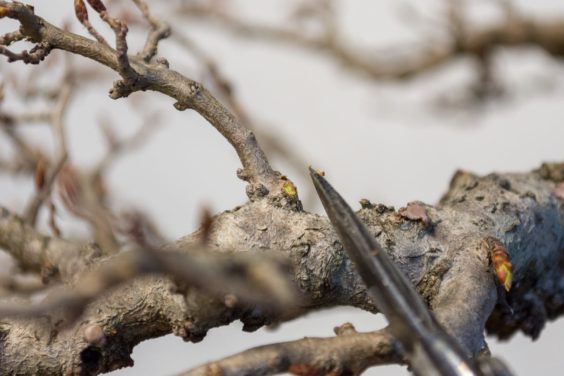
I try to remove these buds whenever I see them with fingers, tweezers or scissors.

Buds emerging from the base of a branch

Removing the buds with scissors

Buds removed

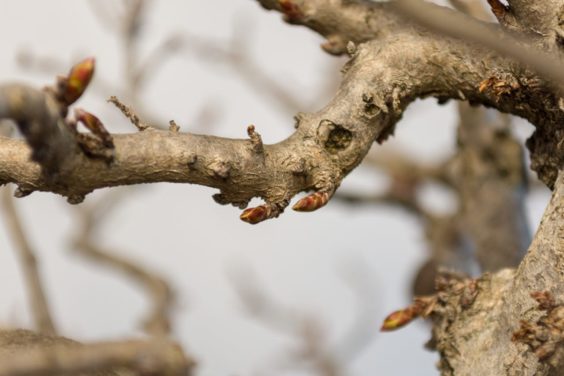
The base of branches are a common site for buds to emerge, but they can also grow in less likely locations such as the underside of branches.

Buds beneath a branch

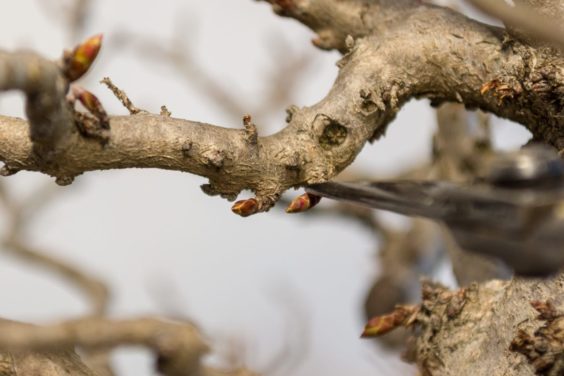
Removing the buds

After removing the buds from the bottom of the branch

When the cuts are small, I don’t use cut paste. I dab a little liquid cut paste on slightly larger wounds.

Wounds left after removing buds

After applying cut paste

The work is never ending, especially if the trees start with a lot of scar tissue. These shoots are one reason why we often see hornbeam with large, tapering, trunks, and it’s why we prize more slender specimens with white bark as they are harder to come by.

The post A quick tip for maintaining Korean hornbeam bonsai appeared first on Bonsai Tonight.
Where do roots like to grow? A look inside the pot

$
0
0

For as important as roots are to healthy bonsai, we don’t often get a good look at how they grow in the pot. Few containers offer a view at what’s going on inside and we often disturb the roots with sickles or chop sticks when removing trees from their containers.

I got a particularly good view of the roots on a plum bonsai this year. I’ve been caring for and repotting the tree for the past 25 years so I’m familiar with how the roots grow, what size pot the tree likes and which soils work best for the tree.

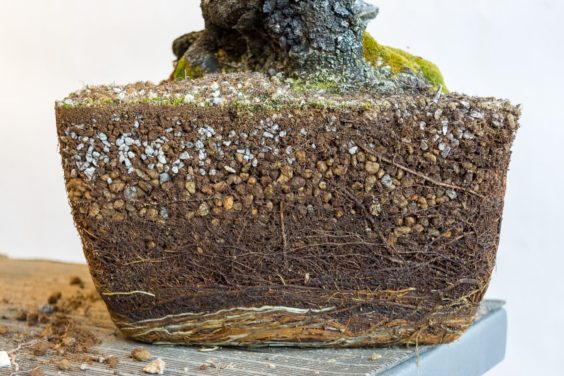
Roots on a plum bonsai

Due to the speed with which the roots grow, I repot the tree every year. The soil mix is 50-60% akadama with the remainder consisting of pumice (the white particles) or kiryu (the yellow particles). The bottom half inch is straight pumice.

As is clear in the photo, there are more roots in the bottom half of the rootball than in the top half, and far more roots in the bottom inch than anywhere else – the course roots obscuring any view of the pumice layer.

Getting such a clear view of the roots made me wonder if there is any benefit to changing the distribution of roots in the pot – or if it’s even possible. The roots have looked like this every time I’ve repotted the tree, despite the different mixes I’ve used over the years. Clearly, the tree likes the available air and water near the bottom of the pot. Or is it the temperature? Or are plum roots programmed to grow as much and as low as possible?

It wouldn’t be tricky to answer these questions if I had enough similar trees to test different hypotheses. Just for fun, I rooted a number of cuttings from this tree a few years ago so I may get the chance to run some tests. That said, the tree typically produces the slow growth that I look for at this stage of development so there may be more pressing questions to investigate.

In the meantime, I’ll keep making small tweaks to the soil – different sizes, particle types, etc. – and see if any patterns emerge.

The post Where do roots like to grow? A look inside the pot appeared first on Bonsai Tonight.
Viewing all 1061 articles
Browse latest View live