Quantcast
Channel: Bonsai Tonight
Viewing all 1061 articles
Browse latest View live

Bonsai Development Series #4: Removing the sacrifice branch

$
0
0

The basic idea of sacrifice branches is a simple one: develop sacrifice branches in order to thicken the trunk and then remove them when the trunk reaches the desired thickness.

The application of this idea is where things can get tricky, so let’s start with a simple example.

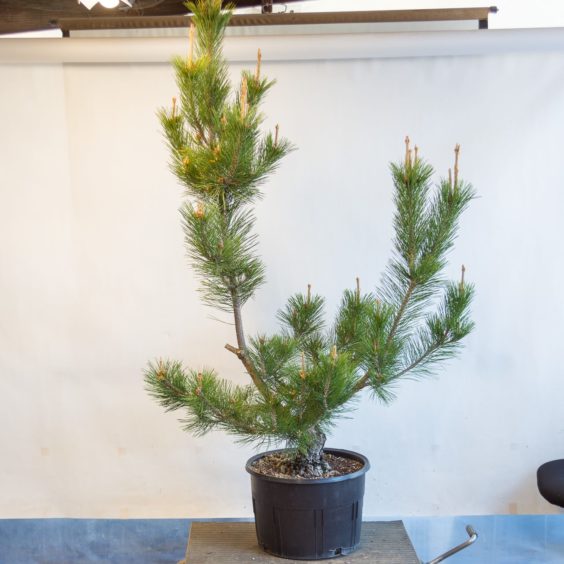
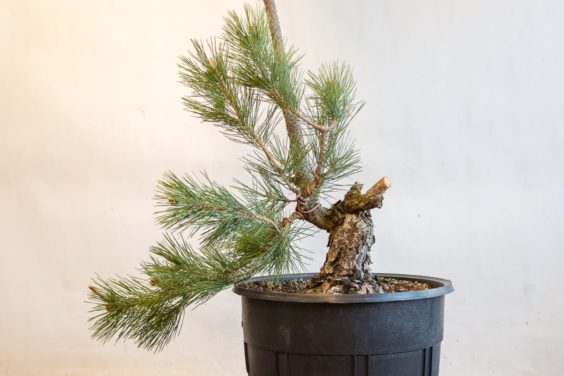
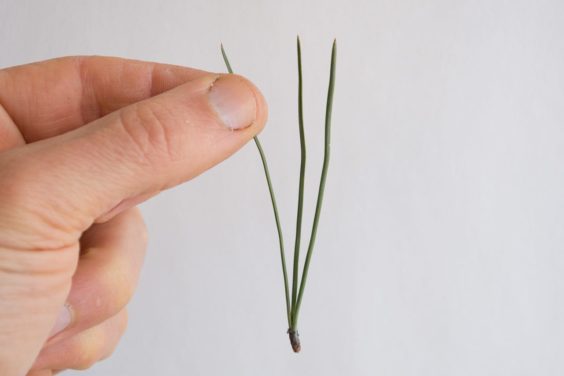
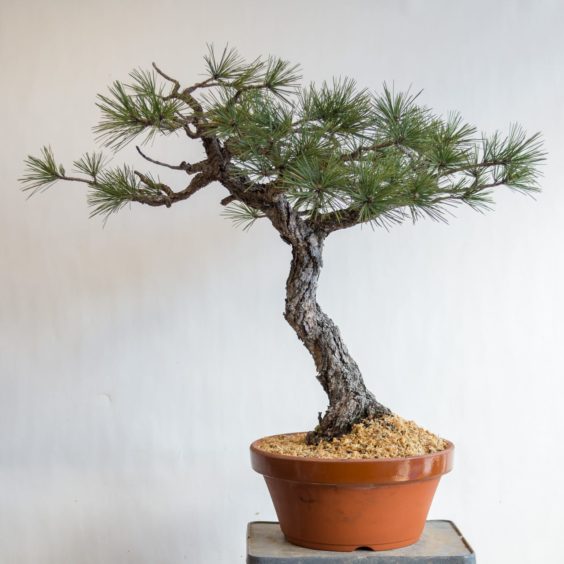
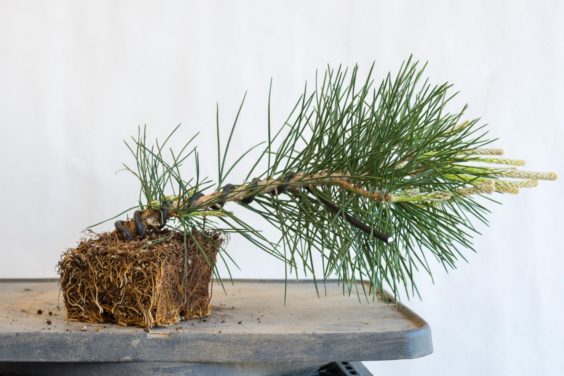
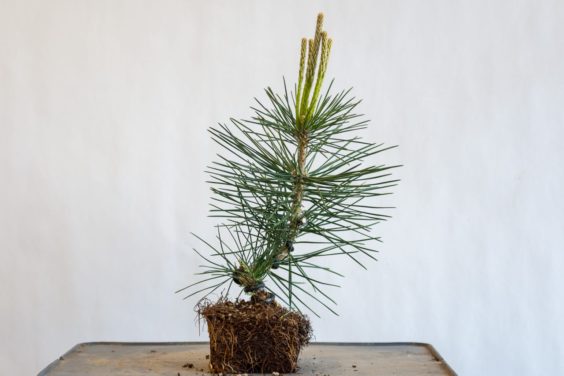
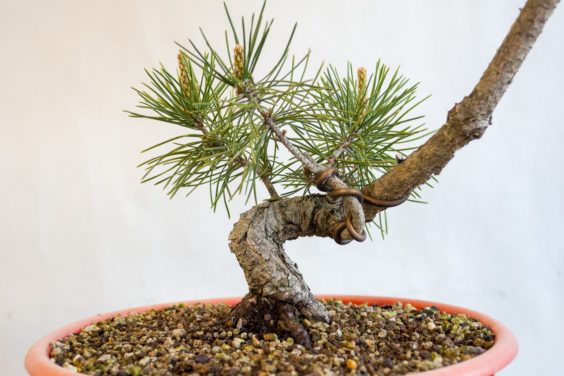
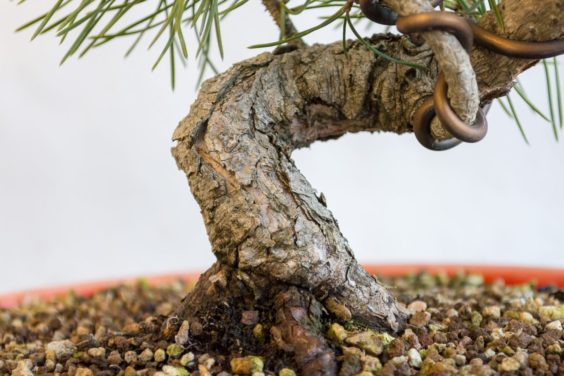
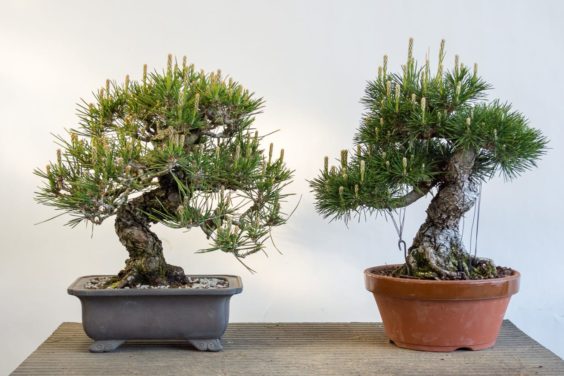
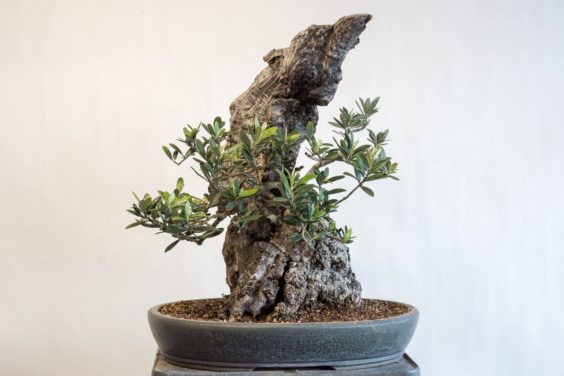
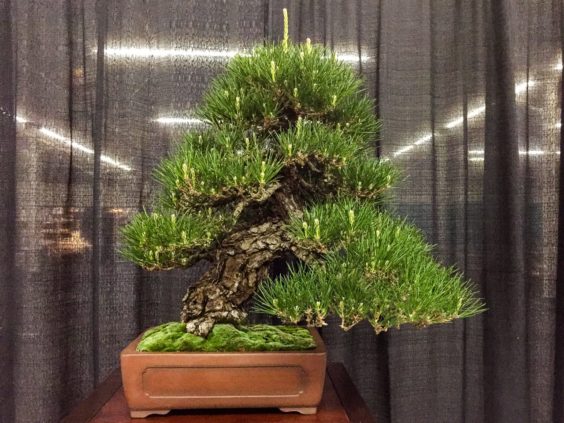
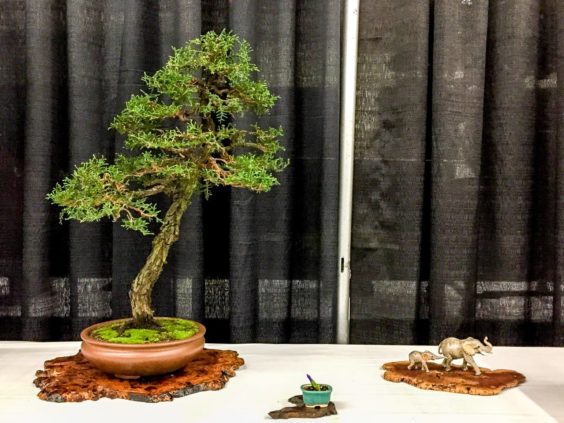
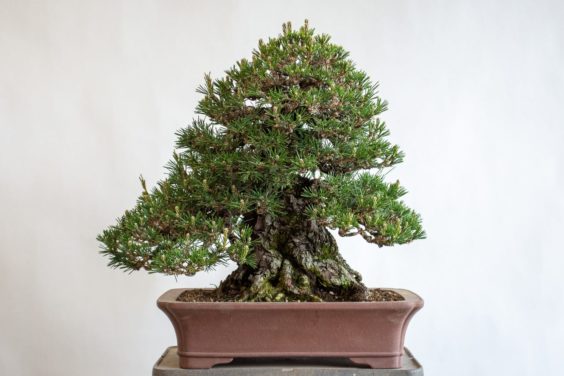
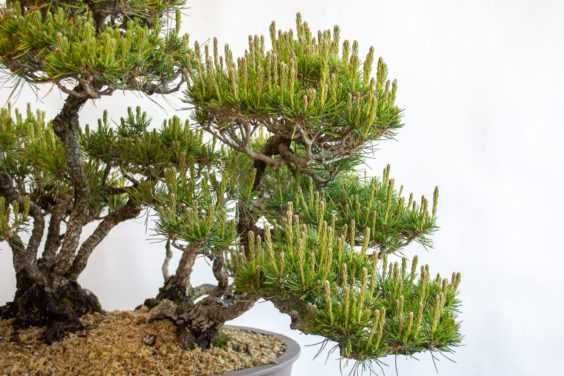
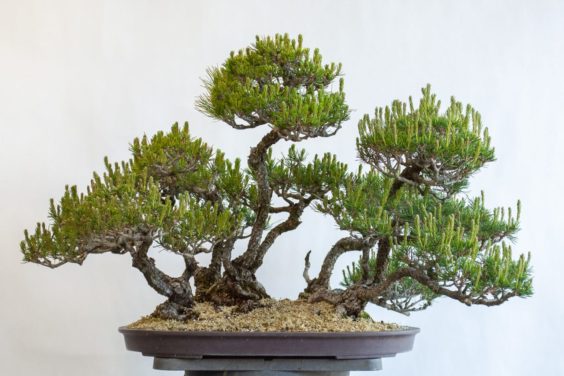
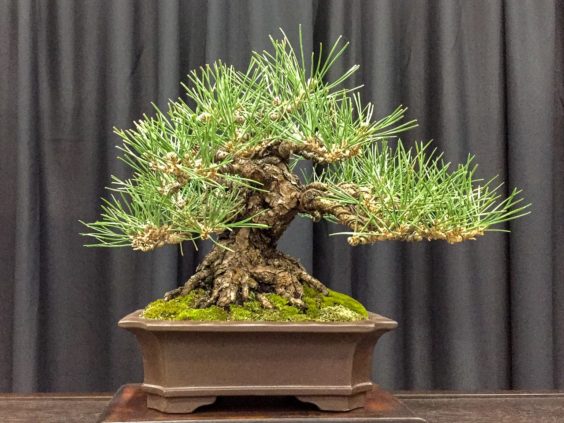
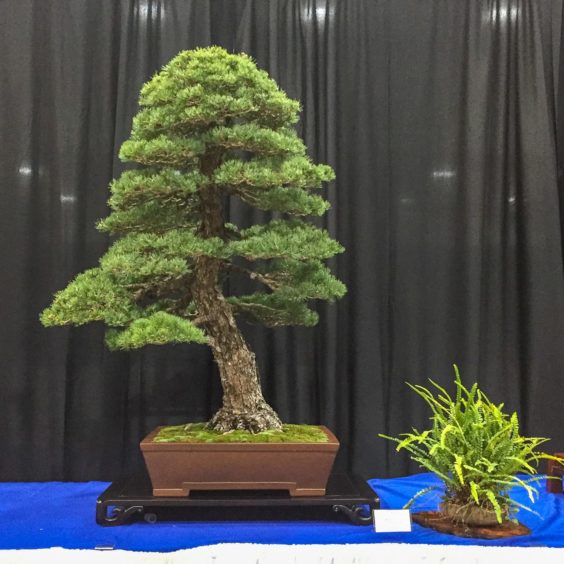
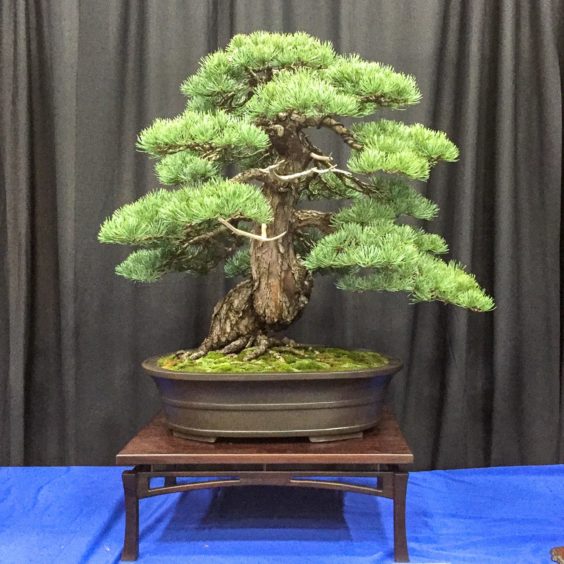
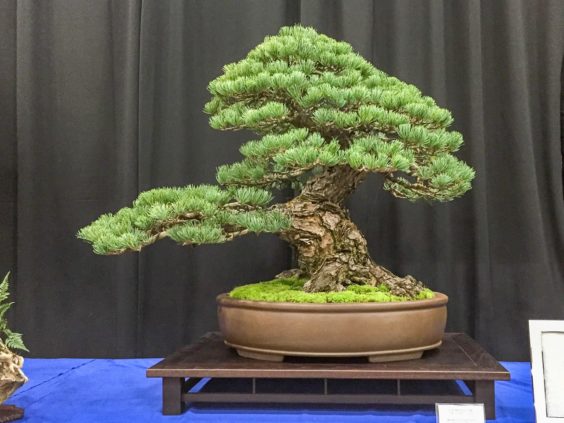
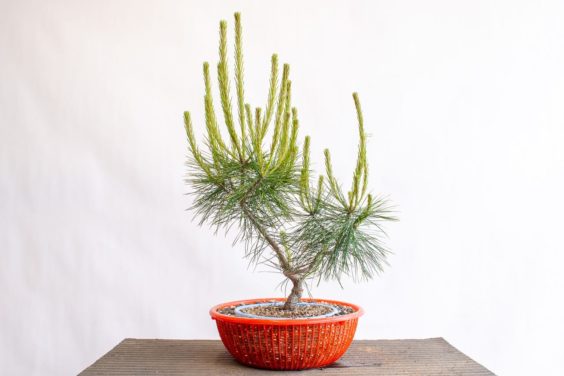
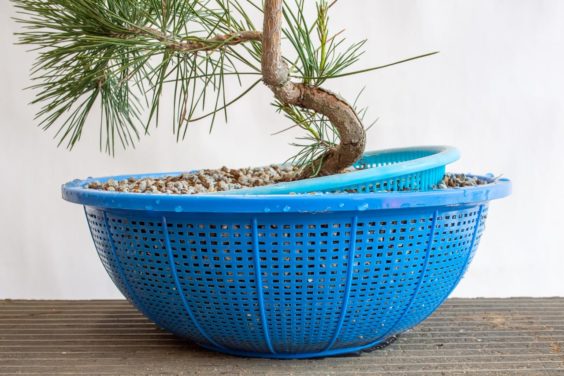
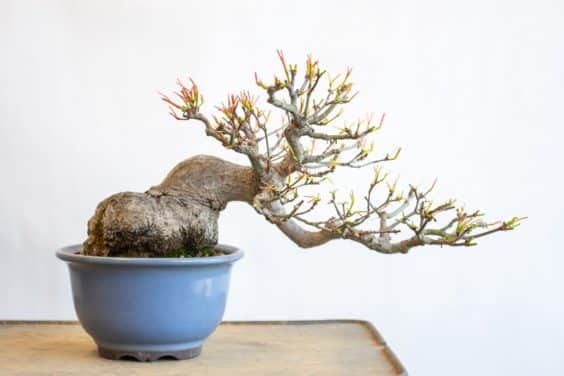
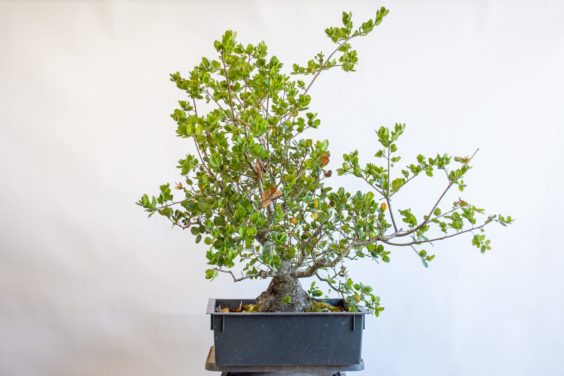
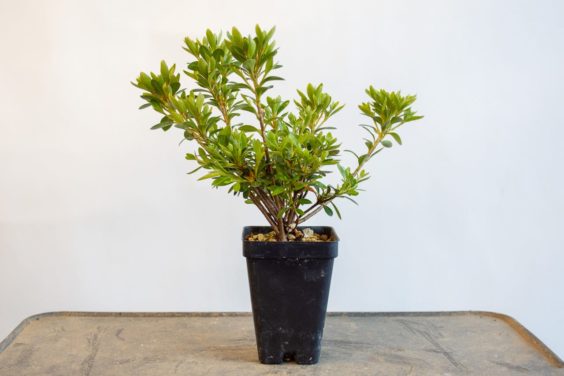
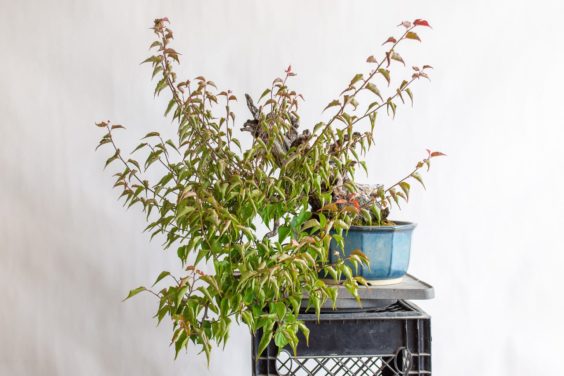
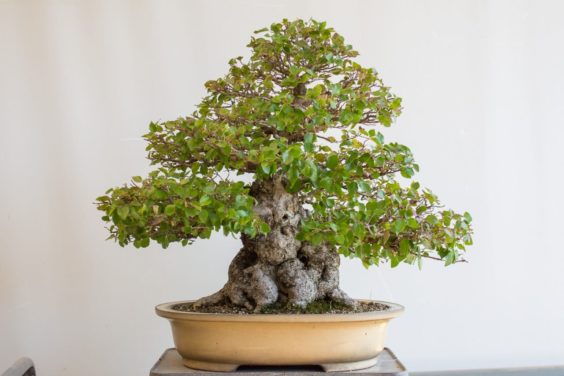
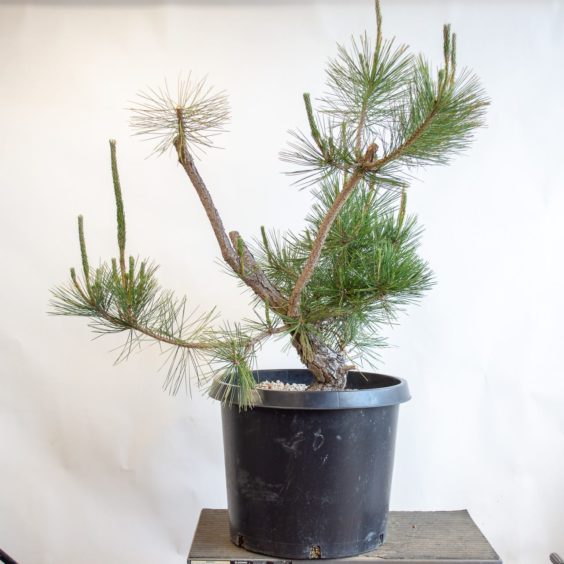
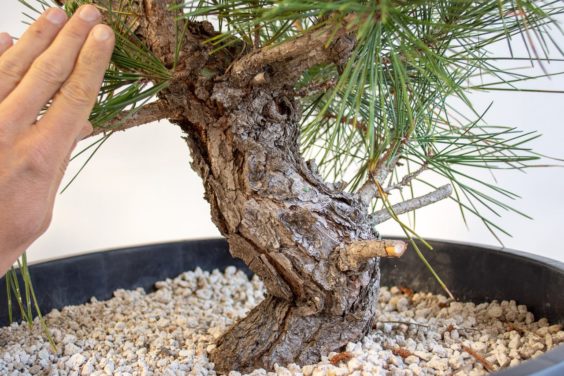
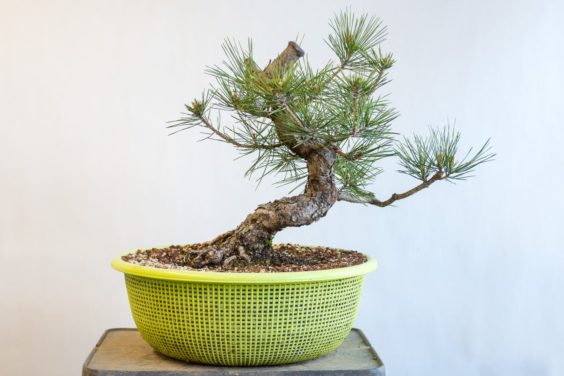
My goal for the pine below has been to develop a trunk with interesting movement but little taper. To achieve this, I let a single sacrifice branch grow from a spot near the future apex while maintaining relatively low branches that can be used to fill in the future silhouette.

Japanese black pine – 14-years old

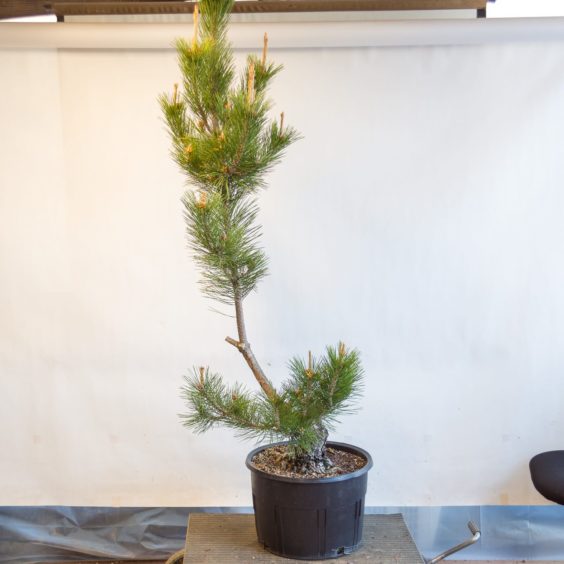
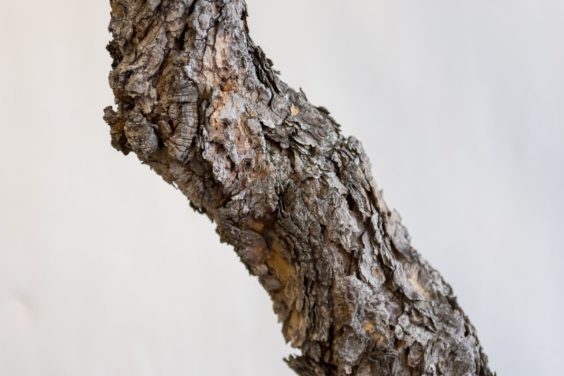
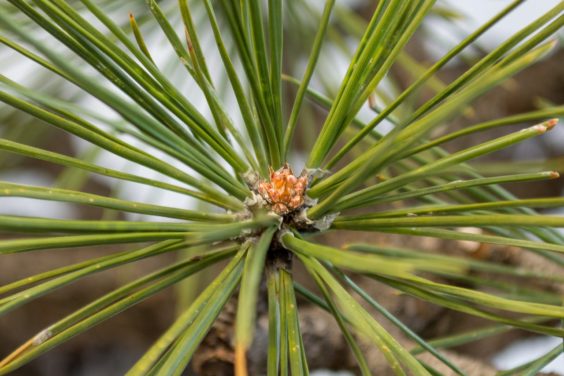
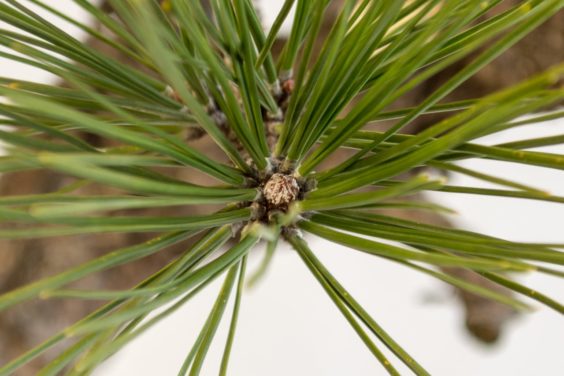
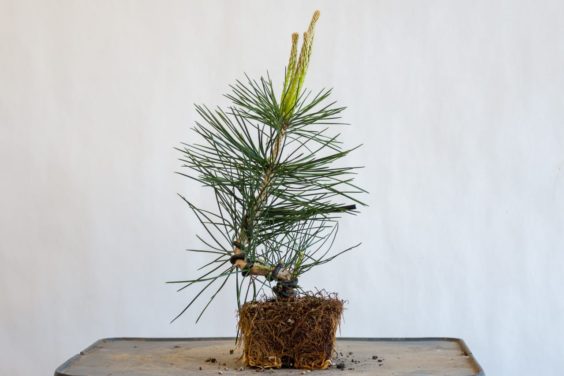
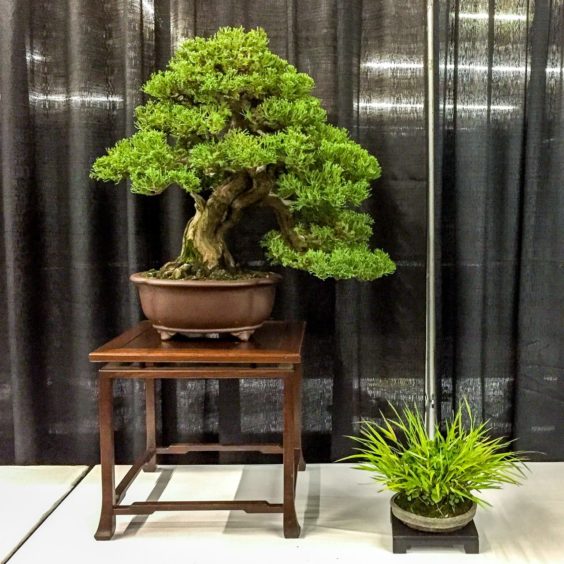
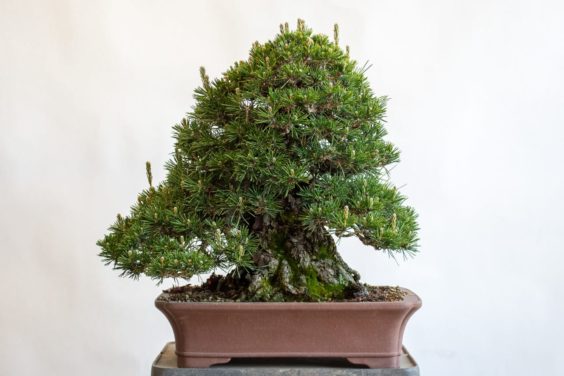
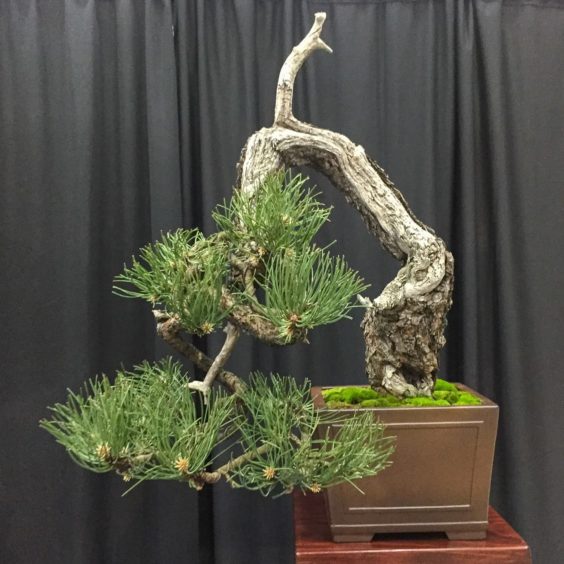
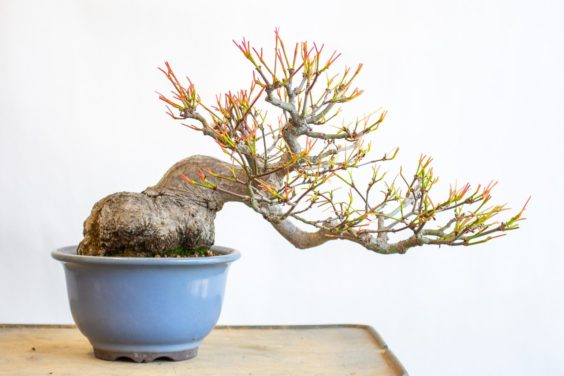
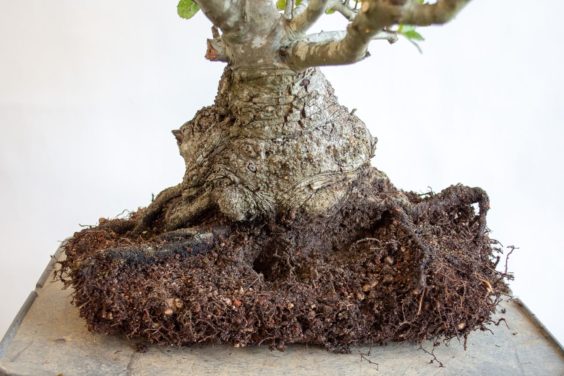
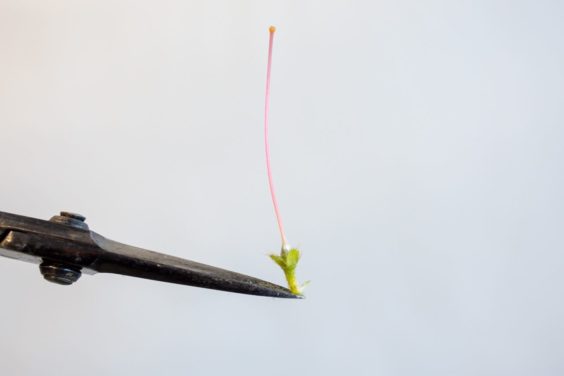
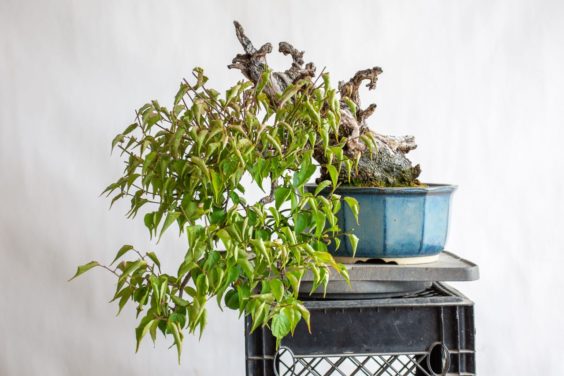
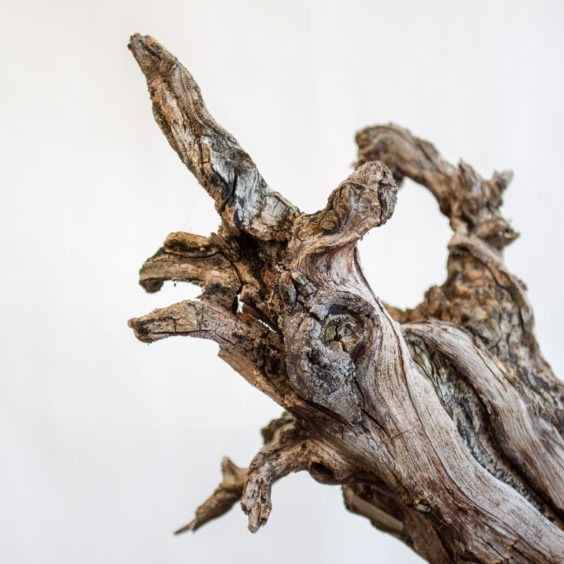
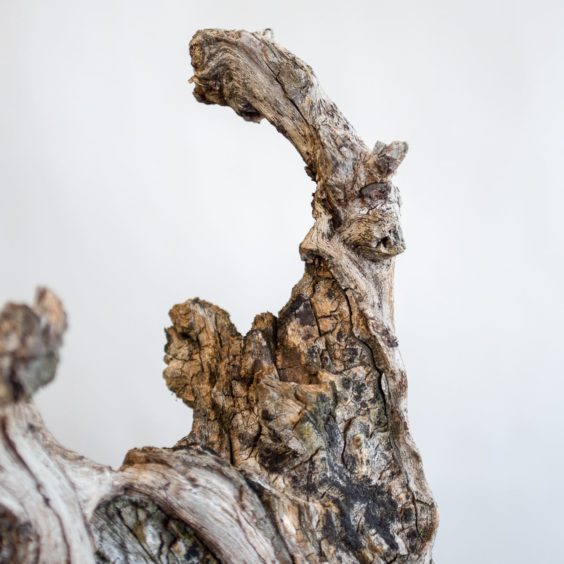
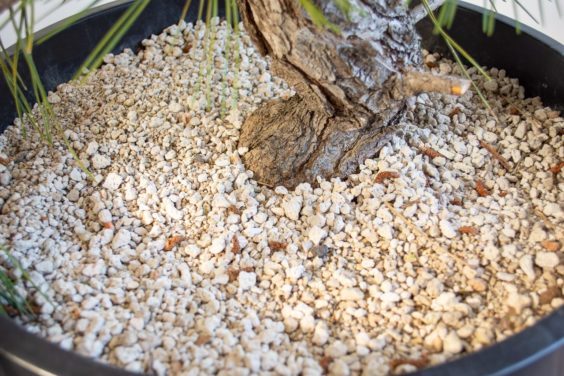
The sacrifice branch has been growing freely for about 7 years. During this time, the trunk grew to its current thickness. Because I am satisfied with the diameter of the trunk, I removed the sacrifice branch.

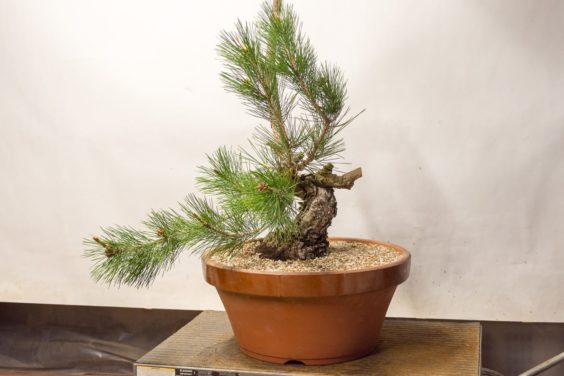
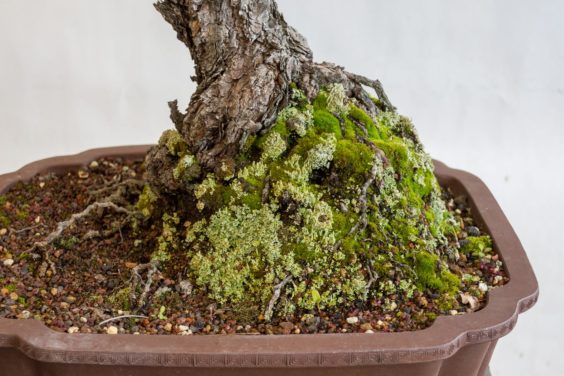
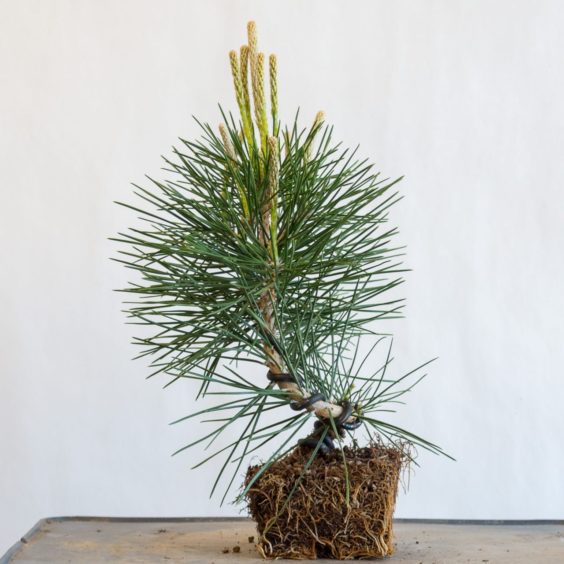
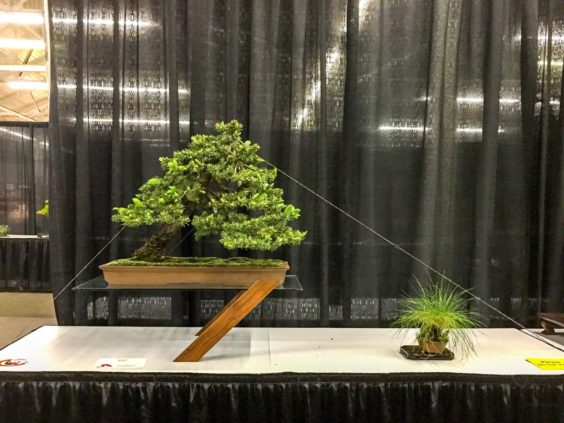
After removing the sacrifice branch

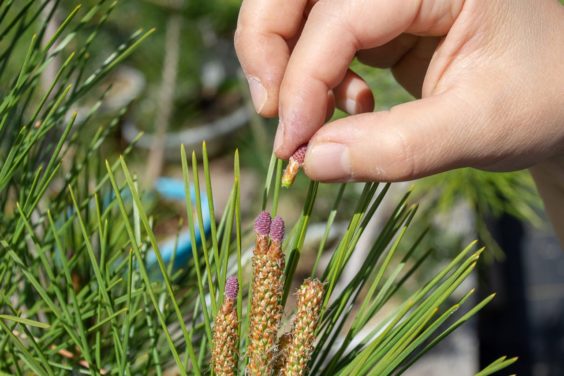
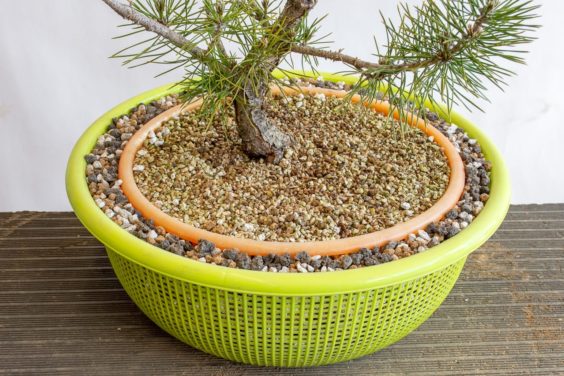
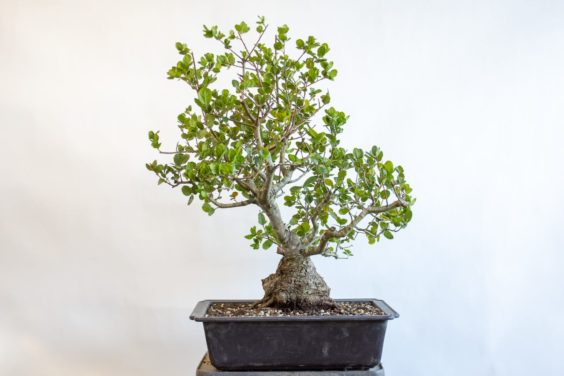
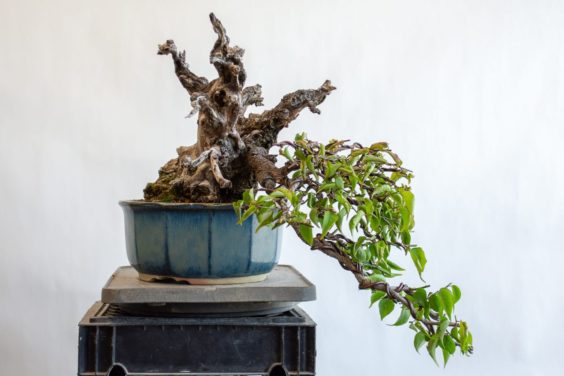
From this point forward, my strategy for developing the tree will shift from growing the trunk to refining the branches. This is where techniques such as branch thinning, needle plucking and decandling come into play.

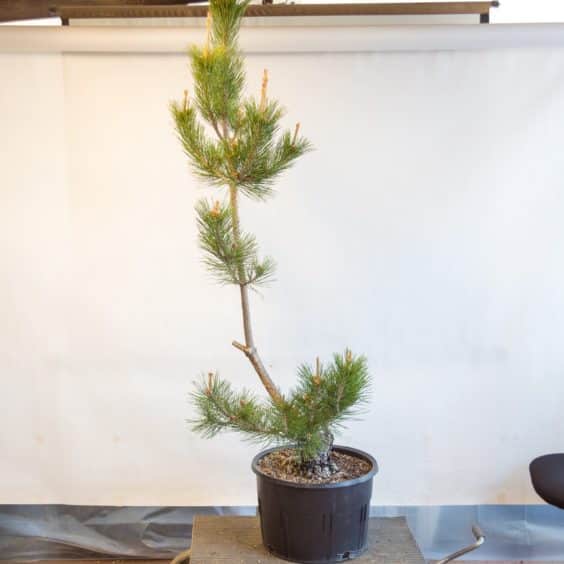
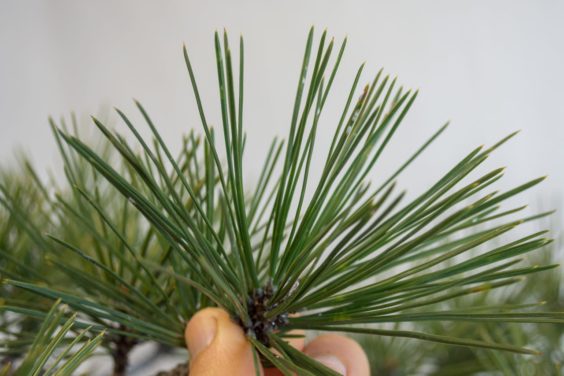
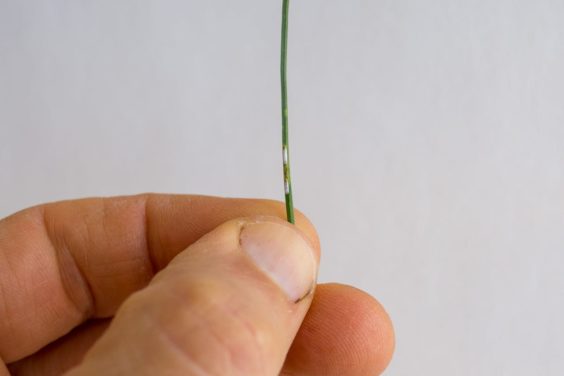
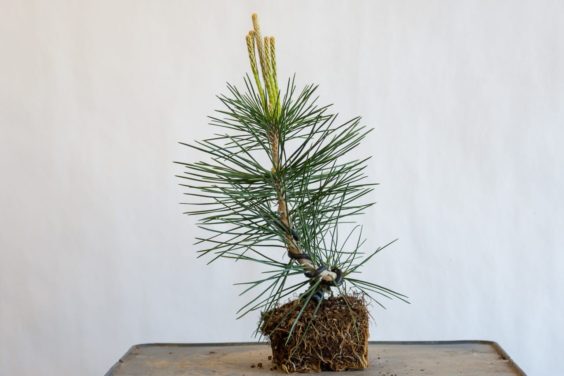
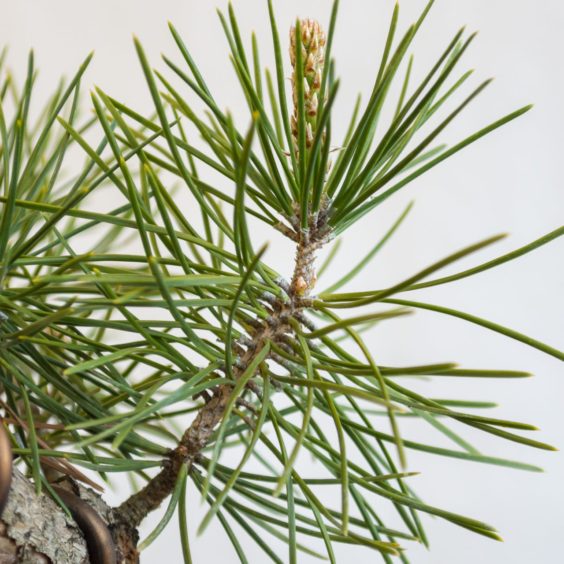
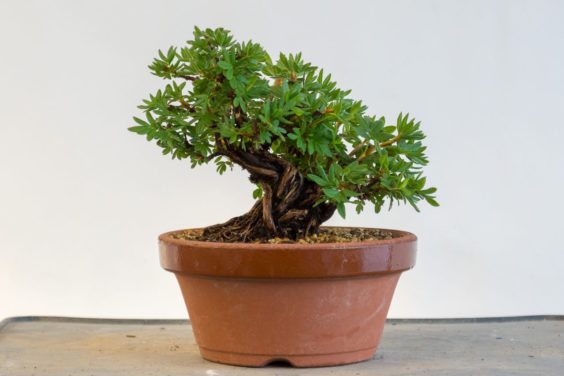
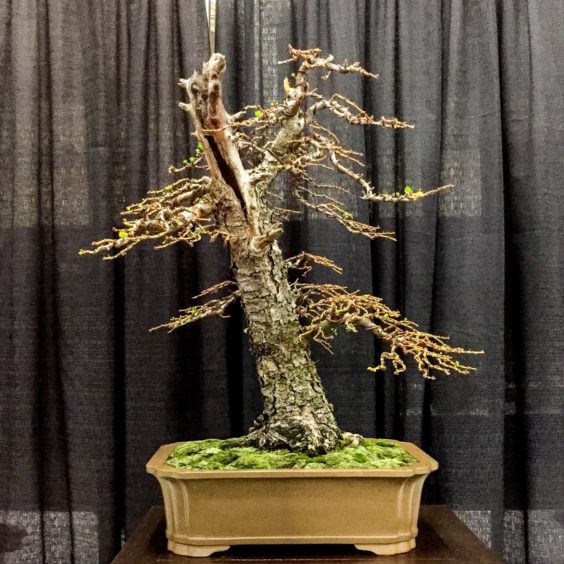
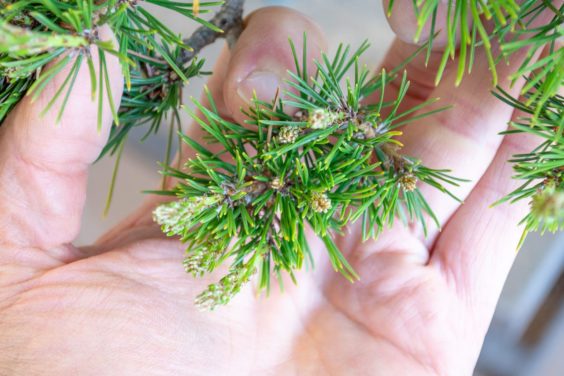
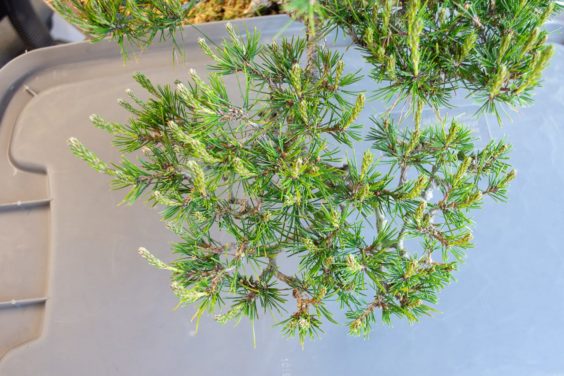
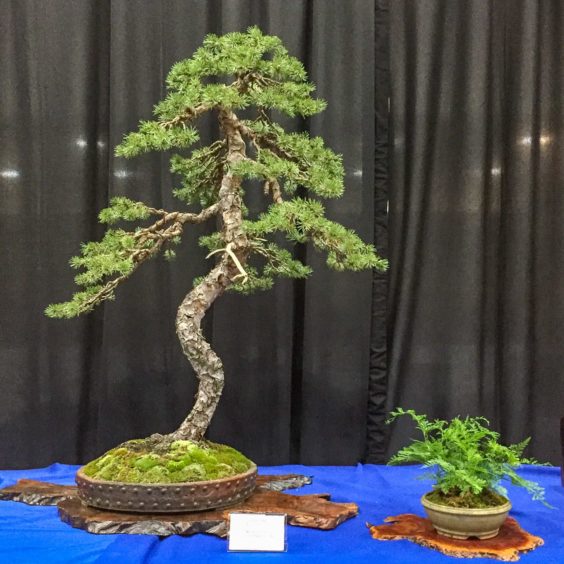
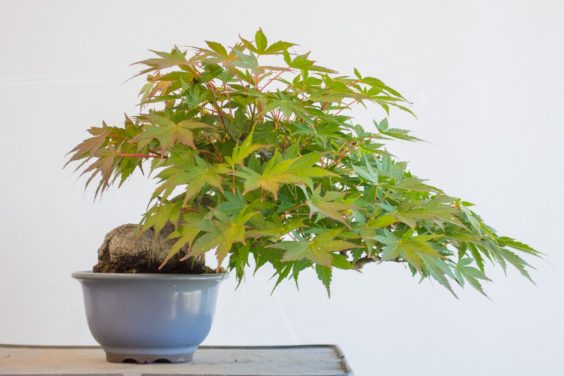
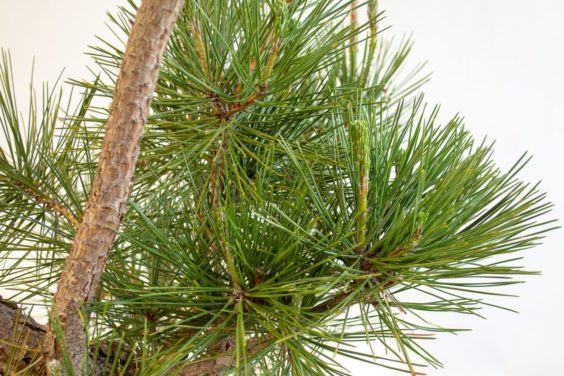
I began this refinement work by shortening two of the larger branches on the tree in an effort to encourage new growth closer to the trunk.
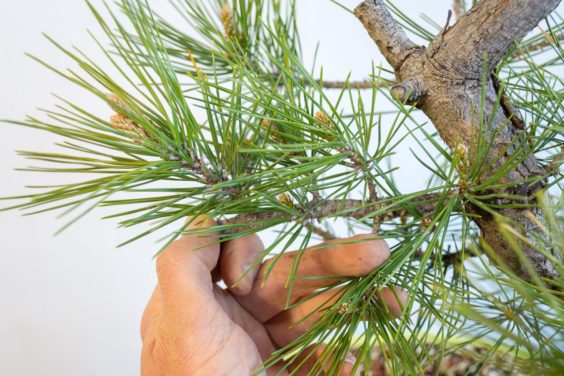
Large branch

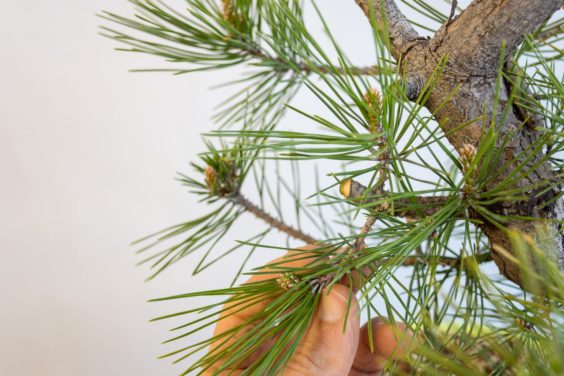
After shortening the branch

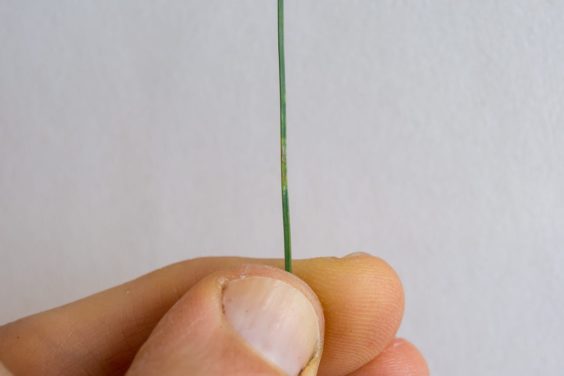
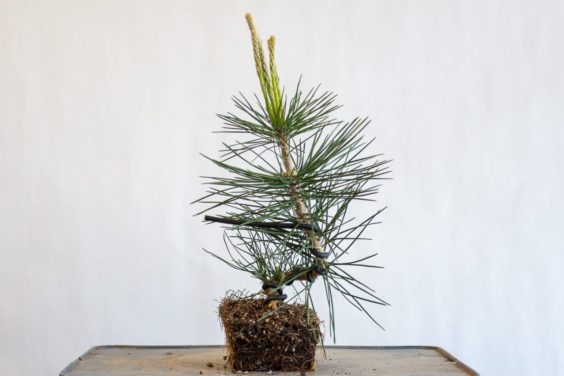
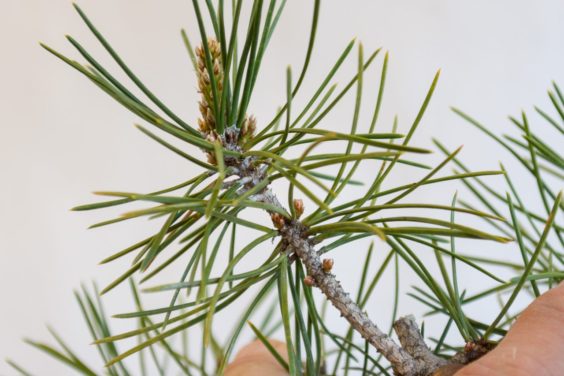
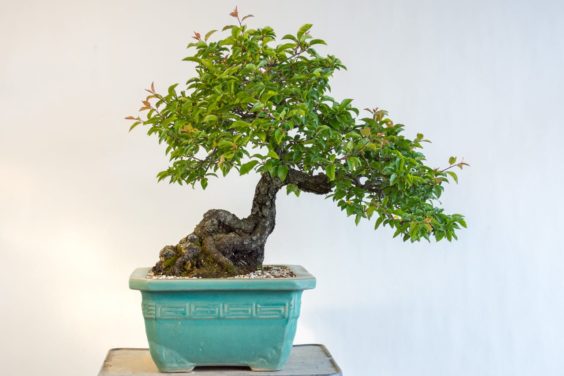
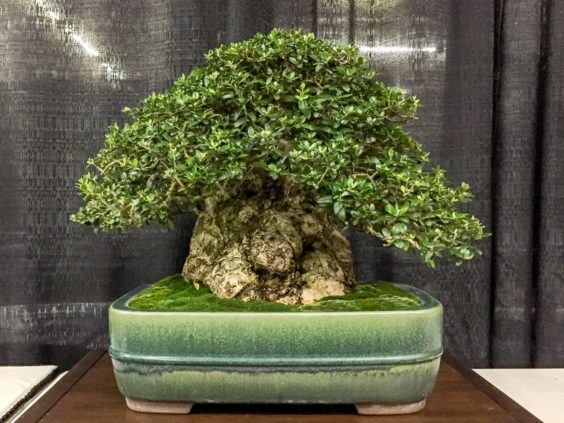
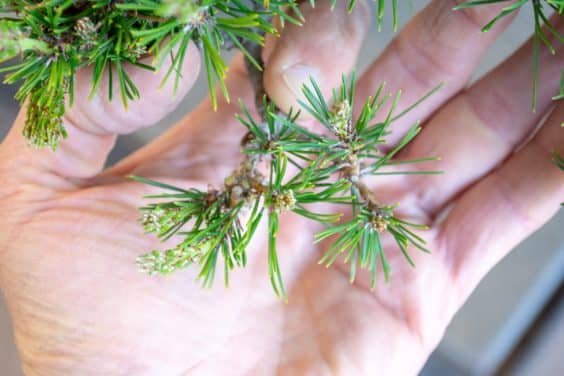
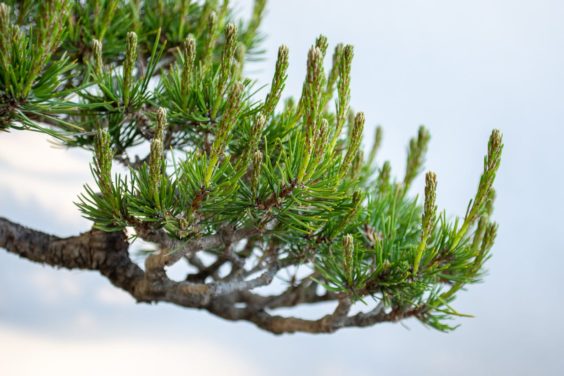
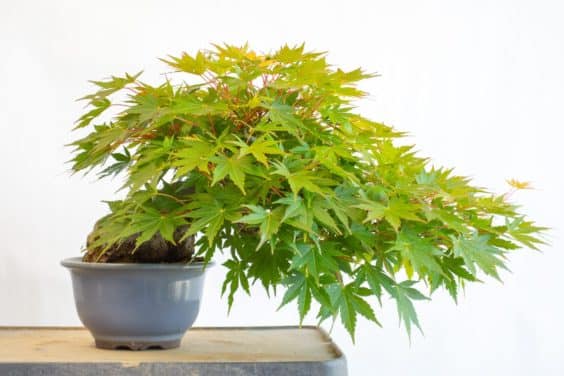
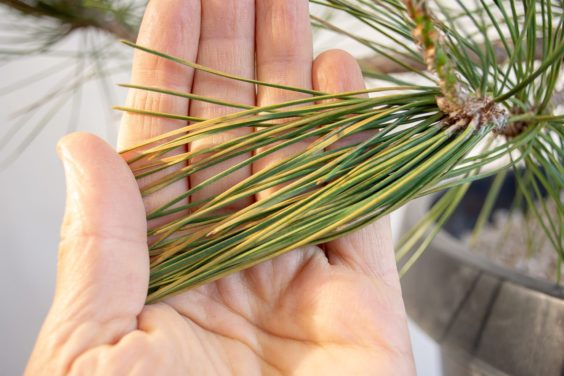
I did the same thing on a second branch by removing the long shoots and leaving several smaller ones closer to the trunk.

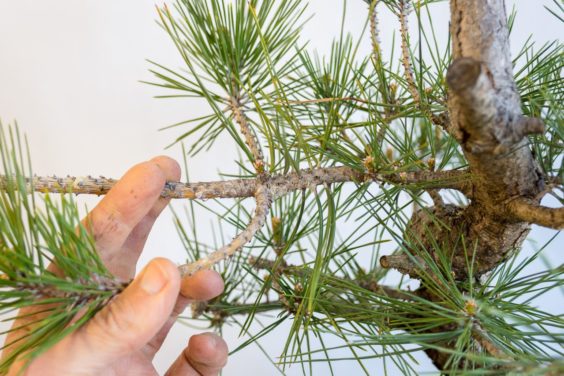
Branch to be shortened
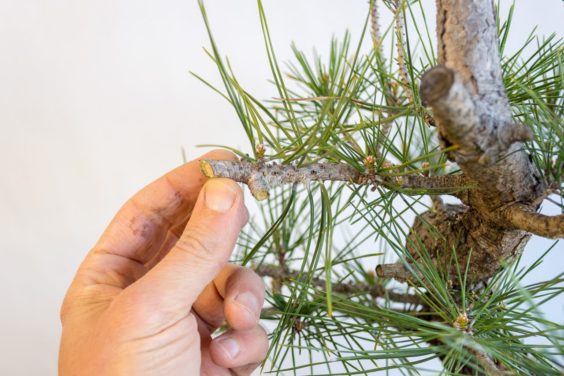
After shortening

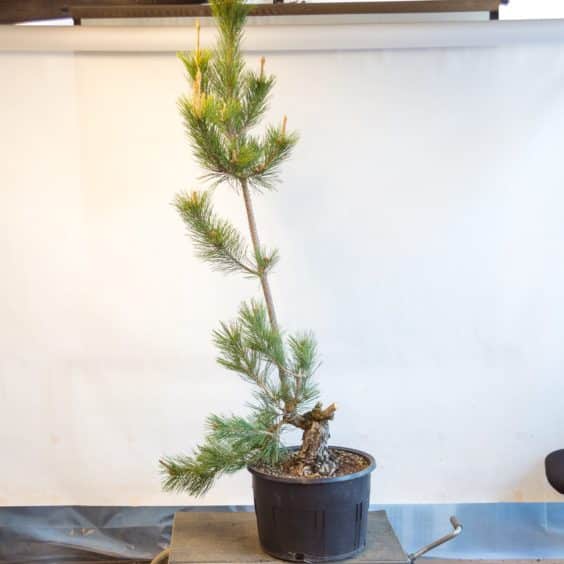
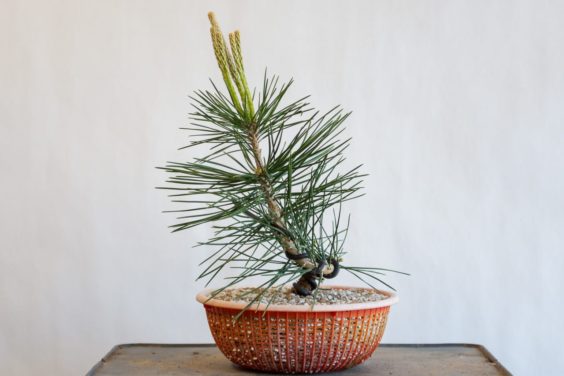
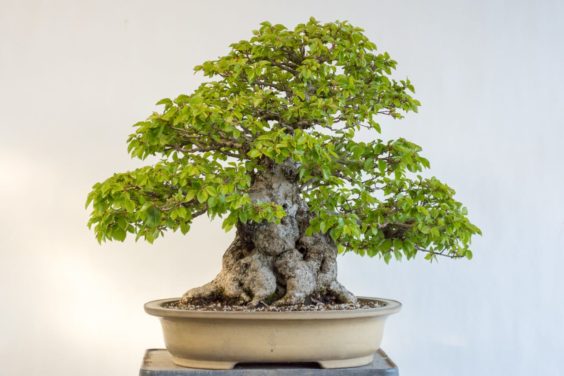
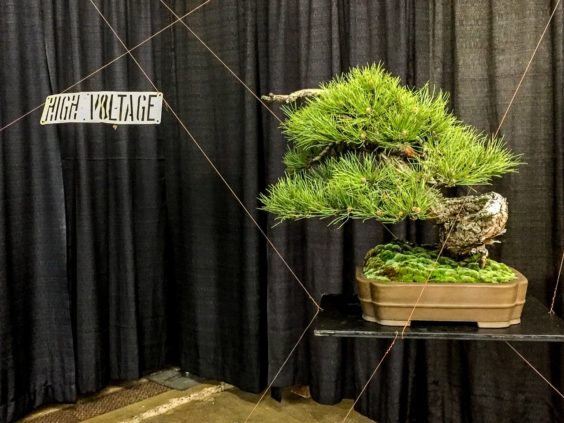
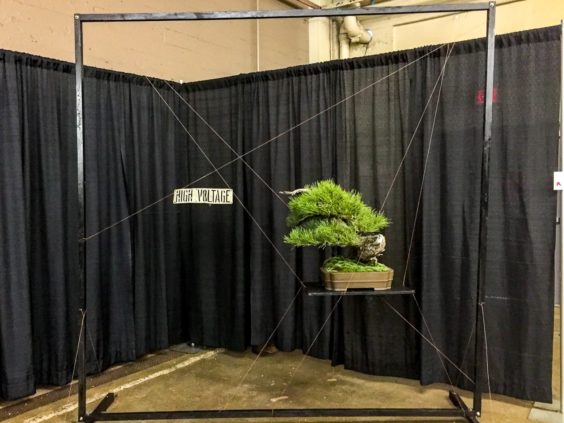
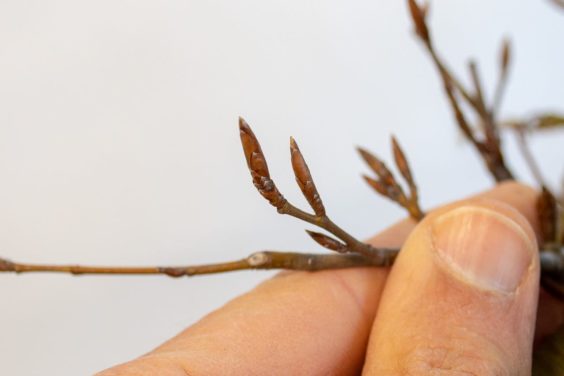
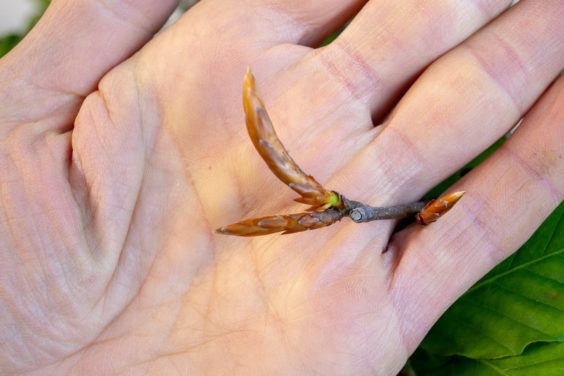
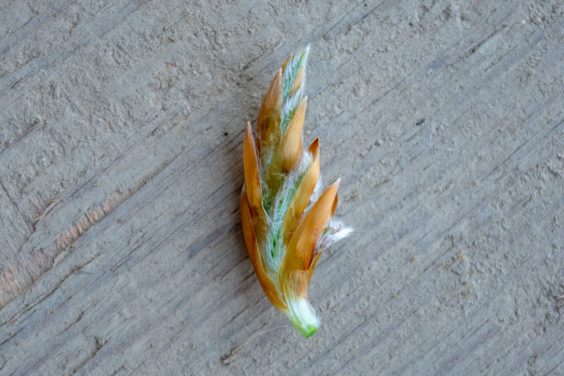
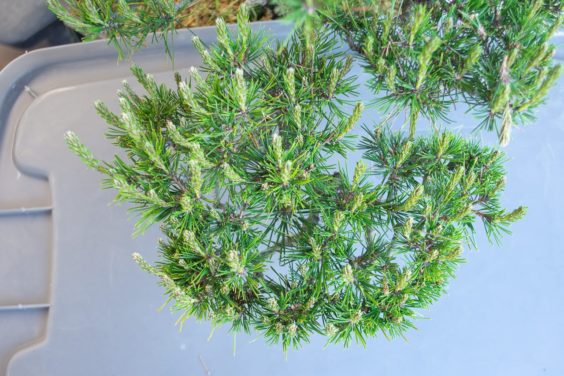
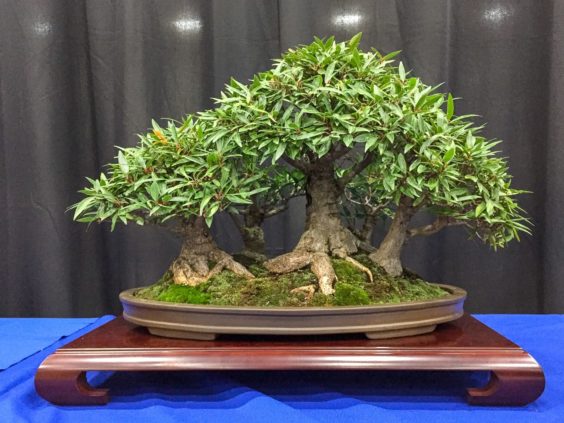
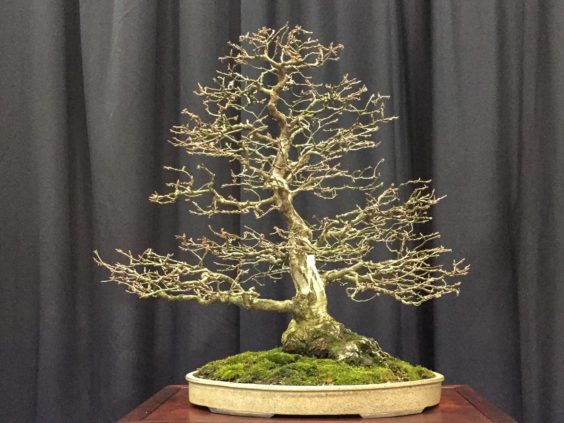
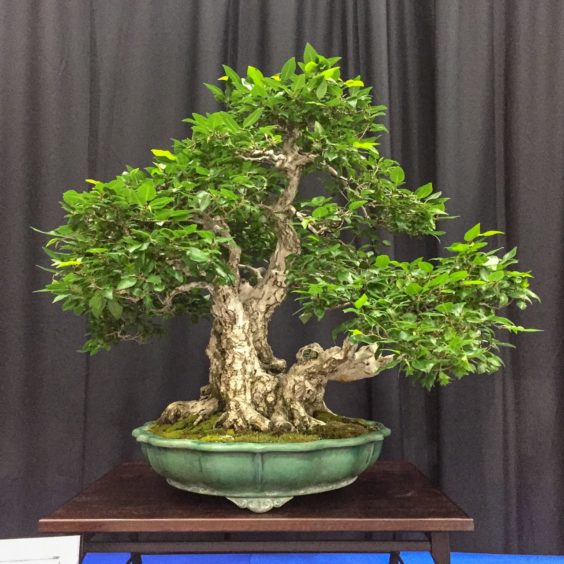
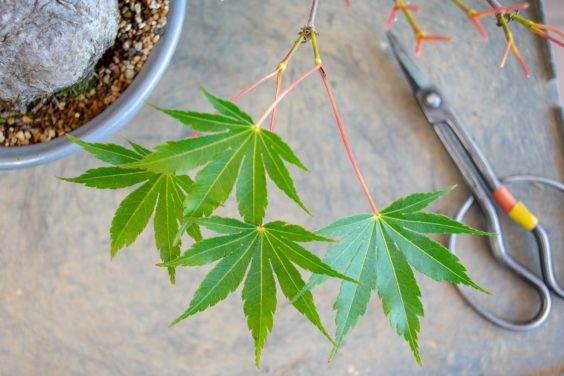
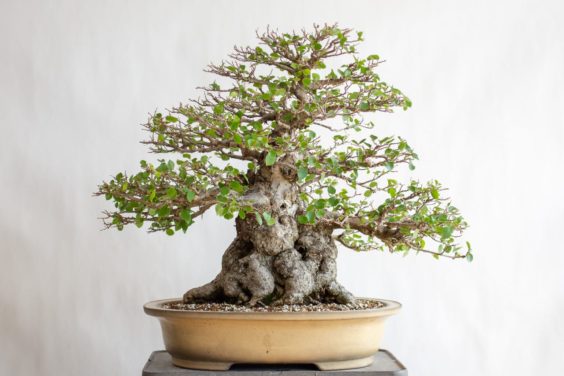
Those few cuts are the extent of the work I’ll do on the tree this season. Now would be an appropriate time to wire the branches I want to work with, but since the spring buds have started elongating, I’m better off wiring them later in the year.

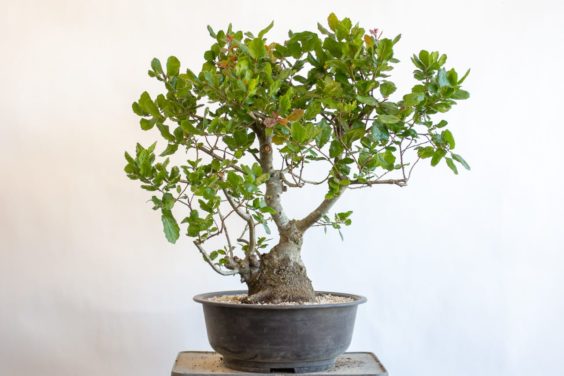
Spring work complete – 13″ after cutback

The post Bonsai Development Series #4: Removing the sacrifice branch appeared first on Bonsai Tonight.


Bonsai Development Series #5: Selecting a new trunk line

$
0
0

One of my fourteen-year-old pines is a lot bigger than the others. Beyond some selective pruning the last few years, I’ve mostly let the tree grow freely. This year, it’s time to select a branch to continue the trunk line.

Why this year? After looking at the options for the future front of the tree and the branches available to continue the trunk line, it became clear that there were few branches to choose from and that now was a good time to start this new line so it would be ready when it’s time to remove the main sacrifice branch.

Here’s the process I went through to set this new trunk line.

Black pine – about 6′ tall

I started by removing a side branch that emerged along the main sacrifice branch. This branch was shading out the branches I’m interested in developing.

After removing a branch on the left side of the tree

Next I removed some low branches on the right side of the tree. I’d saved them thinking they might be usable in the final design but decided they emerged at an awkward location on the trunk.

After removing a low branch on the right

With these branches gone, I then removed some old needles to open up some dense areas and let more light pass through to the lower branches.

After removing needles along the sacrifice branch

Although it’s hard to see in the photo above, the tree only has two low branches at this point. Two branches can be a great starting point for creating a bonsai. One can serve as the first branch, and the other can become the new trunk.

I’ve grown a number of pines using this approach. For this tree, I’ll wire the lower branch down and the upper branch up so it can serve as a new section of the trunk. Here are the branches wired.

After wiring

Close up showing the new trunk line and the first branch

As the tree hadn’t been repotted in a while, I took it out of the pot and worked on the roots.

After removing the tree from the pot

I removed a few large roots that grew at awkward angles and cut off the bottom third of the root ball. This will be enough to fit the tree into the new pot.

After root work

After repotting

I selected a terra cotta pot for the tree as it has a shape that’s closer to the shape I ultimately want the root ball to take. I thought about using a colander, but I didn’t have a colander the right size or strength for the tree.

My main job for the coming months will be to make sure the wire doesn’t cut in too much. In fall, I plan to reduce the first branch and take a look at where the trunk might go from here.

The post Bonsai Development Series #5: Selecting a new trunk line appeared first on Bonsai Tonight.

Repotting a Jeffrey Pine

$
0
0

One of the newest trees in my garden is a Jeffrey pine.

Jeffrey Pine

Jeffrey pines are high-altitude trees native to California. Like the Ponderosa pine, the needles grow in sets of three.

Jeffrey pine needle-bundle

Unlike Ponderosa pine, which have bright green needles, Jeffrey pine needles are grey-green. Both have interesting bark.

Trunk detail – Jeffrey pine bark

When the tree came into the garden last month, I put it on a bench with other pines. A few days ago, I gave the tree a closer look.

A few things struck me about the tree. I was curious why it had been planted so high in the pot. There is a large mound of soil at the base of the trunk but it didn’t look like there were heavy roots in the area.

Mound of soil at the base of the trunk

Looking closer at the foliage, I saw that a number of branches had pine needle scale.

Infested needles

Pine needle scale

When there aren’t too many scale, I scrape them off with a fingernail. This leaves the needles pest-free, but signs of the damage – typically yellow and brown patches – remain.

After removing the pests – needle showing scale damage

In light of the infestation and the strange potting level, I decided to repot the tree. Some of the buds had started to open but most had yet to wake up so it looked like a good time to repot.

New needles forming at the bud

Dormant bud

When I first took the tree out of the pot, the roots looked pretty good with just a few signs of new growth.

Soil and roots look good

Looking at the bottom of the rootball gave a different impression. Lots of roots had started to grow and there were large patches of fungus – hopefully beneficial mycorrhiza. The only area of the rootball with no roots was behind the drainage screen.

The bottom of the rootball

I removed the bottom inch of the rootball and started poking at the large mound of soil at the base of the trunk. It appeared to be field soil. Unsurprisingly, I found no roots growing in it. I finally found some roots in the bonsai soil below but there weren’t many.

After bare-rooting about one-third of the rootball

Original soil intact

Side view showing the structure of the roots

I decided to plant the tree lower in the pot in a mix of akadama, lava and pumice. I hope to develop roots closer to the trunk which will give me more options when it’s time to select a bonsai pot. In the meantime, the tree will grow in a training pot.

After repotting

As this is my first Jeffrey pine, I’m excited to learn how it grows in my garden. For the time being, however, I’ll let it grow for a year or two to regain its strength before working on it.


The post Repotting a Jeffrey Pine appeared first on Bonsai Tonight.

Alternative approach to creating shohin pine bonsai

$
0
0

I’ve been following the same approach to creating pine bonsai for the past few years now. It’s time for a change!

I outlined the basic approach for starting informal upright pines five years ago (see “Wiring 3-year-old black pines“). Sometimes, instead of removing the lowest needles before wiring, I leave all of the needles on the tree. This gives me additional options for generating branches lower on the trunk – a useful approach for creating miniature and shohin-sized pines.

Here’s what this looks like.

Two-year-old black pine – 14″ from the base of the trunk

I start by inserting a heavy wire (4mm aluminum) near the base of the trunk.

Wire inserted

Instead of wiring the trunk like I would a branch, I circle the trunk two times as low as possible. This will make sure the wire will hold a severe bend low on the trunk.

Two loops of wire low on the trunk

From that point up I wire at a more gentle angle, however, the spirals are still tighter than normal as I want to make relatively sharp bends.

Wiring complete

I usually extend the wire up to the first branch division, but since I’ll be reducing the trunk after a year or two, I don’t need curves above the lower few inches.

Now it’s time for the low bend. The goal is to bend the trunk as low to the roots as possible.

First bend complete

After creating the first bend, I spiral the trunk around and point the apical buds upward.

Bending complete – 12″ from the base of the trunk

After bending the trunk I removed the side branches near the top of the tree. From this point on I’ll select a single extension of the trunk as an sacrifice branch. Reducing these side branches will slow growth slightly but avoid shading the lower needles – needles that I’ll need one or two years from now when it’s time to shorten the trunk.

After removing the side branches.

Here are a few tips for avoiding common problems with this approach.

  1. The low curve begins 1″ above the roots. This results from using wire that’s too weak to hold the low bend or using large spirals near the roots. Poor bending technique can also account for this. When my fingers aren’t strong enough to get the bend as low as I want, I use one or two pairs of pliers to help make the bends right above the roots.
  2. The wire crushes the needles during wiring. This is tricky and requires patience, practice and pliers. It’s another reason I grow trees in batches – so I gets lots of practice each step of the way.
  3. The trunk breaks during bending. This is best avoided by ensuring that bends are supported by the wire. This too becomes easy to avoid with a little practice.

Here are a few detail shots to show the curve from different angles.

Left side

Back side

Right side

Close-up

I’d removed the tree from it’s pot to get a better angle on the first bend. Now that the bending is complete, I can repot the tree into a bigger container.

After repotting into a 6″ colander

If you looked closely at the pine, you’ll have seen that it’s started to grow. Ideally I’d finish this work before the spring buds begin elongating. Having worked on pines behind schedule before, I can expect the tree to slow down for a while but catch up later.

The post Alternative approach to creating shohin pine bonsai appeared first on Bonsai Tonight.

Bonsai Development Series #6: Sacrifice branch basics

$
0
0

Few trees in my garden better demonstrate the use of sacrifice branches than the pine below.

Black pine – six-years-old from seedling-cutting

The large branch that grows up and to the right is the sacrifice branch. The small tree at the base of this branch is the future bonsai.

The future bonsai

As I noted a few weeks ago, the definition of a sacrifice branch is simple: any branch used to achieve development goals that is not part of the final design. The most common reasons to use sacrifice branches are to thicken a section of the trunk or to close a large wound.

In the case of the pine pictured here, the goal of the sacrifice branch is to thicken the trunk.

Close-up of the trunk

The plan is to leave the sacrifice branch in place for a few more years until the lower section of the trunk reaches the desired thickness. In the meantime, I’ll encourage as much growth as possible on the sacrifice branch while maintaining the health of the lower branches that will be part of the future bonsai.

This is often easier said than done. Because the tree invests most of its resources in the sacrifice branch, the growth below is often weak.

The branch in the photo below is a good example of this. The top needles grew in 2017, the middle needles in 2016 and the lowest needles in 2015.

Three years of needles

As long as these needles stay healthy, I can create back buds with relative ease. If they brown out and fall off, I’ll need to graft if I want branches in that area.

How to keep these lower branches healthy? The main way is to occasionally reduce growth on the sacrifice branch to ensure the lower growth receives good sunlight. Not pruning, thinning, or decandling the lower branches can also help keep them healthy.

The pine pictured here appears to have a good ability to produce back buds. Looking closely at the lower branches reveals small buds that appear right where buds appear after decandling – just above the previous year’s growth. What’s interesting, in this case, is that these buds are growing in the zones just past needles that developed in 2015, and in the photo below, 2014! Even though the needles that developed in 2014 are long gone, new buds are appearing right where I’d expect them to grow had I decandled the tree three years ago.

Unprompted – and welcome – adventitious buds

These back buds aren’t uncommon on healthy, young pines, but I can’t count on them appearing when I need them so I try to preserve as many old needles as possible. There’s a good chance that this branch will become a sacrifice branch itself after I remove the current sacrifice branch, in which case these back buds may come in handy.


The post Bonsai Development Series #6: Sacrifice branch basics appeared first on Bonsai Tonight.

Spring watering tips

$
0
0

Spring is my favorite time of year in the garden. It’s also a rather challenging season when it comes to watering.

Without checking the soil, it can be hard to tell how much water a tree needs at a glance. Take, for example, the two young junipers below.

Cutting-grown kishu shimpaku

For the past week, I’ve been watering the tree on the left twice a day and the tree on the right once every two days.

This might seem natural as the tree on the left has more foliage than the tree on the right, but that doesn’t account for the dramatically different water needs.

Here are two more junipers that are closer in size but with the same variance in water needs.

Needs water twice per day; needs water once every two days

The main difference is that the trees on the right were repotted this year and have yet to establish new roots. The trees on the left have been in their pots for one year. Even though all four trees are the same age, the ones with more roots are drying out much faster than the recently repotted ones.

I’ve found similar patterns among my pines. The tree on the left was repotted this year and needs water every other day. The tree on the right was repotted a year ago and needs water every day.

Twenty-four and fourteen-year-old black pines

The main takeaway for all of the above trees is that repotting can have an effect on a tree’s ability to take up water.

Is this pattern the same for all of trees in the garden?

Nope.

The juniper below was repotted one year ago but only needs water once or twice a week.

Kishu shimpaku grafted on California juniper

The tree is recovering from some stress a couple of years back. Last summer I watered it once every one-to-two weeks. It’s drying out faster this year which I take to be a good sign.

My deciduous trees and broadleaf evergreens follow no patterns at all.

Potentilla – repotted this year, needs water daily

Cherry plum – repotted this year, needs water daily

Korean hornbeam – repotted this year, needs water once or twice a week

Dwarf wisteria – repotted last year, needs water once every four-to-five days

Olive – repotted last year, needs water no more than once per week

While the watering rates above are accurate, they have little bearing on what the trees will need next week. The stage of growth for each tree – and the weather – will determine whether or not I’ll need to water them on any given day.

Despite this apparent complexity, the basic test for whether or not a tree needs water remains simple. I check 1/4″ to 1/2″ below the surface of the soil with my finger and only water when the soil is beginning to dry out. If it’s wet, I gently sprinkle the foliage but try not to let much water hit the soil. That makes for a lot of checking this time of year, but the effort can go a long way toward ensuring the trees enter the warmest time of the year in good health.

The post Spring watering tips appeared first on Bonsai Tonight.

Novel displays at Bonsai Society of San Francisco’s annual exhibit

$
0
0

You know it’s a good day when a bonsai display makes you do a double take.

Slant-style spruce

Yep, the tree is sitting on a sheet of glass. Better yet, the glass is supported – balanced no less – by two grooved wood slats.

Spruce display by Eric Schrader

The display is part of the Bonsai Society of San Francisco’s annual exhibit at the San Francisco Flower & Garden Show. The garden show – and the exhibit – run through this weekend. I highly recommend visiting if you can make it!

It’s worth noting that the wire in the above composition isn’t needed for balance – it’s protection against inadvertent contact by visitors. This is in contrast to another of Eric’s displays in which the wire is an integral element of the composition.

Ponderosa pine

In this case, the tree sits on a black panel suspended by wires within a slender frame.

Ponderosa pine supported by copper wires

The more conventional displays merited just as much attention as the innovative displays as the overall quality of trees in the exhibit was high.

Coast live oak

Japanese black pine

Japanese maples planted on a large stone

The exhibit display labels revealed that two impressive junipers started as sub-ten-dollar nursery material thirty years ago.

San Jose juniper

Shimpaku juniper

A visitor closely examining each display might find a skull-shaped stone, a bone, a scrap of barbed wire and a giant pastry.

A few of these are pictured here – the rest are best appreciated at the event. In the meantime, I hope you enjoy the highlights below!

Shimpaku juniper

Catlin elm

Pygmy cypress

Semi-cascade shimpaku juniper

San Jose juniper

Larch

Olive

Black pine and olive

Tim Kong’s coast redwood display

The post Novel displays at Bonsai Society of San Francisco’s annual exhibit appeared first on Bonsai Tonight.

Catching up on black pine work in spring

$
0
0

Spring is typically a season for letting bonsai grow freely. For black pines, some of the main tasks include fertilizing and removing young pine cones.

Tea bag with cottonseed meal fertilizer

Removing young pine cones

Spring is also a good time for catching up on needle plucking and cutback.

I generally don’t recommend working on pines after the new shoots start elongating as it’s easy to damage tender foliage. The alternative is to wait until decandling time.

For the black pine below, I thought the foliage was fairly dense and that the tree would benefit from additional light in the tree’s interior. Here’s the tree before cutback and needle plucking.

Black pine – 16″ tall

And here’s the tree after this work.

After cutback and needle pulling

The tree goes right back into the sun and will receive lots of fertilizer between now and decandling at the end of May.


The post Catching up on black pine work in spring appeared first on Bonsai Tonight.


Spring growth on Japanese beech – understanding when to pinch

$
0
0

Buds on Japanese beech are easy to spot – they’re the long, pointy things at the ends of branches.

Japanese beech buds

They are among the last buds to open in spring. Once most of the quince, maples, and plums are in full gear, the beech buds begin to elongate.

Elongating bud

Once these buds start moving, it will soon be time to pinch.

The ideal time for pinching is when you can just distinguish the new leaves on a young shoot. This can be tricky due to the bronze-colored bud scales located between leaves.

Here’s a shoot that’s not quite ready for pinching.

Partially open shoot

Although the shoot looks like a relatively solid mass, removing the bud scales makes it easy to see the new leaves.

Partially open shoot after removing bud scales

Bud scales

Removing bud scales, however, is not necessary or desirable. Instead, we can wait until the shoots open up a bit more before pinching.

Elongating buds – ready for pinching

If the new leaves are hard to spot, gently bending the shoot – or waiting a day or two – can help.

Revealing the new leaves

Generally, all but the first two leaves are removed. Here’s a close-up.

Bud ready to be pinched

After pinching

Shoots that aren’t pinched on time can be reduced by cutting, but internodes may lengthen.

Too late for pinching – time to cut

As always with pinching, it’s important to know when to pinch and when to let a tree grow freely. I’ve been working on a beech forest for just over a year and I want to make sure the trees are well established before pinching so I let the tree grow.

Japanese beech forest – mid-April

I’d planned on leaving the tree alone until May, but there were so many leaves that I decided to cut back the shoots that were open to one, two, or three leaves to let more light into the tree’s interior.

After reducing the spring shoots

Of course, not all of the trees are open yet so I’ll have a few more shoots to reduce between now and June when I’ll do some thinning and leaf pruning.

The post Spring growth on Japanese beech – understanding when to pinch appeared first on Bonsai Tonight.

Protecting bonsai from hail damage

$
0
0

Here’s a topic I never planned to address – protecting bonsai from hail damage.

As most readers know far better than I do, hail can quickly damage bonsai – especially deciduous varieties with foliage that has yet to harden off.

Upon realizing that it was hailing yesterday morning, I ran outside and grabbed my smaller deciduous trees to bring them under cover. Fortunately the storm passed quickly, leaving stones that only got up to 1/2″ in size.

Once it cleared up, I took a closer look at my trees and found that most fared well. The pines, for instance, didn’t seem to notice.

Black pines

The Japanese beech also seemed unfazed.

Japanese beech

The stewartia, on the other hand, seemed less happy with the weather as they lost quite a few leaves.

Fallen stewartia leaves

The junipers, whether cuttings or collected specimens, simply shrugged.

Itiogawa shimpaku cuttings

Why didn’t I expect to address the topic? This was the most hail I’d seen in my garden in over 25 years. We typically don’t get much hail, and when it does come, it typically passes quickly.

ABS Gateway to Bonsai in St. Louis this weekend!

Gateway to Bonsai, hosted by the American Bonsai Society and the Bonsai Society of Greater St. Louis, opens this Thursday in Collinsville, Illinois. The event features headliners Marc Noelanders, Bjorn Bjorholm, and Matt Reel, plus workshops, seminars and a large vendor’s area.

I’ll be vending at the event, leading a seminar on advanced wiring, and hosting a workshop that focuses on the creation of exposed root black pine bonsai. Participants will create two exposed root black pines using the approach featured in this post. I’ll also provide guidance for developing the trees over the next several years.

If you’re thinking of heading to the convention and want to learn more, find more info about the event here!

The post Protecting bonsai from hail damage appeared first on Bonsai Tonight.

Thinning a red pine forest

$
0
0

In general, I treat red and black pines the same. This doesn’t, however, mean that the trees respond the same to the same work.

Black pines are generally the more predictable of the two varieties. After decandling, I can expect between one and three shoots per branch in all but the strongest areas where it’s common to find up to ten or more shoots.

Red pines, on the other hand, often produce more variable growth. The same tree may respond differently to decandling from year to year, and different trees – even when growing in the same container – can produce widely variable growth.


Red pine

Three of the five trees in my red pine group planting came out well this year, producing between one and three shoots per branch. The other two trees came out dense with many branches producing seven to fifteen shoots each.

The tree on the left, for example, produced a low number of shoots per branch.

The left hand tree

The tree on the right came out dense this year.

The right hand tree

Here’s an example of a crowded area.

Crowded shoots

And here’s the same branch after removing nine shoots.

After cutting back to two or three shoots

Zooming out a bit, here’s what the larger block of foliage looked like before and after thinning.

Branch pad before thinning

Branch pad after thinning

Looking from the side, it’s easier to see the foliage on the top half of the pad and the branch structure below.

Branch pad from the side

The tree looks remarkably similar after cutback from the front as the difference is more noticeable from above than straight on.

After thinning

It appears I had the same idea seven years ago. If you’re curious about how the trees have changed since then, see “Thinning a red pine forest.”

ABS Gateway to Bonsai in St. Louis on now!

Gateway to Bonsai, hosted by the American Bonsai Society and the Bonsai Society of Greater St. Louis is open now through Sunday morning. The event features headliners Marc Noelanders, Bjorn Bjorholm, and Matt Reel, plus workshops, seminars and a large vendor’s area.

I’m vending at the event, leading a seminar on advanced wiring Friday, and hosting a workshop that focuses on the creation of exposed root black pine bonsai on Saturday. If you’re thinking of heading to the convention and want to learn more, find more info about the event here!

News from the National Arboretum

In bonsai news from the National Arboretum, the National Bonsai and Penjing Museum was recently voted the best place in Washington D.C. to take out of towners. This is an impressive achievement considering the Museum beat the National Mall to gain the top recommendation! See details from Washington City Paper here.

The post Thinning a red pine forest appeared first on Bonsai Tonight.

2018 Gateway to Bonsai – exhibit highlights

$
0
0

The American Bonsai Society and the Bonsai Society of Greater St. Louis hosted Gateway to Bonsai this past weekend in Collinsville, Illinois. The event drew visitors from all over the country – and a few from outside the U.S. – who enjoyed a good selection of workshops, seminars, and demonstrations.

In between the scheduled events, attendees had ample time to enjoy the convention’s exhibit. As the trees came from different latitudes, some were in full leaf and growing vigorously while others were still dormant.

Here are some of the highlights. I noted some of the award winners but missed others – feel free to indicate other winning entries in the comments below and I’ll update the captions.

Trident maple

Colorado Blue Spruce by Todd Schlafer – John Naka Award, Professional

Willow leaf ficus

Juniper

Shohin display

Black pine

Eastern white cedar by John Wall – John Naka Award, Hobbyist

Japanese white pine and trident maple by Barbara Bogan – Best Shohin Display

Japanese white pine ‘kokonoe’ by Mark Fields – Best in Show

Shishigashira maple

Hornbeam

Japanese white pine ‘miyajima’

Ponderosa pine

Scots pine

Korean hornbeam

Itoigawa juniper by Jesse Gilbertson – Best Conifer

Colorado spruce by Andy Smith – Best Native Bonsai

Japanese white pine

Arakawa Japanese maple

Accent plant

Crabapple

I’d like to thank the ABS Board Members and volunteers from the Bonsai Society of Greater St. Louis whose coordination made the convention a success. Special thanks to Cheryl Sykora and Barbara Bogan for organizing the event and to everyone who stopped by and said hello – it was great to meet you!

The post 2018 Gateway to Bonsai – exhibit highlights appeared first on Bonsai Tonight.

An alternative approach to repotting trees in development

$
0
0

For young trees growing in colanders, a repot isn’t always necessary when the roots run out of space. Here’s an overview of an alternative approach in two photos.

Red pine in 6″ colander

After nesting the colander within a larger colander

The theory behind this approach is that large roots are less likely to develop outside the inner colander. This focuses growth on the roots closest to the trunk – the roots that help the tree develop taper near the surface of the soil.

Like many techniques in bonsai, the double colander approach has its pros and cons. Apart from whether or not it improves the roots – I have yet to measure the effect – it’s worth considering as a fast and simple alternative to traditional repotting. And if a tree starts drying out too quickly in summer, it’s easy to nest it in a larger container without waiting until the next repotting season.

Sometimes I use the same size soil in both colanders and other times I use larger soil in the outer container. Am not sure it makes a big difference either way. The main thing is to let roots escape the inner container and begin growing in the outer one.

Nested colanders with larger soil in the outer container

The approach also facilitates subtle changes in the planting angle.

Inner colander set at an angle

As for the cons, the main one is that repotting can be a mess. Several years back, I mentioned my hesitation about the approach after finding the repotting process involved hacking through a jumble of roots and plastic scraps. I was happy with the roots in the inner container, but didn’t enjoy removing the plastic scraps from the used soil.

The post An alternative approach to repotting trees in development appeared first on Bonsai Tonight.

Defoliating a shohin Japanese maple

$
0
0

I started working on a shohin Japanese maple about a year and a half ago. Here’s what it looked like at the end of 2016.

Shohin Japanese maple

The first order of business was repotting. I found the tree didn’t have a lot of roots so I was expecting it to grow slowly. And as the new shoots emerged, I pinched them to further keep growth in check.

Despite these efforts, the tree grew strongly.

May, 2017

Fortunately, there are several techniques for slowing growth on Japanese maples. I first removed every other leaf on the tree, and then a month later, I cut every leaf in half, leaving just a quarter of the foliage the tree had produced in spring.

The tree held on to those half-leaves through the end of the year and as this year’s buds began to elongate I pinched again. The tree was even more vigorous this year!

Japanese maple – April, 2018

In an effort to reduce the tree’s vigor, I figured I’d try defoliating it. I thought about partially defoliating the tree by preserving the smaller, interior leaves, but most of the leaves were equally strong. And whereas partial defoliation is a good technique for balancing interior and exterior growth, completely defoliating the tree can be good for stimulating new buds. As the silhouette of the tree is getting large in relation to the trunk, I became curious about how the tree would respond to full defoliation.

The process is simple – I cut off every leaf with sharp scissors, leaving just a small section of the petioles that supported each leaf.

Two pairs of new leaves

After removing the leaves

As I worked, I noticed that one of the leaves had yellowed.

Japanese maple leaf with some yellowing

Upon turning the leaf over, I discovered the culprits.

Aphids!

Aphids commonly appear on maples in early spring but typically move along once the leaves fully mature.

Here’s what the tree looked like after removing the leaves.

After removing the leaves

Finding that some of the shoots had extended beyond the desired silhouette of the tree, I performed a little cutback.

After minor cutback

I’d like to reduce a few of the larger branches, but will wait until summer or fall – or possibly next year – to give the tree a chance to produce as many new shoots as possible. I’m figuring that greater density will lead to shorter internodes.

In the meantime, I’ll be watering carefully to make sure the tree doesn’t stay too wet as transpiration dramatically slows down for trees with no leaves.

The post Defoliating a shohin Japanese maple appeared first on Bonsai Tonight.

Repotting out of season – bringing new trees into the garden

$
0
0

I generally don’t do a lot of work on new trees until I have a good idea what shape the roots are in. I’ll water, fertilize and maybe do some cutback but hold off on wiring until I know the tree is strong enough to recover from the work.

When trees are healthy and have been well-cared for, my usual routine includes waiting until the next repotting season before looking at the roots. When trees are in poor soil or poor health, I repot the first chance I get.

Just after I wrapped up this year’s repotting season, I brought a number of new trees into the garden – a mix of coniferous, deciduous and broadleaf evergreen varieties.

By standard measures, it’s “too late” to repot these trees as all of them have produced spring growth. It’s not, however, too late for a more gentle repotting that will help ensure good percolation when I water.

Below is a coast live oak that leafed out well this spring. There are plenty of new shoots and the leaves look healthy. As for the soil, percolation is good but the particles had broken down some time ago. I wanted to take a closer look at the roots so I decided to repot.

Coast live oak – about 30 years from acorn

I removed soil from the perimeter of the rootball but left the center section alone.

After reducing the rootball

Were it winter or early spring, I’d remove more soil and consider bare-rooting up to half of the rootball. Because the tree has started growing, I opted to keep the rootball intact.

Lower trunk and rootball

I planted the tree in a mix of akadama, lava, and pumice, one part each. I also cut back some of the longer branches and removed all dead leaves and twigs. Although I like the way trees look after removing dead foliage, my primary reason for doing so is to set a baseline from which I can better track how the tree responds to the repotting.

After repotting

I had so much fun with this repot that I decided to do another.

Coast live oak – also about 30 years from acorn

This tree wasn’t in good health like the previous oak. The leaves were smaller and covered with spots – signs of fungus. Plus, the new shoots were relatively short considering how good the shoots looked on the first tree. Wanting to get the tree on a better trajectory, I removed more soil from this oak to learn more about what might be keeping it from being healthier. What I found were two patches of field soil in which no roots were growing and a big gap occupied by a clan of sow bugs. I cleared away the bugs and old soil and proceeded with the repotting.

Root-work complete

This is definitely more root work than I’d planned on doing for this time of year, but I’m curious to learn more about repotting oaks out of season. Having purchased several of similar age and health, I can take different approaches and see how each responds. If there are any patterns, I may have some good data points for future experiments.

Apart from removing more soil than I expected, the rest of the repotting was straightforward.

Repotting complete

Both trees are in full sun for the time being as the weather has been mild lately. If it heats up much before the trees have a chance to root out, I’ll likely move them to a sheltered spot in the garden. In the meantime, I’ll make sure the trees get plenty of water. If the foliage looks good a month from now, I’ll start fertilizing and hold off on any more work for the rest of the year.

The post Repotting out of season – bringing new trees into the garden appeared first on Bonsai Tonight.


Removing flowers on satsuki azaleas

$
0
0

Satsuki azaleas are beautiful when they bloom.

Cutting-grown satsuki

They are somewhat less attractive when the petals fall away.

Azalea flowers after losing their petals

Once most of the flowers on a satsuki have wilted or fallen away, it’s time to remove the parts of the flower that are left behind – most visibly, the pistil and sepals.

Pistil, sepals, and peduncle

The reason for removing these parts is to save the tree from producing mature seeds so it can redirect its resources elsewhere.

After removing the flowers

For large satsuki with lots of flowers, this can take a little time – especially if one has lots of azaleas in their collection. Fortunately, because different satsuki bloom at different times, this work can be spread out across several weeks or even months, depending on when each azalea blooms.

Azaleas after peak bloom

After removing the flowers

Of course, without flowers it can be hard to tell which cuttings were white and which were pink. Before removing the flowers, I added “p” or “w” tags so I can keep track of the colors in the off-season.

The post Removing flowers on satsuki azaleas appeared first on Bonsai Tonight.

Cutback and wiring on a semi-cascade ume

$
0
0

Mid-May is when I usually begin working on my deciduous bonsai. If a tree has grown well, I’ll reduce the new shoots to 2-4 leaves and wire any branches that need adjusting.

An ume in my garden has been growing vigorously this year. It’s time for cutback.

Ume

It was hard for me to see how the branches were arranged in the tree’s interior so I reduced the longest shoots before taking a closer look.

After reducing the longest shoots

From here I could start wiring. I used aluminum wire and further reduced the branches as I worked, starting with the lowest cascading branches. Near the top, I bent everything down as I want new branches in this area to round out the apex just above the current level of foliage.

After thinning and wiring

From the left side

I’ll plan on more cutback in fall depending on how much the tree grows between now and then.

When the wiring was complete, I took note of how the deadwood has aged since I did some carving last year. I have yet to apply lime-sulfur or similar treatments to the deadwood – the colors here are natural.

Deadwood detail

Deadwood detail

Deadwood detail


The post Cutback and wiring on a semi-cascade ume appeared first on Bonsai Tonight.

Focus on defoliation – determining how many leaves to remove

$
0
0

After an experiment with full defoliation on a Korean hornbeam – see the process (here) and the results (here) for details – I’ve made it an annual practice to partially defoliate refined specimens.

The question I’ve been asking in recent years is, how many leaves should I remove?

Last year I took a fairly conservative approach. Here’s the tree before and after partial defoliation.

Korean hornbeam – May 2017

After removing about half of the foliage

I’d hesitated to remove more leaves as the tree was recovering from losing all of its foliage early the previous fall. (I had removed the leaves ahead of an exhibit).

I found that a number of small interior branches died back last year, likely due to a lack of light during the growing season.

Not wanting to repeat the mistake, I removed far more foliage this year, including all large leaves, downward-growing leaves, and leaves at the outside of the silhouette.

After partial defoliation – May 2018

Because the remaining leaves have been in the shade up until this point, I placed the tree in a shady spot until the tender leaves get used to the increased light.

When it’s time for cutback in fall, I’ll see if there is more or less dieback than the previous year and adjust my plan for next year’s defoliation accordingly.

The post Focus on defoliation – determining how many leaves to remove appeared first on Bonsai Tonight.

Spring maintenance for junipers – removing the berries

$
0
0

When it comes to juniper bonsai, spring is great for watering, fertilizing and letting new shoots grow freely. It’s also a good time to remove newly formed berries.

Chinese juniper grafted on California juniper – 17″

Chinese junipers, or shimpaku, can produce both male and female flowers on the same plant. The male flowers, which take the form of pollen cones, naturally dry up and fall away on their own. The female flowers can produce a berry that takes longer to mature. I pick these off when I see them.

Juniper berries

After removing the berries

I don’t know that this makes a lot of difference, but I do know it’s a good opportunity to closely inspect the foliage for signs of weakness or infestation.

This juniper is recovering from a stressful summer a few years back so I’m letting it grow freely this year. Removing the berries is the biggest task I have lined up for the tree until it starts producing more vigorous growth.

Juniper berries

The pollen cones dried up and fell away a few weeks ago. All that remains are the stems that support the cones. These too turn yellow and brown before falling away.

Stems that supported pollen cones

Healthy pollen cone stems

After checking the foliage and removing the berries I put the tree back on the bench.

After checking the foliage and removing the berries

When it comes to the foliage, I’m looking for shoots that extend beyond the tree’s silhouette. At this point the tree has many new shoots, but they’re growing slowly, a sign that the tree has yet to regain its full vigor.

Foliage detail


The post Spring maintenance for junipers – removing the berries appeared first on Bonsai Tonight.

Caring for recently dug pines

$
0
0

The first few years of growing pines from scratch can be a lot of fun. From sprouting the seeds, to making seedling cuttings, to setting the first curves of the trunk, the early years of pine development include some fun steps.

The opposite is true when working with field-grown material.

Field-grown Japanese black pine

The first step is to generate as many roots as possible. Not exactly “fun” in the traditional sense, but important as this step underlies all subsequent steps.

It can be a big transition from the field to a container. Field grown trees are often planted in pure pumice to avoid keeping the soil too moist.

Pine planted in pumice

While the tree is producing new roots, I tend to water the soil infrequently but provide overhead water to the foliage at least once or twice a day.

I take a similar approach with fertilizer, sprinkling the foliage with fish emulsion but holding off on dry fertilizer until the needles have fully developed – a good sign that new roots are growing.

In the meantime, I watch the foliage carefully to gauge the tree’s progress. I do this by checking for insects and removing brown needles when they appear so I can monitor the rate at which old needles die off.

The foliage on this pine looks pretty good. Apart from some sunburned needles, my main concern is that the new needles are developing slowly – not surprising considering that we’ve been having a cool spring.

Healthy foliage

Sunburned foliage

Despite the size of the tree and the container, the bonsai will likely reach no more than 11″ fully styled. Here’s a close-up of the lower part of the trunk.

The main section of the trunk

The big question at this point is how many years will pass before it’s time to work on the tree. I plan to repot towards the end of this year if the tree grows well. If, however, the new needles stay short or I see other signs that the tree is progressing slowly, I may wait a second year before repotting to avoid slowing the tree down. The initial branch selection or styling can begin once the tree is healthy and growing vigorously.

The post Caring for recently dug pines appeared first on Bonsai Tonight.

Viewing all 1061 articles
Browse latest View live